

This post is part of our AI CKEditor Integration series. If you haven’t read the previous blog on setting up the AI CKEditor module, we suggest starting there to understand the basics.
The built-in features like translation, tone adjustment, and text completion offer a strong starting point. But the real strength of the module comes from creating custom plugins that match your specific content workflows.
In this blog, we’ll walk through how to build those plugins. You’ll learn how to define custom behaviour, connect it with the editor interface, and shape AI assistance around your editorial needs.
Why create custom AI CKEditor plugins?
While the AI CKEditor module ships with a variety of powerful tools such as translation, tone change, and summarisation, there are many scenarios where teams need functionality tailored to their content workflows. This is where custom plugins shine.
Here are a few reasons you might want to build a custom plugin:
- Business-specific use cases: You may want to generate product descriptions in a specific format, suggest metadata, or summarise legal content with a custom tone, needs that generic tools don't fully support. Brands may need custom plugins that align with brand values and styles.
- Workflow automation: Automate repetitive editorial tasks like cleaning up input from clients, converting text to a brand-specific tone, or inserting dynamic content placeholders.
- Dynamic features: Some plugins can dynamically adjust based on user roles, entity types, or content fields, allowing a smarter integration between CKEditor and your Drupal backend.
Understanding the architecture
Custom AI CKEditor plugins work by:
- Taking input (selected text, form fields, or nothing)
- Processing that input through an AI model
- Returning formatted HTML output
- Allowing users to edit the result before inserting it into the editor
Setting up Your development environment
Create a custom module or use an existing one. Your plugin file should be placed in:
src/Plugin/AiCKEditor/{YourPluginName}.phpModule structure
/custom_module/
├── custom_module.info.yml
└── src/
└── Plugin/
└── AiCKEditor/
 └── ImproveClarity.php
Basic plugin structure
Every custom AI CKEditor plugin should extend the AiCKEditorPluginBase class. To make your plugin discoverable by Drupal, decorate the class with the #[AiCKEditor(...)] attribute, which provides metadata such as id, label, and description. This is essential for your plugin to appear in the AI Tools list within CKEditor.:
<?php


namespace Drupal\my_custom_module\Plugin\AICKEditor;


use Drupal\ai_ckeditor\AiCKEditorPluginBase;
use Drupal\ai_ckeditor\Attribute\AiCKEditor;


/**
* Plugin to do something custom.
*/
#[AiCKEditor(
 id: 'custom_feature',
 label: new TranslatableMarkup('My Custom Feature'),
 description: new TranslatableMarkup('This is my custom feature for AI CKEditor.'),
)]
final class MyCustomFeatureCKEditor extends AiCKEditorPluginBase {


}
Key methods to implement
Configuration methods
- buildConfigurationForm(): This method is responsible for rendering the configuration form users see when setting up the plugin.
If your plugin requires no custom settings, and you’ve extended the base plugin class, you can safely skip this method. However, if your plugin needs to allow users to choose an AI provider or model, this is where you'll implement that logic.
For example, let’s say your plugin uses the AIRequestCommand and you want to give users the ability to choose from available providers. Here's how you might set up a provider selection dropdown in the form:
/**
  * {@inheritdoc}
  */
 public function buildConfigurationForm(array $form, FormStateInterface $form_state): array {
   $options = $this->aiProviderManager->getSimpleProviderModelOptions('chat');
   array_shift($options);
   array_splice($options, 0, 1);


   $form['provider'] = [
     '#type' => 'select',
     '#title' => $this->t('AI provider'),
     '#options' => $options,
     "#empty_option" => $this->t('-- Default from AI module (chat) --'),
     '#default_value' => $this->configuration['provider'] ?? $this->aiProviderManager->getSimpleDefaultProviderOptions('chat'),
     '#description' => $this->t('Select the AI provider to use.'),
   ];


   return $form;
 }
- submitConfigurationForm(): Handles saving configuration data.
- defaultConfiguration(): Set up the default configuration before the initial setup is done.
User Interface Methods
- buildCkEditorModalForm(): This method defines the form that end users interact with inside the CKEditor AI modal when they use the plugin.
public function buildCkEditorModalForm(array $form, FormStateInterface $form_state, array $settings = []) {
 $storage = $form_state->getStorage();
 $selected_text = $storage['selected_text'] ?? '';
 $editor_id = $this->requestStack->getParentRequest()->get('editor_id');
 $form = parent::buildCkEditorModalForm($form, $form_state);


  // Your form elements here
  $form['response_text'] = [
   '#type' => 'text_format',
   '#title' => $this->t('AI Response'),
   '#prefix' => '<div id="ai-ckeditor-response">',
   '#suffix' => '</div>',
   '#allowed_formats' => [$editor_id],
   '#format' => $editor_id,
 ];
  return $form;
}
Processing methods
ajaxGenerate(): Handles the AI processing when users click "Generate".
public function ajaxGenerate(array &$form, FormStateInterface $form_state) {
  $values = $form_state->getValues();

  try {
	$prompt = $this->buildPrompt($values);
	$response = new AjaxResponse();
	$response->addCommand(new AiRequestCommand(
  	$prompt,
  	$values["editor_id"],
  	$this->pluginDefinition['id'],
  	'ai-ckeditor-response'
	));
	return $response;
  }
  catch (\Exception $e) {
	// Handle errors appropriately
	$this->logger->error("Error in custom AI plugin: " . $e->getMessage());
	return $form['plugin_config']['response_text']['#value'] = "An error occurred.";
  }
}
Real-world example
Here is a plugin to improve the clarity of the selected text:
<?php
namespace Drupal\custom_module\Plugin\AICKEditor;
use Drupal\Core\Ajax\AjaxResponse;
use Drupal\Core\Form\FormStateInterface;
use Drupal\Core\StringTranslation\TranslatableMarkup;
use Drupal\ai_ckeditor\AiCKEditorPluginBase;
use Drupal\ai_ckeditor\Attribute\AiCKEditor;
use Drupal\ai_ckeditor\Command\AiRequestCommand;
/**
* Plugin to improve the clarity of selected text.
*/
#[AiCKEditor(
id: 'improve_clarity',
label: new TranslatableMarkup('Improve Clarity'),
description: new TranslatableMarkup('Rewrite selected text to improve readability and clarity.'),
)]
final class ImproveClarity extends AiCKEditorPluginBase {
/**
* {@inheritdoc}
*/
public function defaultConfiguration(): array {
return [
'provider' => 'NULL',
];
}
/**
* {@inheritdoc}
*/
public function buildConfigurationForm(array $form, FormStateInterface $form_state): array {
$options = $this->aiProviderManager->getSimpleProviderModelOptions('chat');
array_shift($options);
array_splice($options, 0, 1);
$form['provider'] = [
'#type' => 'select',
'#title' => $this->t('AI provider'),
'#options' => $options,
"#empty_option" => $this->t('-- Default from AI module (chat) --'),
'#default_value' => $this->configuration['provider'] ?? $this->aiProviderManager->getSimpleDefaultProviderOptions('chat'),
'#description' => $this->t('Select the AI provider to use.'),
];
return $form;
}
/**
* {@inheritdoc}
*/
public function submitConfigurationForm(array &$form, FormStateInterface $form_state): void {
$this->configuration['provider'] = $form_state->getValue('provider');
}
/**
* {@inheritdoc}
*/
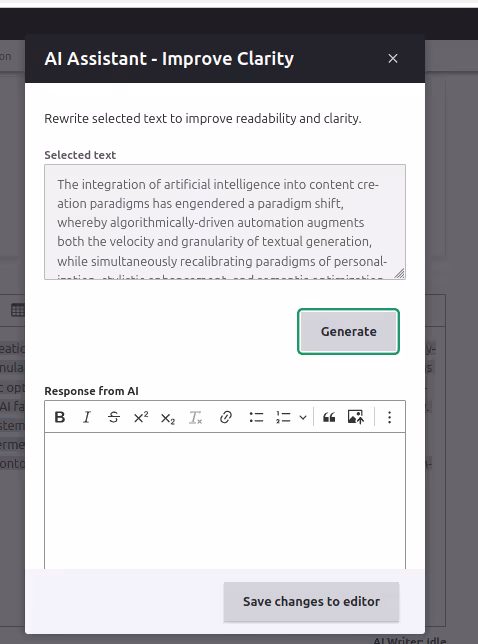
public function buildCkEditorModalForm(array $form, FormStateInterface $form_state, array $settings = []): array {
$storage = $form_state->getStorage();
$editor_id = $this->requestStack->getParentRequest()->get('editor_id');
if (empty($storage['selected_text'])) {
return ['#markup' => '<p>' . $this->t('Please select some text before improving clarity.') . '</p>'];
}
$form = parent::buildCkEditorModalForm($form, $form_state);
$form['selected_text'] = [
'#type' => 'textarea',
'#title' => $this->t('Selected text'),
'#default_value' => $storage['selected_text'],
'#disabled' => TRUE,
];
$form['actions']['generate']['#value'] = $this->t('Improve Clarity');
return $form;
}
/**
* {@inheritdoc}
*/
public function ajaxGenerate(array &$form, FormStateInterface $form_state) {
$values = $form_state->getValues();
try {
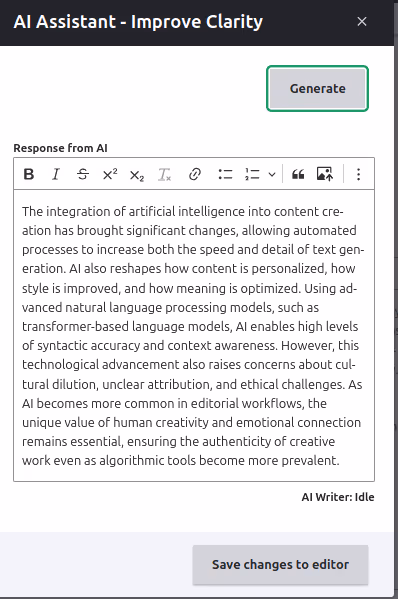
$prompt = 'Rewrite the following text to improve clarity and make it easier to understand without changing the meaning:' . PHP_EOL . '"' . $values["plugin_config"]["selected_text"] . '"';
$response = new AjaxResponse();
$response->addCommand(new AiRequestCommand($prompt, $values["editor_id"], $this->pluginDefinition['id'], 'ai-ckeditor-response'));
return $response;
}
catch (\Exception $e) {
$this->logger->error("There was an error in the Improve Clarity plugin: @message", ['@message' => $e->getMessage()]);
return $form['plugin_config']['response_text']['#value'] = "An error occurred during AI processing.";
}
}
}
See your plugin in action
Once you've created your custom AI CKEditor plugin, enabling it follows the same process as the built-in plugins:
- Clear cache to ensure Drupal discovers your new plugin
- Navigate to Administration → Configuration → Content authoring → Text formats and editors
- Select and configure your text format (e.g., Full HTML → Configure)
- Find your custom plugin in the "AI tools" section under "CKEditor 5 plugin settings"
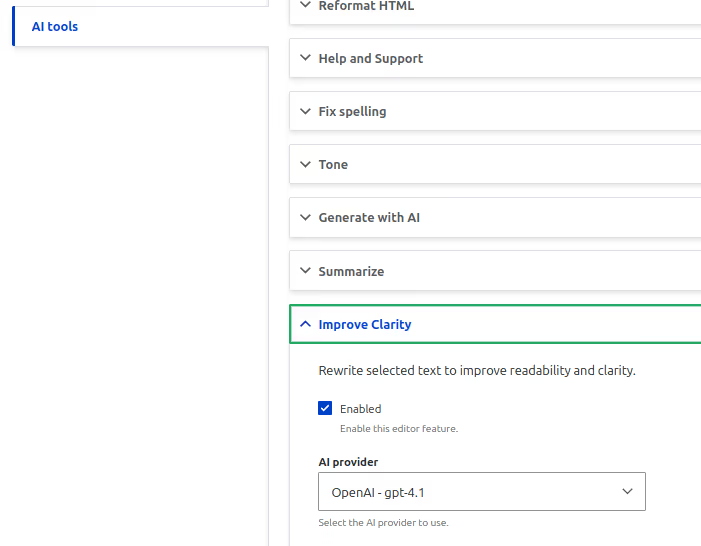
- Enable and configure your plugin as needed
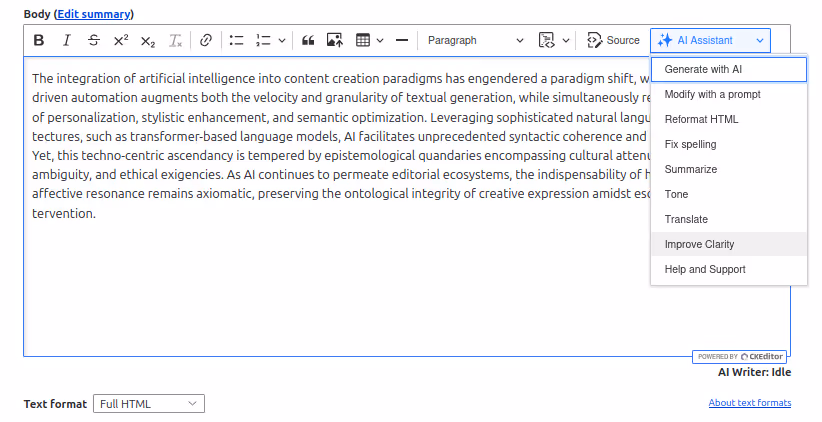
- Your custom plugin will now appear in the AI Tools dropdown when users click the ✨ button in CKEditor, ready to enhance content with your specialized AI functionality.
Conclusion
Creating custom AI CKEditor plugins gives you the flexibility to shape content workflows around real editorial needs.
Whether it’s refining tone, automating structure, or guiding writers with contextual prompts, each plugin can bring meaningful improvements to the way content is created and managed.
Start with a clear use case, build in small steps, and adjust based on real feedback.
Drupal’s plugin architecture, combined with the AI CKEditor module, provides a strong foundation for developing tools that feel native to your workflow and make everyday writing faster, more focused, and more consistent.