All blogs

Exploring data integrity with API constraints in Drupal
Drupal's powerful and flexible architecture allows developers to create complex websites and applications. One key feature that makes Drupal robust is its support for constraints. Constraints are rules that enforce data validation and integrity within your content.
They ensure that the data entered into the system adheres to specific criteria, enhancing the reliability and quality of the content. In this blog post, we'll explore how to work with constraints in Drupal, focusing on custom constraints and how they can be used effectively in your projects.
What are Constraints?
Constraints in Drupal are validation rules applied to data entities. They help ensure that data entered into fields or entities meets certain criteria. Constraints can be applied to:
- Fields (e.g., ensuring an email field contains a valid email address).
- Entities (e.g., ensuring a content type has required fields filled).
- Custom conditions as defined by developers.
Drupal provides several built-in constraints, but you can define custom constraints for more complex scenarios.
Prerequisites
Before you begin, ensure you have:
- A Drupal site is set up and running.
- Administrative access to your Drupal site.
- Basic knowledge of Drupal module development and PHP programming.
Building Constraints
Step 1: Understanding Built-In Constraints
Drupal comes with various built-in constraints that you can apply to your fields and entities. Some common examples include:
- NotBlank: Ensures a field is not empty.
- Email: Validates that the input is a valid email address.
- Length: Restricts the length of the input to a specified range.
These constraints can be easily applied when creating or managing content types and fields through the Drupal administrative interface.
Step 2: Creating Custom Constraints
For more complex validation logic, you may need to create custom constraints. Let's create a custom constraint that ensures a field contains only uppercase letters.
- Create a Custom Module:
First, create a folder for your module in the modules/custom directory, for example, uppercase_constraint. Inside this folder, create an .info.yml file:
2. Define the Constraint:
Create a PHP class for the constraint in src/Plugin/Validation/Constraint/UppercaseConstraint.php:
3. Define the Constraint Validator:
Create the validator class in src/Plugin/Validation/Constraint/UppercaseConstraintValidator.php:
Step 3: Applying the Custom Constraint to a Field / Entity
Now that your custom constraint is defined, you can apply it to a field, entity type or custom entity.
- Adding a Constraint to a Field of an Entity Type
In .module, implement either
hook_entity_base_field_info_alter() (for base fields defined by the entity) or
hook_entity_bundle_field_info_alter() (for fields added to a bundle of the entity):
For fields like title, body, etc use hook_entity_base_field_info_alter()
For other fields than base fields used: hook_entity_bundle_field_info_alter()
- Adding a Constraint to a Base Field of a custom Entity Type
Constraints on base fields are added using BaseFieldDefinition::addConstraint() in overrides of ContentEntityBase::baseFieldDefinitions():
- Adding a Constraint to an Entity Type
In .module, implement hook_entity_type_alter():
- Adding a Constraint to a custom Entity Type
Add the constraint to the entity type annotation on the entity class. If the constraint plugin is configurable, the options can be set there. If it is not, specify an empty array with {}
Step 4: Testing Your Custom Constraint
To ensure your custom constraint works as expected, create or edit a content item of the type you applied the constraint to. Try entering a value in the field that doesn't meet the constraint criteria and verify that the validation error message is displayed.
In the example below, the description field must contain only uppercase letters. If the field is not in uppercase, the validation error message "The Description is not in uppercase." is displayed.

Conclusion
Working with constraints in Drupal helps maintain the integrity and quality of your data. By leveraging built-in constraints and creating custom ones, you can ensure that your content meets specific validation criteria. This guide covered the basics of creating and applying custom constraints in Drupal. With this knowledge, you can build more robust and reliable Drupal applications.
Additional Resources

Run batch process via Ajax without redirecting to batch window
Recently, while working on a project, I encountered a need to download an XLS file upon clicking a button. Due to the large volume of data involved, we opted to use Drupal's Batch system to generate the file, minimizing the risk of errors such as page timeouts or memory issues.
Typically, initiating a batch process redirects to the batch window, which can disrupt user experience and confuse non-technical users. To enhance usability, we implemented an AJAX callback to start the batch process without redirecting to the batch window, thereby improving clarity and user interaction.
For example
Let’s take a very generic scenario, in which the node title will be updated(prepend “Update” text before node title) by a batch process based on the content type selected in the form by the user.
Default Batch process workflow: Here you can notice when the batch initiates the execution, and then redirects to the batch page.


Batch process workflow: that initiates using Ajax request
Here you can notice when the batch initiates the execution, then remains on the same page (i.e. desired behavior that tried to be achieved)

Implementation steps to run batch through jquery ajax request
1. Create custom module in which custom_module.routing.yml file will be created
in which batch API endpoints path will be defined

2. Create controller in which batch API executing code will be added that defined in custom_module.routing.yml file
Here: “BatchBuilder()” called & “setFinishCallback()” defined
Added below custom logic:
check whether therequest to batch controller by
post method or not so that the batch process not redirect to the batch
window itself (i.e. by default core functionality)

“batch_set()” called then gets currently completed “batch” object using “batch_get()”

Then get “batch id” from the batch object , pass to the returned ajax response.

Make sure return “ajax response” (as this endpoint 'll be call/initiate by ajax request: step-4)
3. Create custom_module.libraries.yml file & attach library file to the page.

4. Then call the batch API endpoint through jquery ajax request that initiates batch process
for eg: “click on download btn” call the batch API endpoint using ajax request

5. After the batch completed its execution by checking progress of batch 100%, then call the batch finished callback endpoint through the jquery ajax request

Note: if you ‘ll skip above mentioned step 5, then code added in batch finished callback ‘ll never execute.
Let's take example : I want to “export xls” file so I 'll add the code for "write the file content in xls file" in custom function of batch API & download file code 'll be written in the finish callback of batch API
In this scenario if we skip the step5 then file 'll never 'll be download
In similar fashion, this step is taken care/execute by the default implementation of Batch API, can observe in this file:
root_folder_project/web/core/misc/batch.js
User interactive batch
If you want to pass some dynamic user selected values to batch then you need to add some additional steps along with above mentioned steps
1. Create custom form & on submit form, call the ajax callback which ‘ll send user submit data from “form to jquery”.
Buildform(): where click on submit button, ajax callback “nodeUpdateBatchCallback()” called


Note: Make sure attached jquery file to the form so that call the batch process
Ajax callback(): Click on submit button, pass the user selected value to js using ajax “SettingsCommand” command.

2. Then in the attached jquery file get the user submit form values & pass these values to the batch controller by jquery ajax post request.
Get user submitted values from “form to js” using following code:
Here “Settings.user_submit_val.fields” defined the in “form file” then pass these values to the ajax request

3. Fetch the user submit form values in batch controller & use it as per requirementGet user submitted values from “request” object using following code:
$all_values = $request->request->all();
$fields = $all_values['fields'];
Here “fields” denotes variables that are defined in the js file to pass data to the batch while calling batch API endpoint.

Conclusion
Batch can run in the same window without redirection to the batch window itself by using an approach in which initiates the batch process using ajax.
This approach allows you to leverage the core Batch API implementation & integration to desired functionality that gives better user interface experience to end users while interacting/performing following actions which are implemented using Batch API:
Download csv file,
Updating data in bulk, etc.
Reference links: To get more detail about the batch process, can follow links:
* Github Demo link : Demo example, in this eg. node title data 'll updated on the basis of content type selected in the form by the user by batch process that initiates using ajax request.
* Batch API: documentation

The impact of Drupal as a Digital Public Good in the healthcare landscape
In an era of rapid digitalization, industries are undergoing significant transformations due to technological advancements. The healthcare sector has experienced significant changes due to digital technologies. Drupal has been a prominent player in this.
Let's delve into the significance of Drupal as a Digital Public Good (DPG) for the healthcare industry.
Navigating the Digital Age: The Impact of DPGs
DPGs have reshaped the way businesses engage with their audience. These are tools everyone can access focusing on privacy, responsible design, digital payments, and data exchange systems. It aims to be beneficial for everyone, creating a ripple effect that strengthens communities.
Nonrivalry and non-excludability are the main characteristics of a DPG. This means that once a public good is provided, it does not exclude anyone from its use, and the consumption of the good by one individual does not reduce its availability to others.
The non-excludable and non-rivalrous nature of public goods benefits the society as a whole.
Drupal's strengths as a DPG
Drupal has evolved significantly since its inception. Recently it achieved recognition as a Digital Public Good capable of creating enhanced digital experiences for enterprises across various industries.
Its flexibility, scalability, and library of modules make it a preferred choice for organizations seeking to create compelling digital experiences.
Drupal prioritizes security and reliability to ensure the trust of its users. With robust built-in security features, regular updates, and a dedicated security team, it provides a secure foundation for building and managing digital assets.
It also ensures that it is accessible to all, regardless of location, background, or technical expertise.
With seamless content management, customer data management, analytics, and personalization features among others, Drupal offers a complete solution for delivering digital experiences across various channels.
In today's connected world, where consumers expect personalized digital interactions, Drupal as a DPG plays a crucial role in enhancing customer engagement.
Spotlight on the healthcare industry's digital needs
The healthcare industry is undergoing a digital change. Patients are demanding more control over their health information, and healthcare providers need efficient and secure ways to deliver care. Digital transformation is required to meet the demands of improved patient care, operational efficiency, and regulatory compliance.
Some of the key digital needs for healthcare organizations are:
- Data security and privacy: Security is paramount in the healthcare sector, where the confidentiality of patient data is non-negotiable. With regulations governing the handling of sensitive patient data, robust security measures are required to safeguard against unauthorized access, breaches, and cyber threats.
- Electronic Health Records (EHR) systems: The transition from paper-based records to electronic health records (EHR) systems is important for enhancing patient care coordination, reducing medical errors, and improving decision-making. EHRs enable secure storage and exchange of patient information.
- Patient engagement and education tools: Patient engagement and education tools play a vital role in enabling them to take an active role in their healthcare journey. Digital platforms that offer personalized health information, interactive educational resources, and tools for appointment scheduling and medication management help patients.
- Enhanced care delivery: Healthcare providers need efficient tools for telehealth consultations, remote patient monitoring, and data-driven decision-making.
- Streamlined operations: Hospitals and clinics require digital solutions to manage administrative tasks, automate workflows, and reduce costs.
- Interoperability: Healthcare systems need to seamlessly exchange data between different platforms and institutions to ensure proper data management.
- Personalized health measure: Leveraging digital tools like wearables and AI can enable personalized care plans and preventive health measures.
- Public health initiatives: Digital platforms can help spread health information during outbreaks, promote disease prevention, and foster healthy communities.
Addressing these digital needs by healthcare organizations helps to adapt to the evolving needs.
Drupal for the Healthcare Industry
The healthcare sector has its unique challenges and requirements which can benefit immensely from the capabilities of a DPG like Drupal.
From patient engagement portals and telemedicine platforms to content-rich websites and mobile applications, Drupal offers to build tailored solutions that cater to the diverse needs of healthcare organizations.
- Security and compliance: Drupal’s robust security features like user access controls and data encryption, ensure patient data remains safe and compliant with regulations. Also, Drupal's community of developers actively monitors and addresses vulnerabilities which enhances the platform's security.
- Flexibility and customization: Drupal's various modules allow healthcare organizations to tailor their digital platforms to meet specific requirements. Whether building patient portals, telemedicine platforms, intranet sites, or public-facing websites, Drupal offers a wide range of modules and themes that can be customized to suit the unique branding and functionality needs of healthcare providers.
- Integration with EHR systems: Drupal can seamlessly integrate with electronic health record (EHR) systems and other healthcare IT systems through APIs and web services. This integration enables the sharing of patient information securely across different platforms.
- Multilingual and multisite capabilities: Healthcare organizations with a global or multilingual presence can benefit from Drupal's multilingual and multisite capabilities. Drupal allows the creation of localized content and websites tailored to different regions and languages, enabling them to reach diverse patient populations effectively.
- Scalability and performance: Drupal's scalability and performance capabilities make it suitable for healthcare organizations of all sizes, from small clinics to large hospitals Drupal's caching mechanisms, database optimizations, and scalability features ensure that websites can handle high traffic.
Drupal offers a comprehensive and adaptable solution for healthcare organizations seeking to create robust digital platforms that deliver high-quality experiences to patients.
Drupal in action
Here are some digital infrastructure examples of healthcare organizations that have successfully leveraged Drupal to enhance their digital presence.
Overhauling the digital landscape of ADA with Drupal 10 & multisite architecture
Drupal 10 multisite architecture enhances the digital presence ensuring top-tier security, performance, and a user-centric experience. The American Diabetes Association (ADA) utilizes Drupal to manage its contribution to the fight against diabetes by funding research, improving treatment options, and offering care services.
ADA revamped its online presence using multisite capabilities by developing a cohesive and intuitive platform with Drupal resulting in the scalability of its digital infrastructure, unique designs for its audience, centralized content management, and robust security of user data.
With the upgrade, the ADA can now educate, support, and enable individuals affected by diabetes more efficiently. This allows them to reach a larger audience, efficiently manage their services, and have a positive impact on the lives of many people affected by diabetes.
Feel free to explore the full case study here.
.avif)
Drupal multisite powered HCP portal for a Fortune 500 pharma company
The Drupal multisite platform serves as a hub for healthcare professionals worldwide to connect, share information, and access high-value materials.
Drupal enabled the creation of a digital portal that provides access to a wealth of medical education resources, including articles and research papers for a leading Swiss multinational pharmaceutical company.
Multisite architecture simplified website management across countries, maintaining consistent standards. The plug-and-play feature allowed easy customization of web features for different geographies. The platform standardized and enhanced the accessibility of medical resources.
HCPs worldwide were able to connect, collaborate, and access a wealth of medical information. The platform facilitates tracking online behavior and derives rich data insights to deliver personalized content at the most opportune moments.
The solution also helped to enhance HCP convenience with any-time, anywhere access to a suite of interactive medical information, enabling them to make informed decisions and deliver exceptional patient care.
Feel free to explore the full case study here.

Conclusion
As the healthcare industry continues its digital transformation journey, recognizing and investing in public goods is crucial as they offer advantages to everyone and have a positive impact benefiting the broader community.
The role of Drupal as a DPG has become increasingly vital. With its robust features, scalability, and emphasis on security, Drupal emerges as the best choice for healthcare organizations looking to create good digital experiences that prioritize patient experience.
By harnessing the power of Drupal as a DPG, healthcare providers can unlock new opportunities for efficient and improved outcomes in the digital age.
By embracing digital transformation initiatives and leveraging cutting-edge technologies, healthcare organizations can optimize operations, improve clinical outcomes, and ultimately enhance the overall quality of care for patients.

Digital Trust | Drupal as Digital Public Good
Have you ever had that client call where everything just clicks? Ideas fly back and forth, the branding vision aligns perfectly, and like you're finishing each other's sentences.
You've explored various technologies and services to craft the perfect solution. Then, the client casually mentions, "Let's do it all in Drupal." A wave of relief washes over you (and maybe even a high five!), because you know Drupal is perfect for building platforms that not just resonate with big enterprises and business goals but benefit everyone.
This scenario resonates with us at QED42 because, let's face it, we love Drupal! But what makes it so unique?
Drupal isn't just a regular content management system (CMS). It's a powerful tool built on the idea of open-source collaboration, which encourages trust and innovation.
And recently, Drupal achieved recognition as a Digital Public Good (DPG)! This means it aligns with principles of openness as it always has and continues to enable digital sovereignty and cultivate trust in technology through openness, direct involvement, and preserving entities’ autonomy, contributing to a more equitable digital world.
Understanding Digital Public Goods
Before we understand why Drupal is our platform of choice, let's explore the concept of Digital Public Goods (DPGs).
Digital Public Goods are a powerful way to benefit the public, emerging as valuable resources that come in various forms such as open-source software, freely accessible datasets, and educational materials.
The key aspect of DPGs is their openness - which means that anyone can access, use, and even improve them. This fosters collaboration and innovation, leading to efficient solutions for common challenges. By enabling users to contribute, innovate, and create freely, DPGs promote direct involvement, and ultimately, digital sovereignty. Individuals and organizations have more control over their digital experiences.
Built on core principles of collaboration and transparency DPGs contribute to achieving a sustainable digital future. This fosters something important in today's digital world — trust.
As the World Economic Forum defines it, digital trust is the belief that technology will act in the best interests of everyone. Studies show that 72% of global consumers value a company's transparency, which helps to trust them and enables their purchasing decisions.
With Drupal as your preferred DPG platform as a business, you have the opportunity to contribute to a more secure, trusted, and sustainable digital future. You're not just building a website, you're shaping a world where technology acts in the best interests of everyone.
Why choose Drupal as your CMS?
When it comes to choosing the right Content Management System (CMS) for your enterprise, there's a lot to consider. At QED42, our experience has taught us the value of Drupal, and it's not just because it's open source. There are a whole lot of other reasons why Drupal stands out, making it our top pick for dynamic and innovative projects geared toward large enterprises.
Legacy platforms often struggle to keep up with the demand for growth and innovation. However, Drupal's modular and flexible architecture enables development teams to quickly and efficiently build and refine complex functionalities.
This modularity also means that integrating pre-built extensions is easier, catering to a wide range of large enterprise needs. just for example, Drupal can seamlessly incorporate tools like Etherpad for real-time collaboration, enabling teams spread across the globe to collaborate on documents simultaneously.
Apart from being agile and modular then there is also the case of the three S:
- Security — With a dedicated security team constantly monitoring and patching vulnerabilities. This ensures that digital platforms remain secure against potential threats.
- Stability — Drupal's well-established codebase and thorough testing processes contribute to its stability. Updates and new features are rigorously tested to minimize the risk of bugs or compatibility issues, providing a stable environment for large websites
- Scalability — Drupal is designed to scale effortlessly as the business grows, this CMS can handle the increased demand without compromising performance.
All this technical advantage, and then there's the crucial element of trust through openness and being a digital public good.
Drupal's commitment to open-source principles goes beyond software development — it fosters trust and transparency in the digital ecosystem. Embracing an open-source framework invites collaboration and innovation from a diverse global community of developers.
This collective effort leads to robust solutions that remain adaptable to the evolving needs of large enterprises.
Drupal's openness extends beyond technical capabilities—it's about building trust. By making its code freely accessible, Drupal enables stakeholders, business owners, and users to understand their platform's inner workings. This transparency instills confidence in its reliability and security, essential for long-term success.
Drupal's status as a Digital Public Good (DPG) underscores its commitment to transparency and accountability. As a DPG, Drupal's source code is open to public scrutiny, allowing organizations to assess its security and functionality. This transparency contributes to the platform's long-term viability.
Final thoughts
Building digital trust in your platform and business isn't an overnight task, it begins with you. From the selection of the right CMS to how you operate your business and the ecosystem surrounding your brand, every aspect matters, and choosing Drupal is a key step in fostering the trust you seek among today's users.
Now for a TL;DR
So, we have established quite a few things about Drupal and why it's perfect! Building with Drupal or having Drupal as the backbone of your digital platform is like having a window into digital excellence. Drupal’s inner workings are designed for transparency, building trust by letting everyone see that their data is safe and secure.
In the meantime, while users manage content easily with Drupal's user-friendly interface and powerful features, developers get to flex their creative muscles, building custom solutions tailored to each client's unique needs.
The perks of being a Digital Public Good — with Drupal, there are no pesky licensing fees, saving businesses money right off the bat.
So, why choose Drupal? Because it's more than just a CMS — it's a community-driven platform that enables businesses to thrive online. It's modern, robust, transparent, secure, flexible, and supported by a friendly community that is always ready to help.
In a world where digital success is crucial. Drupal is the smart(est) choice for businesses looking to stand out and succeed online, PERIOD!

Enabling communities with open source – Drupal as a Digital Public Good
The open-source movement has revolutionized how technology enables communities. At the heart of this movement lies the concept of Digital Public Goods (DPGs) – freely available resources that benefit society.
Drupal, a robust Open-Source Content Management System (CMS), stands tall as a prime example of a DPG, playing an important role in the success of countless non-profit organizations (NPOs).
This blog digs deep into the power of Drupal as a DPG, exploring how NPOs leverage its capabilities to increase their impact and foster stronger communities. We'll explore real-world examples, learn more about the core principles of DPGs, and shed light on how Drupal aligns with this crucial digital movement.
The Rise of Digital Public Goods
The digital age has changed the way we connect and interact with the world around us. However, access to the tools and resources that fuel this connectivity can often be a barrier for many. DPGs bridge this gap by providing open, accessible, and interoperable resources that benefit everyone.
Imagine a library, not just for books, but for digital tools that help communities to thrive. This library is DPGs. NPOs, educational institutions, and even governments can access the tools needed to create impactful digital platforms without exorbitant costs or restrictive licensing.
Core Characteristics of DPGs:
- Open source – Freely available for anyone to use, modify, and distribute
- Globally accessible – Designed for widespread adoption and use by diverse communities
- Collaborative – Cooperation among diverse groups, including developers and users, to enhance and maintain digital tools
- Interoperable: Seamlessly integrates with other digital tools and platforms
- Community-driven – Backed by a collaborative community that fosters development
.avif)
Drupal embodies these core principles, making it a quintessential DPG. Its open-source nature enables NPOs of all sizes to build robust websites and digital experiences without breaking the bank. The vibrant Drupal community provides ongoing support, innovation, and a wealth of resources, ensuring continuous improvement and scalability.
Real-world impact | NPO powered by Drupal
Let's explore some digital infrastructure examples of how NPOs leverage Drupal's DPG advantage:
Overhauling the digital landscape of ADA with Drupal 10 & multisite architecture
Drupal 10 multisite architecture for non-profits enhances the digital presence ensuring top-tier security, performance, and a user-centric experience. The American Diabetes Association (ADA) utilizes Drupal to manage its contribution to the fight against diabetes by funding research, improving treatment options, and offering care services.
ADA revamped its online presence using multisite capabilities by developing a cohesive and intuitive platform with Drupal resulting in the scalability of its digital infrastructure, unique designs for its audience, centralized content management, and robust security of user data.
With the upgrade, the ADA can now educate, support, and enable individuals affected by diabetes more efficiently. This allows them to reach a larger audience, efficiently manage their life-saving services, and have a positive impact on the lives of many people affected by diabetes.
Feel free to explore the full case study here.
Building Drupal-powered knowledge management platform for UNICEF
The potential of Drupal for building robust and user-friendly knowledge management platforms empowers non-profit organizations to achieve their goals more effectively. UNICEF wanted to share its extensive knowledge library with external partners, including donors, stakeholders, and the general public.
UNICEF revolutionized its knowledge sharing and collaboration with Drupal for its web infrastructure. Drupal's flexibility and robust content management capabilities resulted in easy accessibility of resources, customized features tailored to meet specific requirements, and robust security to protect sensitive information.
With this digital solution, Drupal enabled UNICEF to deliver a vast amount of information seamlessly to millions of users worldwide. Content authors now have the flexibility to create and update information seamlessly.
Feel free to explore the full case study here.
.avif)
Interactive data visualization of climate hazards for the International Organization for Migration, UN
Drupal’s various modules enable non-profits to create a visualization application ensuring a seamless user experience. Design and development of an interactive data visualization tool helped The International Organization for Migration (IOM), the UN migration agency, to showcase the impact of climate change on global migration patterns.
The data-driven portal helped to understand climate-related displacement risk better which provides a vital foundation to allocate resources and make informed policy decisions. The data shown enabled international organizations with insights to provide effective and targeted support for vulnerable populations.
They can now interactively explore where and when climate hazard exposure, high population densities, and economic vulnerability will coincide in the future. This shift towards evidence-based decision-making ensures that aid and resources reach those who need it most, maximizing their impact and fostering a more resilient future for all.
Feel free to explore the full case study here.
.avif)
These are just a few examples of how we helped NPOs leverage Drupal's DPG advantage. Here are more examples of how the world’s top non-profits chose Drupal to build impactful digital experiences.
Drupal enables these NPOs with
- Reduce Costs: Free and open-source, Drupal eliminates the need for expensive licensing fees, allowing NPOs to allocate resources towards their core mission.
- Increase Efficiency: Drupal's user-friendly interface and extensive tools streamline website management, freeing up valuable time for NPO staff.
- Embrace Customization: Drupal's flexible architecture allows NPOs to tailor their website to their specific needs and target audiences.
- Foster Collaboration: The open-source nature encourages collaboration and knowledge sharing within the NPO community, leading to a collective benefit.
.avif)
The Drupal Community: A Driving Force
The vibrant Drupal community is a cornerstone of its success as a DPG. Developers from all over the world contribute their expertise, develop modules for specific functionalities, and offer ongoing support.
This collaborative spirit ensures continuous innovation and adaptation, allowing Drupal to stay ahead of the curve and serve the ever-evolving needs of NPOs and other organizations.
Why Does This Matter?
The impact of DPGs like Drupal on the NPO landscape is profound. With accessible and powerful tools, Drupal enables them to:
- Reach a wider audience: Spread awareness about their causes and connect with potential supporters globally.
- Engage Stakeholders: Foster deeper connections with volunteers, donors, and beneficiaries by providing interactive platforms.
- Drive Results: Increase fundraising efforts, volunteer recruitment, and program participation through efficient online outreach.
- Enable Communities: Build stronger communities by providing access to information, resources, and tools that drive social change.
Conclusion
Drupal, as a DPG, represents the democratization of technology for social good. It helps NPOs to focus on their missions, leaving the complexities of web development to the dedicated Drupal community.
In a world where technology is a powerful driver for change, access to digital tools is crucial for social impact. By championing DPGs like Drupal, we enable NPOs to compete and thrive in the digital landscape.
This fosters a more just and equitable environment where technology makes positive change, and NPOs can effectively address the world's most pressing challenges.
Get in touch with our team of experts today to create a future-focused digital architecture with Drupal.

Managing large record sizes in Drupal and Algolia Integration
Imagine having a big homepage on our site, and when we put all the text from different fields together into 'aggregated_text_field,' the total character count goes over 10,000. Then there is a good chance that the home page won’t get indexed in Algolia as there is a 10 KB size limit per record In the free plan. Even if you switch to a paid plan, it's not a good idea to keep so much text in one record. Algolia recommends to split large records into smaller ones.
Thankfully, this is already being discussed in the issue queue of the search api Algolia module and there is a patch available. Let’s apply the patch first and see what it does.
Before we start
- For those new to this series, reading both part 1 and part 2 is mandatory. Part 1 discusses important concepts related to Algolia and Algolia Drupal integration. Part 2 explains the different approaches for structuring the content from the Drupal backend before indexing.
- Make sure you have the same search api ‘index’ configuration (Same fields and machine names) as created in part 1 and part 2.
- Make sure that you have indexed all contents from ‘demo_umami’ profile with those configurations.
- Make sure that you have done all necessary Algolia dashboard configurations as described in part 1 and 2.
- Make sure you have a copy of the code from this repository.
The patch we applied adds a search api processor that helps in splitting the large records. To configure the processor:
- After applying the patch, go to ‘admin/config/search/search-api/index/demo_umami/processors’.
- You will see a new processor named “Algolia item splitter”.

- Enable the processor. Scroll down to the configuration section of this processor and enable it only for the “Aggregated text field” field. Give ‘500’ as ‘Maximum characters’.

- The patch creates a new search api processor that checks the text in ‘aggregated_text_field’.
- If there are more than 500 characters, a new record will be created and the remaining part of the text will be stored in the new record (With 500 character limit). So, big records would get splitted into multiple smaller records.
- The patch also adds a new parameter “parent_record” to all records.
- The original record will have ‘self’ as the value in this field, and split records will have ‘node_id:language_code’ as the value.
- We can use this field to distinguish between actual records and split records.
- Index the contents after applying the patch and check the Algolia dashboard. You will notice the increase in record count as records were splitted.

The consequence of splitting records
By splitting the records, we have created multiple records for the same content. If you visit the search page now, you will notice that the results are duplicated.

- Each duplicated item is a split of the original record. But we only want to show one result from a node in the search page.
- To fix the duplication, we should configure ‘attributeForDistinct’ from the Algolia dashboard.
- Assume that a node was split into 5 records. All the 5 records should have a common attribute with the same value so that Algolia understands those are splits of the same record.
- The search api module adds a ‘search_api_id’ parameter to all the records. Records (Original one and its splits) of a node will have the same value in the ‘search_api_id’ field. Adding this field as ‘attributeForDistinct’ will enable Algolia to display only one item from all the records.
- We can also use ‘Title’ as ‘attributeForDistinct’.
- Go to “Deduplication and Grouping” in the Algolia dashboard.
- Mark ‘Distinct’ as True.
- Add “search_api_id” as “Attribute for Distinct”.
- Save

- Go to the Algolia dashboard and search for “World Chocolate Day”.
- You will only see one result with objectId ‘entity:node/12:en’ (12 is the nid of the article and en is the language code). This is the original record of the article “Dairy-free and delicious milk chocolate”.
- The article “Dairy-free and delicious milk chocolate” also briefly mentions “almonds and hazelnuts” in the final paragraph.
- So search for ‘almonds and hazelnuts’ in the dashboard. You will still see only one record in result in the dashboard and it will be a split of the original record.


- Visit the search page we created and search for the same keywords.
- You will see the same behavior. There won't be any duplication and Only one record from the node will be displayed in results. Yay! We fixed the duplication.
Few more essential dashboard configurations
You have to do another crucial configuration in the dashboard. Since records are splitted, when we delete a node, all the records associated with that node should also get deleted including the splitted records. The same should happen when a node is updated as well. The patch we applied handles this but the ‘parent_record’ field should be configured as a filter from the Algolia dashboard for this to work.

Now, if a node is updated/deleted, it’s splits would also get updated/deleted 🎉.
We have to make one more change. Visit the search page we created and take a look at the results.

The description will be cropped in each result card because we are getting the splitted record from Algolia even when there is no search term. This can be fixed by updating the js and adding a filter ‘parent_record = self’ when there is no search query.
- Remove the configure widget we added earlier in this series and add the following code.

- The change is self explanatory.If there is no search query, a filter to show only parent records would be added along with the language filter.
- Visit the search page again.

- The search page will now show only the original record when there is no search query.
We have now successfully built a fast and responsive search experience for the Umami profile using Algolia. Let’s recap what we have learned in this blog series.
- Explored fundamental concepts and dashboard configurations of Algolia.
- Understood multiple approaches for structuring the site’s content before indexing.
- Built custom search api processors for optimizing the content.
- Designed an intuitive and ‘language aware’ ’search interface using instantsearch.js.
- Understood how to create custom widgets using instantsearch.js
- Learned about splitting records for content rich websites.
- Understood the concepts related to deduplication and grouping in Algolia.
As mentioned earlier in part 1 of this series, ‘search’ has become an integral part of all the modern websites. Whenever users see a search bar on your website, they expect it to be as intelligent as modern search engines. Algolia delivers this with its AI-powered capabilities and flexible APIs. I hope this blog series has given you a clear path to follow for integrating Algolia and Drupal. The complete code is available in the git repository.

Structuring the site's content for Algolia - Drupal integration
The traditional approach to building search pages in Drupal involves using views, which offers several advantages. For instance, when a content type includes a media field, only the media ID needs to be indexed, as the Drupal Render API can handle rendering the actual image.
Similarly, when there's a taxonomy reference field, only the ID needs to be indexed, as the Render API can render the term's name.Views can be used to create a search page for an Algolia index also. But, the true power of Algolia can be harnessed only when the search UI is built using JavaScript.
However, this decouples the search UI from Drupal, eliminating the assistance of the Render API. So, we must develop our own strategies for structuring the data according to the content.
In Part 1 of this blog, we covered the fundamental steps in integrating Algolia search with Drupal and created a search UI for the Umami profile. But, we indexed only the body and field_ingredients fields apart from the title and image_url fields.
In real scenarios, content types often have multiple text fields, paragraphs etc - each holding crucial data that should be searchable. In this blog, we will explore 2 different strategies for structuring the data
- When the content type features only a few text fields.
- When the content type comprises multiple text fields and paragraphs.
Before we start:
- Consider checking out part 1 of this blog series if you haven’t already. We have discussed many important concepts and terminologies related to Algolia there.
- It's crucial to understand the code in this repository. Refer to part 1 for a quick refresher if you need to.
- Read the official documentation on search api processors as we will be developing custom search api processors. But feel free to skip if you prefer ‘coding first, theory later’.
When the content type features only a few text fields.
Add one more body field “body_2” to the “Article” content type and create a new article. Now, both the fields contain data that should be searchable by the user. We can add the new field to our index and then re-index all contents. But how will we display the data from the new field in the search result cards?
Before starting the implementation, let's take a look at the design of our search result cards.

- Each card has a title, image and body fields.
- The body field holds most of the searchable data. So contents from the new field “body_2” should also get displayed there.
The solution is to combine the text from both ‘body’ and body_2 fields into a single field. We will use the ‘Aggregated Field’ field provided by the search api module for this. We can then configure this new field as a ‘searchableAttribute’ in the Algolia dashboard and then render value from that field in the result card. These are the steps to follow.
- Go to /admin/config/search/search-api/index/demo_umami/fields and remove the already added “body” field. Then save the settings.
- Click on Add fields and add “Aggregated field”.
- Select “Concatenation” as the aggregation type. Select “Body” and “Body 2” fields in “Contained fields”.

- Save the field and re-index all contents again.
If you check the records in Algolia now, All the records will have the “aggregated_field” property. Go to Configuration -> Searchable attributes, remove body field and add “aggregated_field”. Update the same in “Attributes to snippet” as well.
Next, we need to replace “body” property with “aggrgated_field” in the search.js from the custom module.

Clear the cache and visit the search page again. Search for any values from the “body_2” field of the new article. The new article will be displayed in the search result and the data we searched will get highlighted in the search result card.

When the content type comprises multiple text fields and paragraphs.
The “Aggregate field” provided by the search api module is very useful for combining values from different fields. But if you are working with a site with lots of content, then there is a high chance that paragraphs might be used for creating content. All the paragraphs might contain important data that should be searchable. Let’s take a look at a slightly complex scenario.
Install paragraphs module in the Umami site and create the following paragraphs.
- Edit the article content type and add a new paragraph reference field “field_paragraphs”.
- Add reference to Banner with text, Accordion and Tabs.
- Next create a blog content type with the following fields.
Add few more Article and Blog contents. Now all the searchable data is spread across multiple fields. How should we structure the data and index in Algolia in the above scenario?
We need the following basic properties in each record when we index content.
- Title - Holds the title of the page.
- Image - Holds the image to be displayed in search result cards.
- Body - Holds all other searchable data.
Most of our work would be in adding the image and body parameters.We will be creating search api processor plugins for accomplishing that. Let’s add them one by one.
First, edit the “demo_umai” index we added in the site and delete all fields except “title” and “page_url”.

Adding the image field
Image will be present in “field_media_image” for both Article and Recipe content types. But for Blog, Image will be in either “Banner” or “Banner with text” paragraph.
We need a single image_url field that will store the image url for all content types. So, we have to create a custom search api processor plugin. In simple words, search api processor plugins are used to manipulate the data before indexing.
Add the following code to umami_site_search/src/Plugin/search_api/processor/UmamiSearchCommonImageField.php
- This processor plugin creates a new field with property path “common_image_field” that will store image urls from all content types.
- To add this field to the “demo_umami” index, Go to “admin/config/search/search-api/index/demo_umami/processors” and enable the “Common image field” processor.

- Then add the field from “admin/config/search/search-api/index/demo_umami/fields”.

- Change the machine name to “image_url” and save.

- Index the contents and check the records in the Algolia dashboard and you should see image_url property in all the records.

Adding the body field
Body field of records should hold contents from all the “text” fields including paragraph fields.
- For that, first we need to create a custom service umami_site_search/src/ParagraphsContentAggregator.php that will return text from all the paragraphs in a node.
- Next, create a new search api processor that will aggregate the text.
- For simplicity, All the non paragraph text fields are hard coded in the code. Text from those fields are concatenated in a specific order. Then text from all paragraphs are concatenated with it at the end and the end result is stored in the “aggregated_text_field” field.
- Enable the processor and add “aggregated_text_field” field to “demo_umami” index.


- Index contents again and check the records. Every record will have an “aggregated_text_field” property.

- Now all we have to do is to update the searchableAttributes and add the “aggregarted_text_field” property as attributesToSnippet form Algolia dashboard.


- Finally, change “aggregated_field” to “aggregated_text_field” in search.js. Visit the search page after clearing cache.
We've reached the end of Part 2 in our journey of integrating Algolia search into Drupal. Let's do a quick recap of what we have accomplished so far.
- We revisited the design of our 'search result cards' and identified the essential elements: 'title,' 'image,' and 'body' fields.
- Adding the title field was simple and straightforward. Simply add the field from the search api UI.
- For the image field, we wanted to accommodate different content types. So, we used Search API processors to create a custom field that could store images from all content types.
- Most of the searchable data resides in the 'body' field. So our approach was to concatenate contents from all ‘text’ fields into a single field.
- We used the ‘Aggregated fields’ field provided by the search api module to combine the texts when paragraphs were not used.
- In situations where our content incorporated paragraphs, we developed a custom 'Aggregated text field' processor to effectively combine text from various fields and paragraphs.
Hope this part helped you to get a better understanding on structuring data. The entire code can be found here
In the next and final part of this blog series, we will understand how to split records when individual records (nodes) contain a large volume of content. We will look into the record size limits in Algolia and explore concepts of ‘deduplication and grouping’ . It is a must read if you are dealing with ‘content rich’ websites.

Integrating Algolia search in Drupal and creating a search UI using InstantSearch.js
We invest significant time, effort, and passion in bringing a website and its content to the web. Thanks to Drupal, content creation and publishing have never been easier. Your website may contain hundreds of pages, offering substantial value to the end user.
However, the success of a website depends not just on the quality of its content, but also on how easily users can find that content. A fast, responsive, and 'smart' search page is an integral part of every modern website, enhancing user engagement and retention. A poor search experience might lead to users discontinuing their use of your website.
Algolia is a proprietary search-as-a-service platform designed for use cases requiring high-quality and relevant search capabilities. It is a hosted search engine and can be integrated to websites using APIs to provide consumer grade search experience. It is capable of delivering real-time results from the first keystroke.
This is the first part of a three-part blog series, where we will explore how to integrate Algolia with Drupal to create a multilingual search page for the umami profile. In this first part, we will look into a basic integration, offering a comprehensive overview of each step.
We will be using “search_api” and “search_api_algolia” modules for indexing the content and then Javascript (instantSearch.js) to create the search page. In the second and third parts, we will dive deeper into structuring the content before indexing. This series is mainly focused for developers and has code level explanations.
Before we start..
- Create a new website with the ‘demo_umami’ profile. We use this profile so that we would get a beautiful multilingual website with preloaded content. We will be creating a search page for this content.
- Create a user account in Algolia from this link.
- Once you’ve created an account, you’ll be taken to your dashboard. This is where you’ll manage your Algolia applications and indices.
- The data we index from our Drupal site will be stored in “indices” and will be called “records”.
- Indices reside inside “Applications”. When you create a user account, Algolia will automatically create an Application named “My first Application” for you.

- To create a new index, Click on the “Data Sources” icon from the dashboard and select “Indices”.
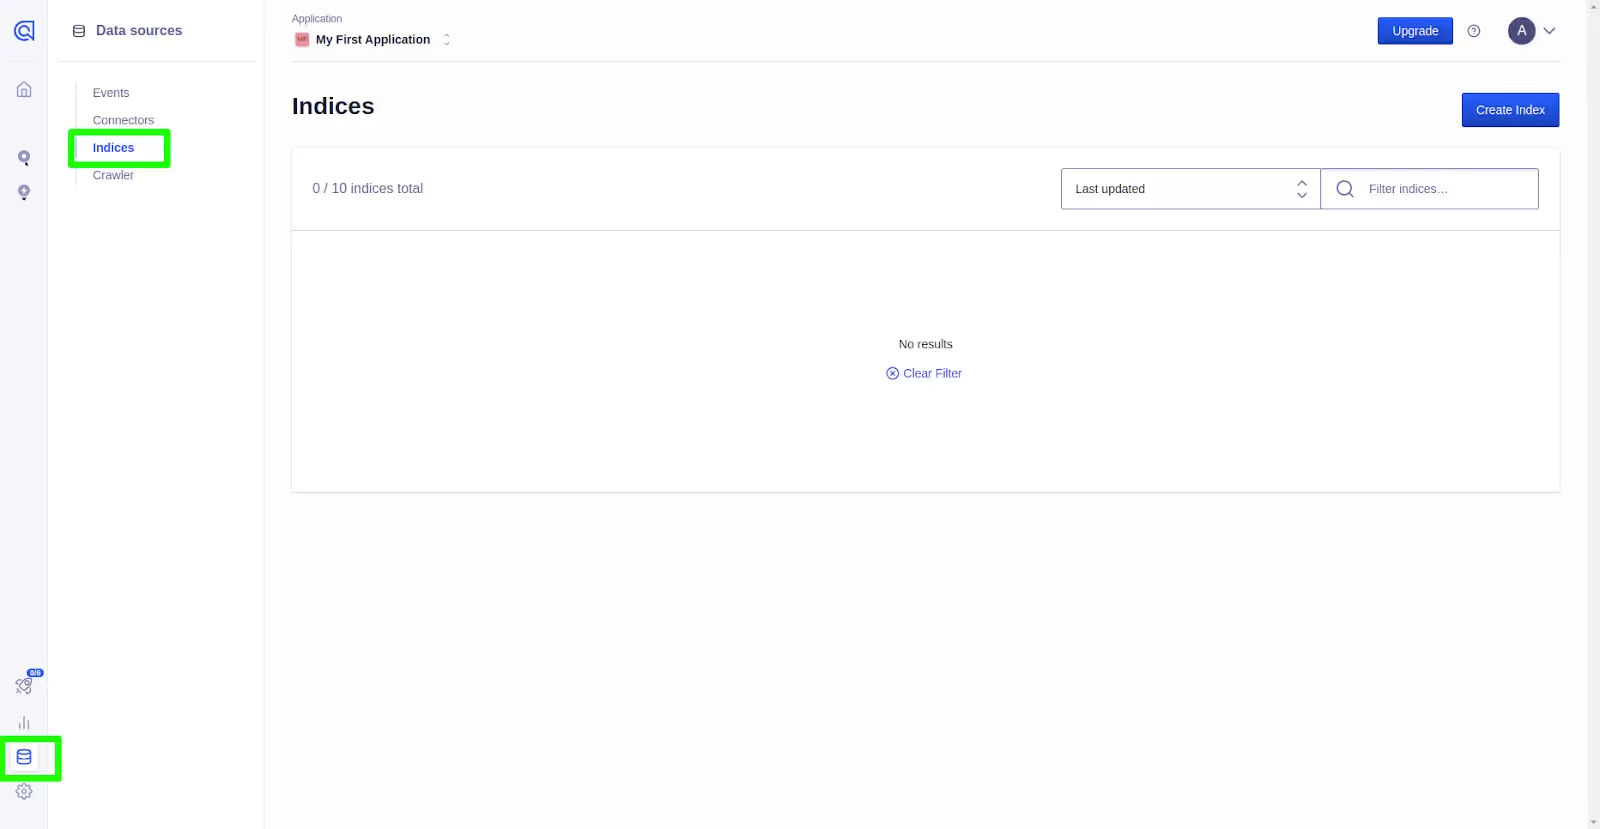
- Click on “Create index”. Give “demo_umami” as the name and save. The index will get created.
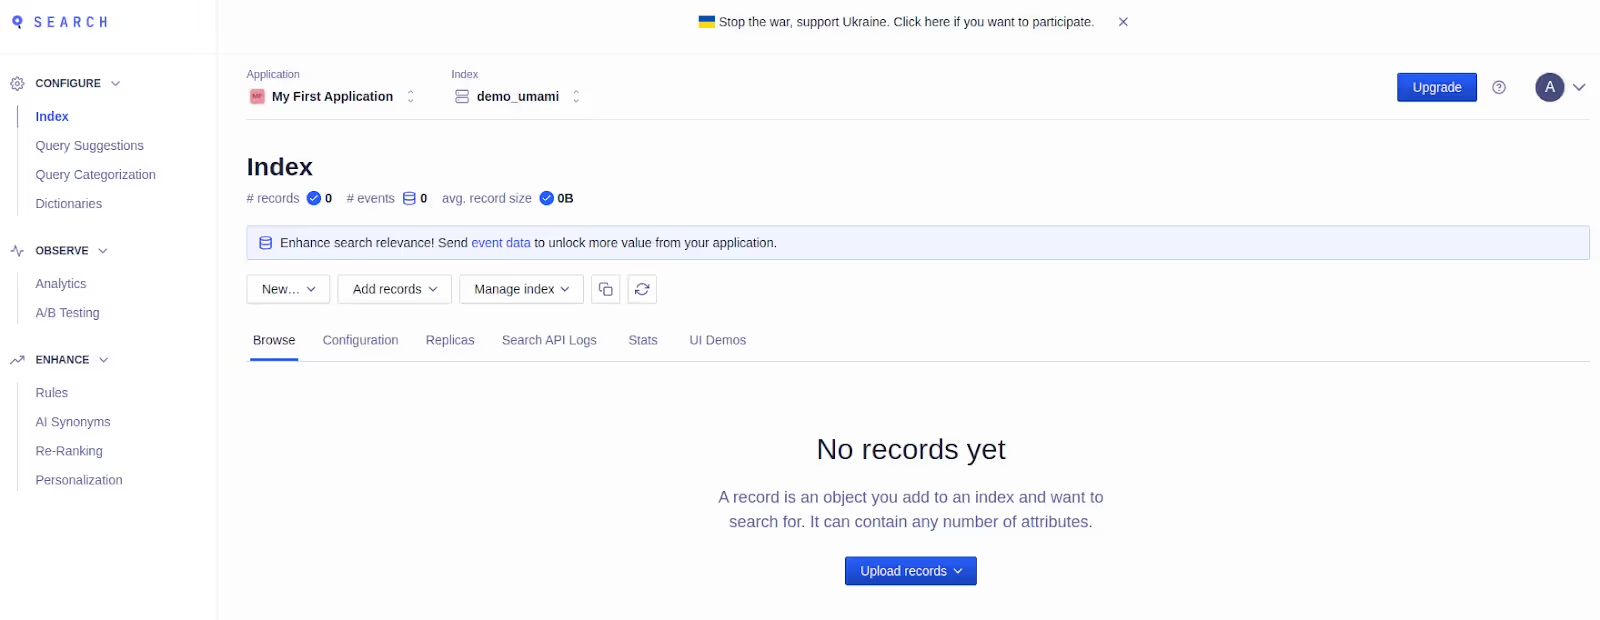
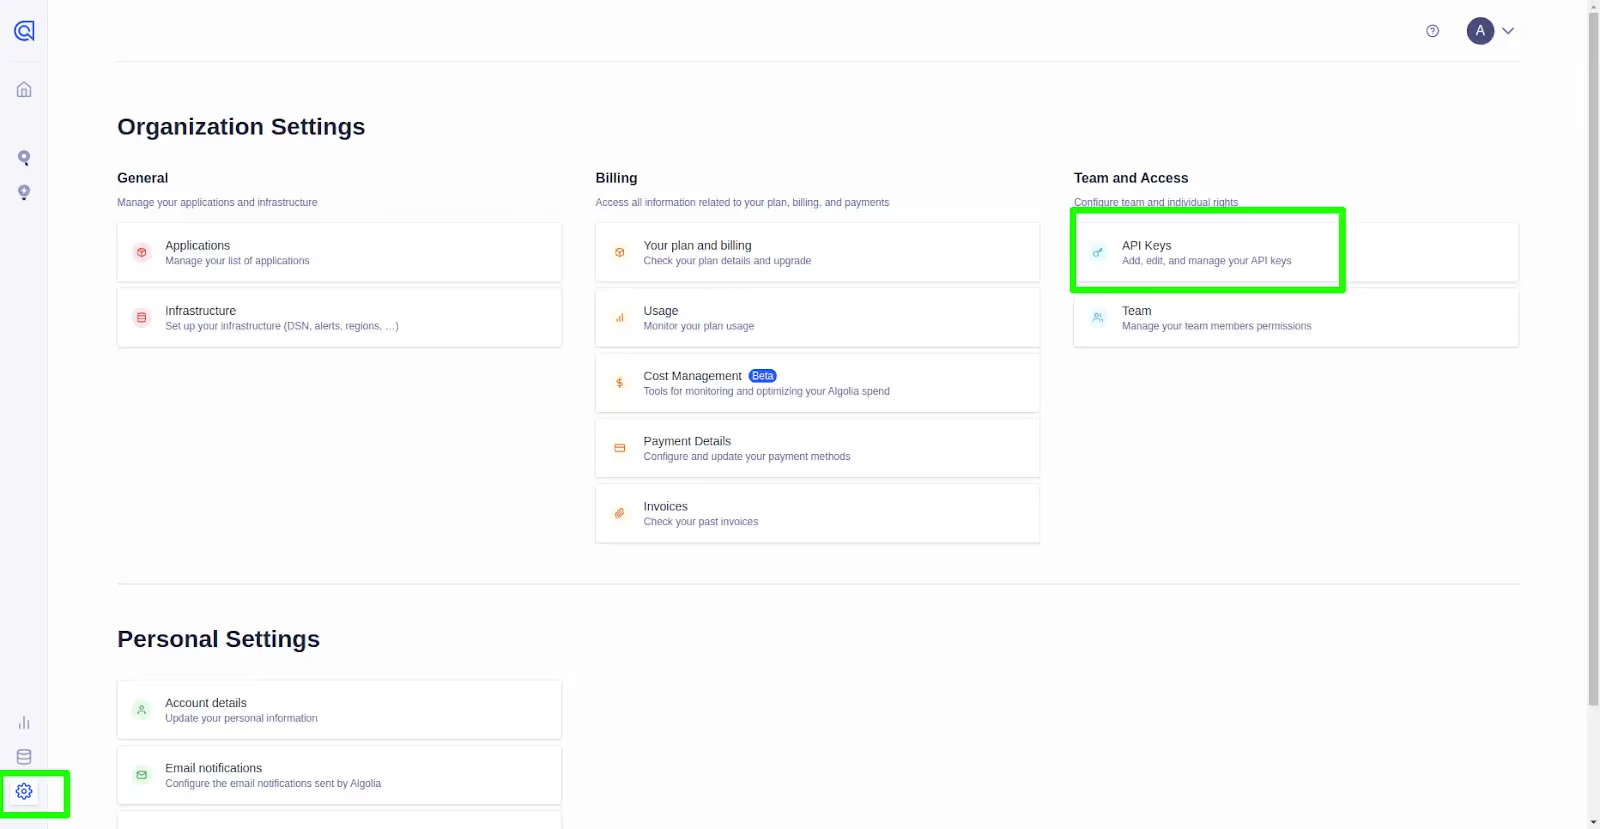
- You need to obtain the “Application ID” and “API key” of your Algolia account to connect your website to Algolia.
- For that, login to your Algolia account again and go to Settings -> API keys.
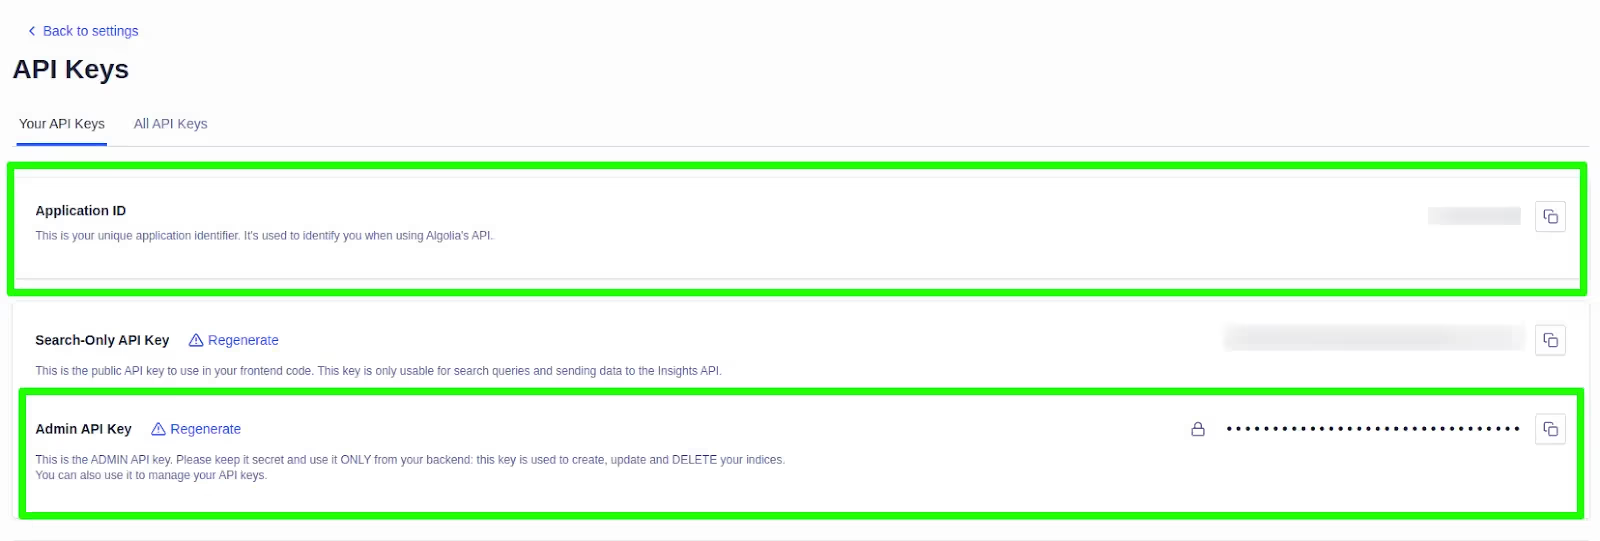
- You will see 2 types of keys: “Search only API key” and “Admin API key”’.
- We will use the “Search only API key” only when we create the front end UI.
- “Admin API key” is the one we need to use in Drupal backend to index the content.
- Make sure to keep the Admin key safe and private as anyone with this key will have full access to your search data. Never use the Admin key in the front end.
We are all set. Let’s start the implementation. In a nutshell, Integrating Algolia search involves 3 key steps.
- Indexing contents from Drupal backend.
- Configuring the indexed data from Algolia dashboard.
- Creating the search UI in Drupal using instantSearch.js.
Indexing contents from Drupal backend
- Download and install search_api_algolia module.
composer require 'drupal/search_api_algolia:^3.0@beta'
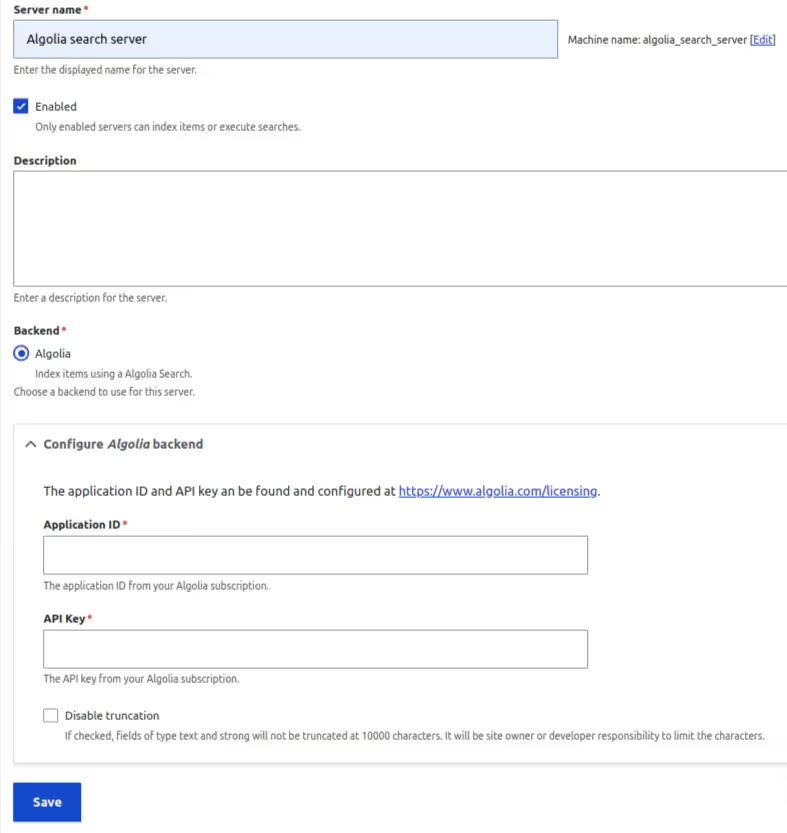
- Go to /admin/config/search/search-api and click on “Add server”. Give “Algolia search server” as the name. Add the API key (Admin API Key) and Application ID. Click save.
- Create a search index with the machine name “demo_umami” (Index machine name should be the same as the index name in Algolia).some text
- Select “Content” as the data source and select only Article and Recipe content types.
- Select both English and Spanish languages.
- Select server as Algolia search server.
- Go to admin/config/search/search-api/index/demo_umami/fields and add the following fields.some text
- title
- field_ingredients (Used by recipe content type)
- field_media_image (Common field that stores the image. We need the URL of the image. So make sure to add the URL of the image - Media Image » Media » Image » File » URI » Root-relative file URL)
- body (Used by Article content type. Most of the searchable data of articles is in the body field).
- page_url (Stores the URL of the page)
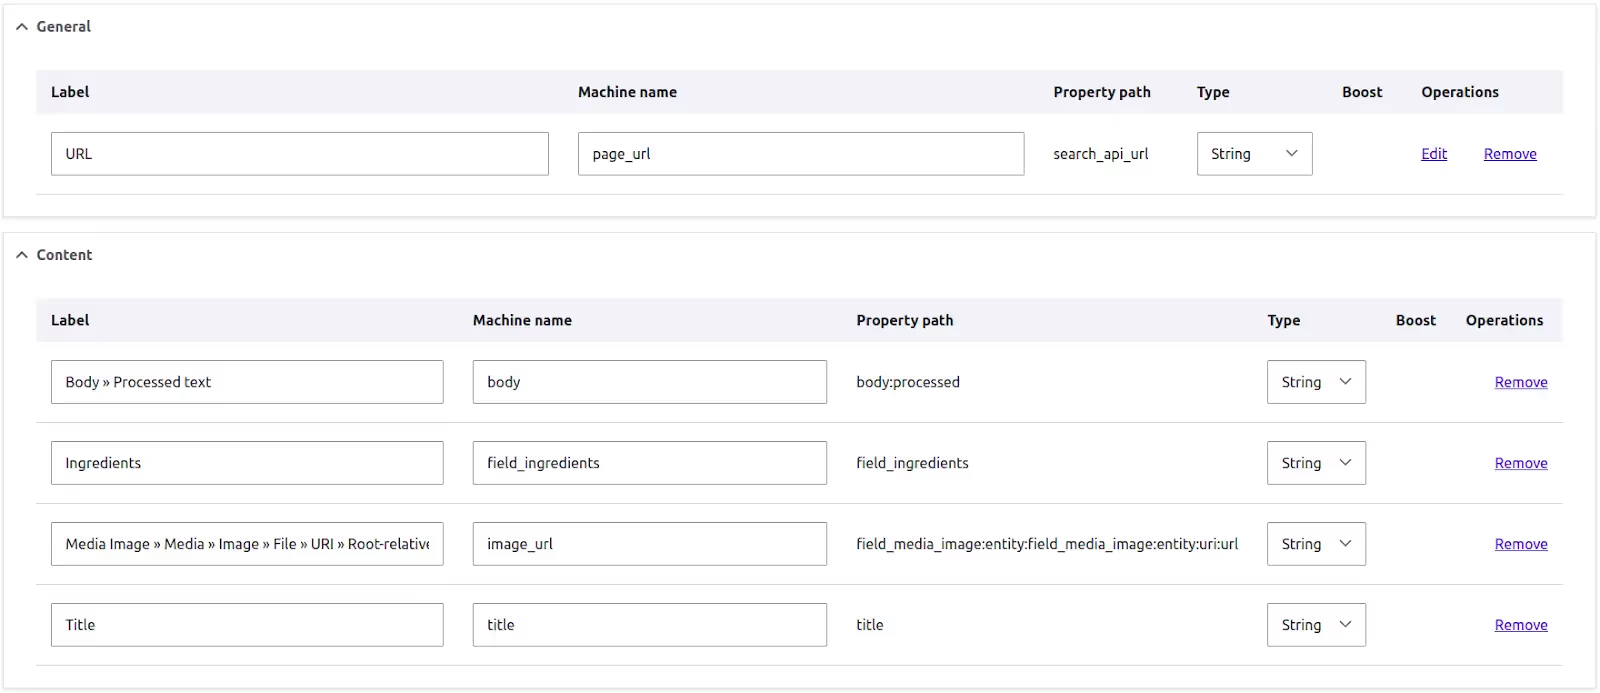
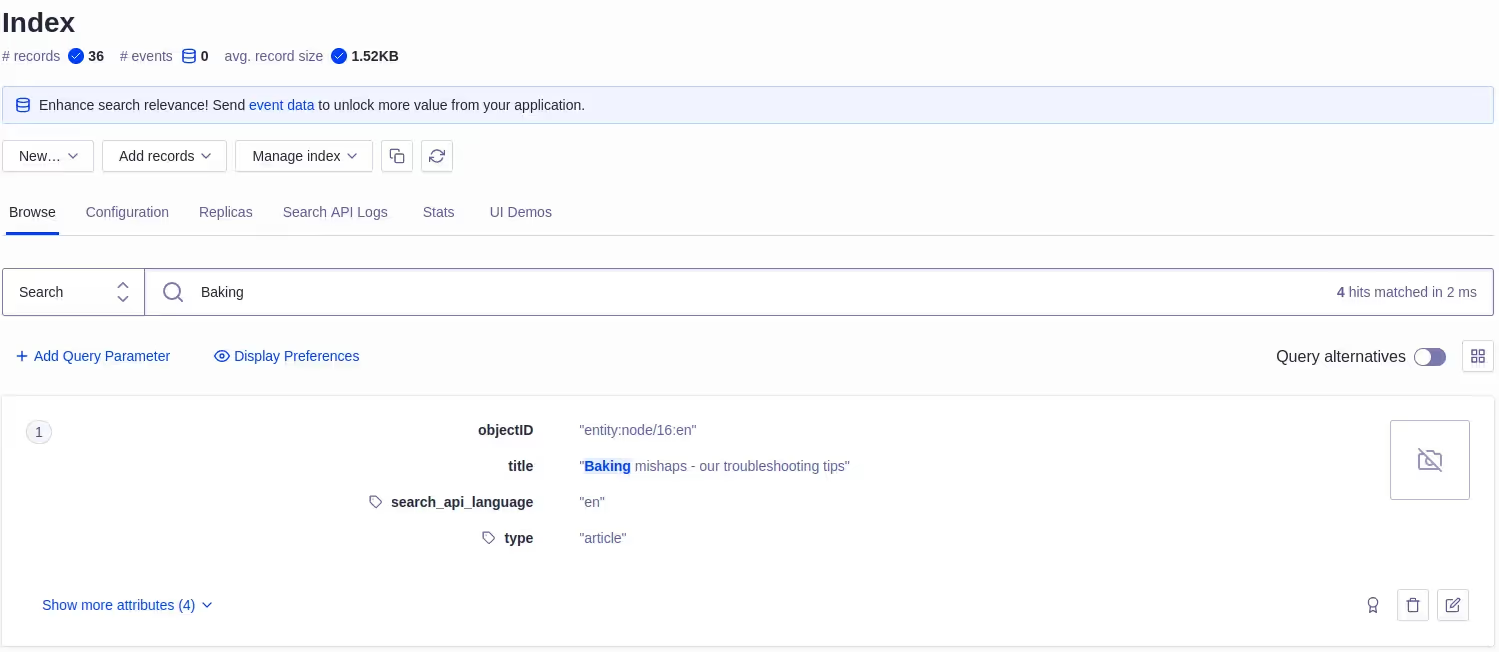
Now we are all set. Index the contents from /admin/config/search/search-api/index/demo_umami. Once completed, Go to your Algolia dashboard and view the index. You will see all the indexed contents from our site in the dashboard. As mentioned earlier, each indexed content is called a “Record”. Every record will have a unique “objectID”. You could even perform a search from the dashboard and see the results.
Configuring the indexed data from Algolia dashboard
Before creating the search page on the website, We need to do some configurations in the dashboard to make the search results more relevant.
Configuration-1: Define searchableAttributes
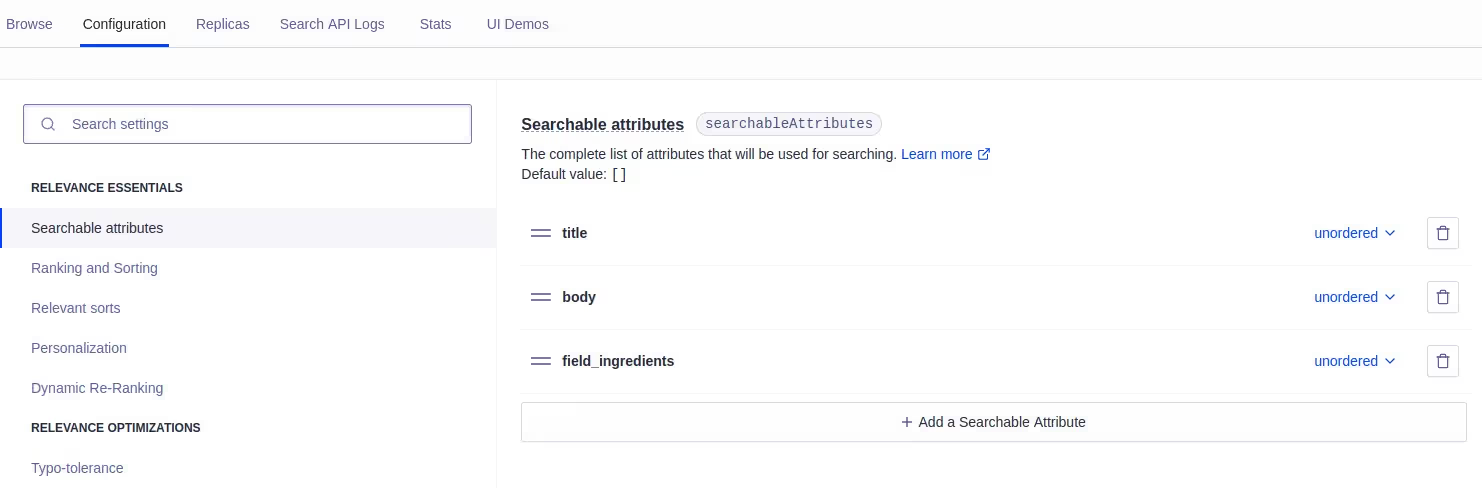
- First, we need to inform Algolia about the fields in our records that should be “searchable”. For example, the title and body fields contain useful data, so should be searchable, but the 'image_url' should not be.
- For that, Go to “Searchable attributes” and add “title”, “body” and “field_ingredients” fields in the same order.
Configuration-2: Define attributesForFaceting
- Next, let’s add a filter. Remember, we have both English and Spanish contents indexed in the “demo_umami” index. When we create the search page, we show only English results in the English version of the search page and only Spanish results in the Spanish version of the search page.
- If you check all the records, you will see that each record has a ‘search_api_language’ parameter and it’s value will be the language code of the record (Page). Let’s inform Algolia to use this parameter as a filter.
- Go to Configurations -> Facets -> Attributes for faceting and click on “Add attribute”. Add the “search_api_language” parameter and make it filter only.
- Save the configuration.

Configuration-3: Define attributesToSnippet
- Now let's configure the “attributesToSnippet” option. This parameter helps to show only the relevant data from a field in each result. For example, the body parameter of article records contains lots of data. But we don’t need to show all the data in the body field of each result in the search page of our site. Instead, we can add ‘body’ as an attributesToSnippet and configure it to show only 20 characters at a time in search results.
- For that, Go to Configuration->Snippetting->Attributes to snippet.
- Click on “Add attribute”. Type ‘body’ and click on “Use body”. Type 20 in the number field. You might see a warning like “We couldn't find the attribute body in a small sample of your records; there might be a typo”. This is because the body parameter is only present in the records of Article content type. You can ignore this warning.
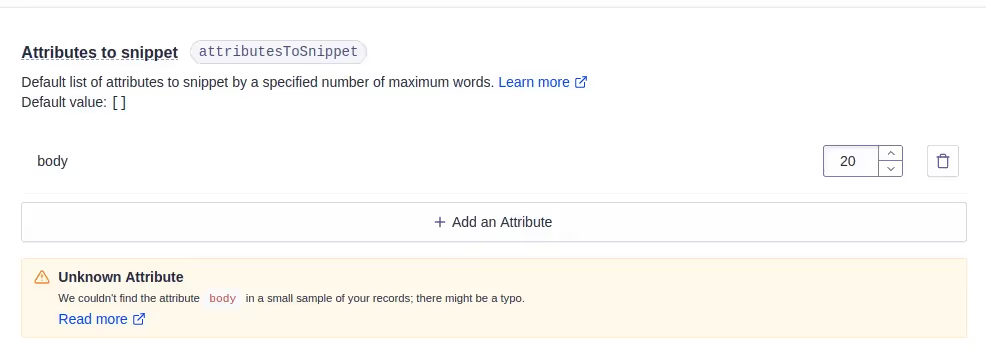
All essential dashboard configurations for this part are completed. Now let's build the search UI to display the search results on our website.
Creating the search UI in Drupal using instantSearch.js
If you navigate to /recipes or /articles in your Umami site, you will see the articles/recipes listed as cards. We are going to reuse this design in our search page. For that, We will define the same HTML structure for the search results and attach the libraries that style the cards to the search page. We will be using instantSearch.js to build the search UI.
This section is divided into 3 sub-parts.
- Render the indexed data in card form, reusing existing styles.
- Add a search box to the search page.
- Filter the results based on language.
Render the indexed data in card form reusing existing styles
- Create a custom module “umami_site_search” and install it.
- Create a umami_site_search.libraries.yml and add the following code.
- This will import instantsearch.js libraries in our search page. Now create search.js in umami_site_search/JS folder and add the following code.
Let's break down the code.
- This part initializes the search. Always use the search only api key from your dashboard here. Never use the admin key.
- Every component in the search page (Search box, Filters, Sorts, Pagination, Results etc..) is called a widget. The widget responsible for showing the search results is called “hits” widget. Since we need to display the results in card format, we need to define the html structure. The following code does the same.
- Using instantsearch.highlight({ attribute: 'title', hit: item }) to display the title instead of just “item.title” ensures that the title of search results are properly highlighted in the search results.
- Similarly instantsearch.snippet({ attribute: 'body', hit: item }) is used to render the body field in such a way that only 20 characters from the body field would get displayed in each result (Remember, we configured it from the dashboard).
- And finally we provide the html element in which search results should be appended to.
- Now, create a custom template with the following code.
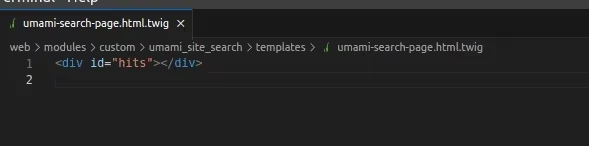
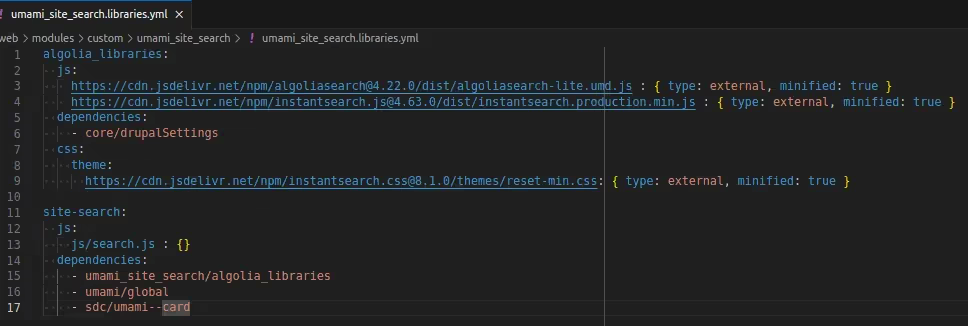
- Add hook_theme() implementation for this template. Update libraries.yml to create a library for search.js. Add the css libraries that style the cards as a dependency.
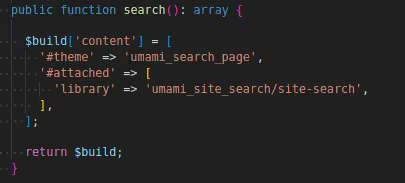
- Next, create a controller for the path /site-search and render the template from that controller.
- Clear Drupal cache and access /site-search path and you will be able to see the search results.
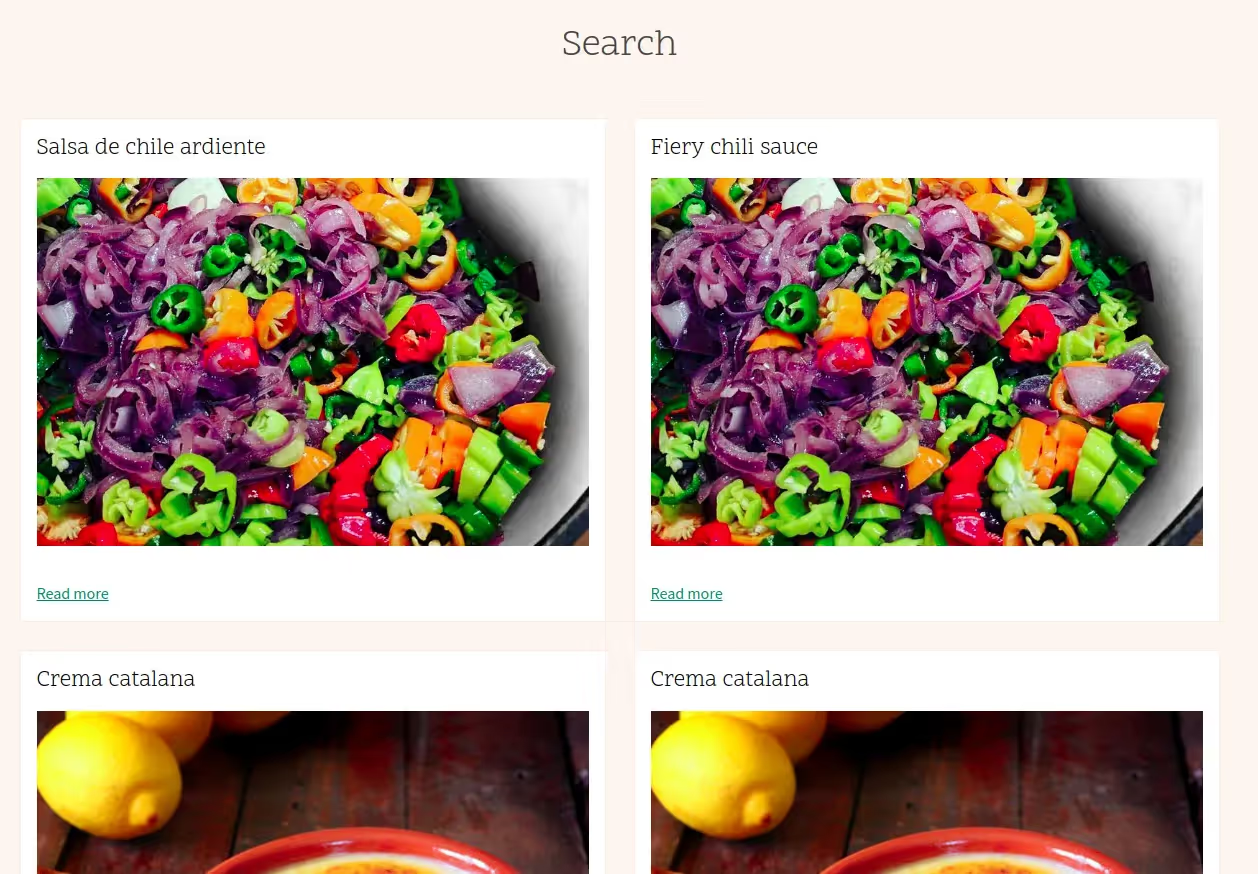
Add a search box to the search page
Now let’s add a “search box” widget so that users can actually type something and search.
- Add <div id="searchbox"></div> in the custom template. The search box will be appended to this element.
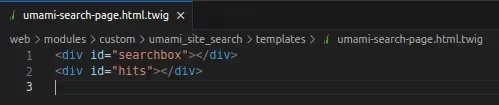
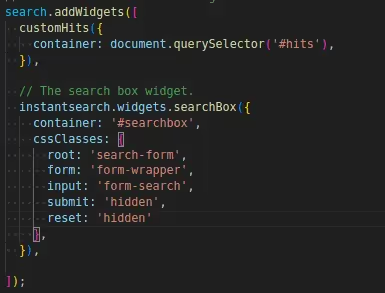
- Initialize the search box widget in search.js. This time, we are not going to provide the HTML structure. By default, most of the instantsearch widgets would have an html structure. We are going to use the default structure of the search box widget. But we are adding few css classes. These classes are used by the default search box in the Umami site. When we add them in our widget, existing styles from the umami theme would get automatically applied.
- Now the search box will be displayed when we access the search page. Test it out with different keywords and you'll quickly discover just how fast and responsive our search page truly is!
Filter the results based on language
- We have already configured “search_api_language” as a filter from the dashboard. Now let's apply that as a filter from the JS.
- We can use the “configure” widget in instantsearch for the same.
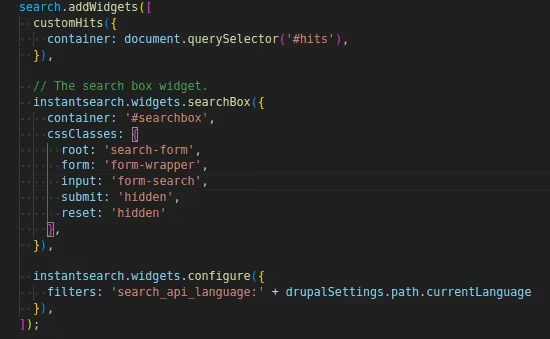
- Reload the search page. Now only English results will be displayed in the English search page. Similarly, /es/site-search will show only Spanish results.
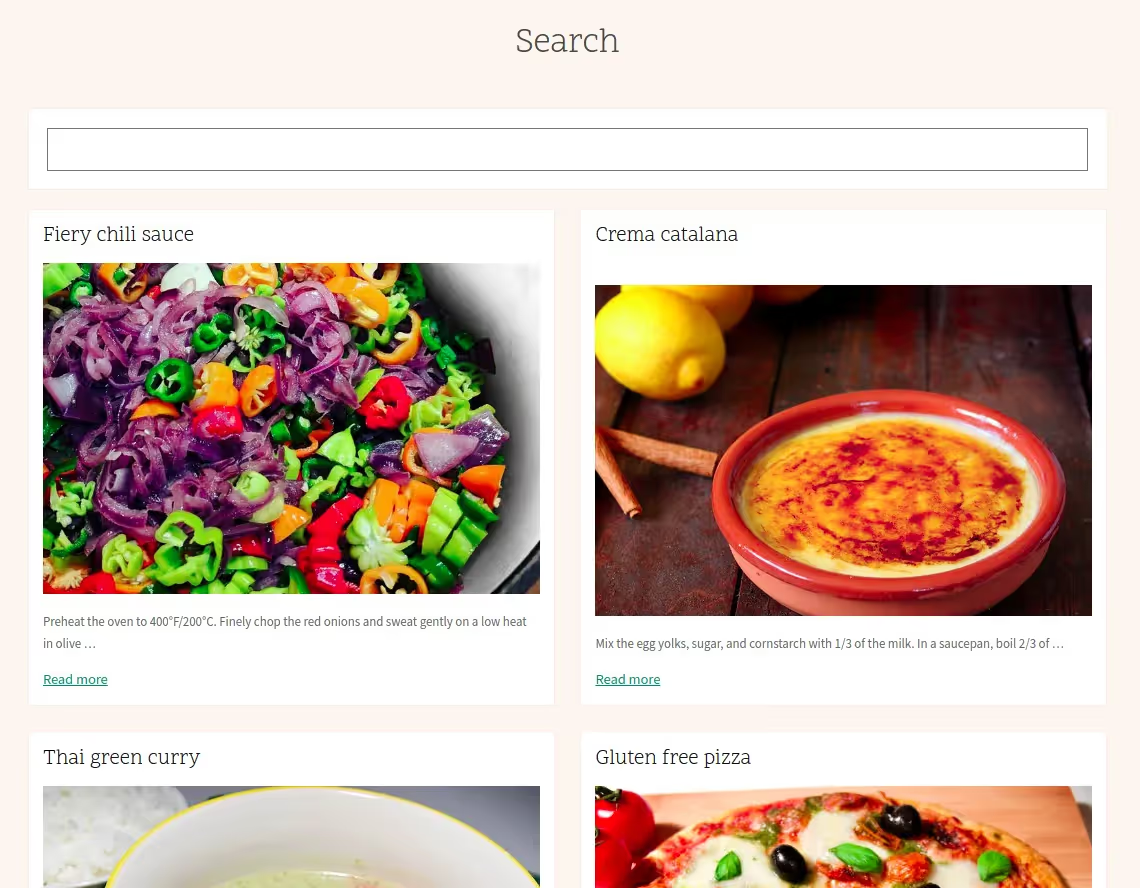
This concludes the first part of our Journey. We've successfully built a fast, responsive, and language-dependent search page. Let’s recap what we’ve learned so far.
- Integrated the search API Algolia module and indexed our content in Algolia.
- Configured the dashboard to ensure Algolia understands and optimally processes our data.
- Created a custom module to build the search UI using instantsearch.js. Reused the ‘card’ design from Umami.
- Created custom widgets for the search page using instantsearch.js.
You can find the entire code in this git repository.
Remember that this demo was just a teaser. The true thrill lies ahead in our next segment, where we will take a deeper look into structuring the data from the drupal backend with the help of search api processors.

Upgrading from older Drupal versions to Drupal 10 | steps and solutions
Drupal 9 support ended on November 1st, 2023. Drupal 8 support ended on November 2, 2021, and Drupal 7 will no longer be supported after January 25, 2025. Maintaining the security and functionality of your website is important, and running on outdated versions exposes your site, business, and users to many risks. Since outdated versions do not receive support or updates, it is time to make a move.
Here's why:
- Security vulnerabilities: Over time, hackers can exploit vulnerabilities in older platforms.
- Outdated technology: Acquia cloud features and API integrations may not work properly with older platforms, leading to unexpected issues.
- Missed updates and patches: You'll miss out on new features and fixes provided by the latest module updates and patches.
- Significant improvements to CKEditor 5: This version has been rewritten from the ground up, offering new sticky toolbars and enhanced support for custom plugins.
- Difficulty in future Drupal upgrades: Upgrading to future versions of Drupal will be more challenging, both in terms of cost and time for developers.
The process of updating to the newer version of Drupal 10 involves several steps:
- Identifying compatibility issues using Upgrade Status: Use Upgrade Status to identify any issues preventing the update to Drupal 10.
- Making the Custom theme compatible: Adjust the current theme to ensure compatibility with Drupal 10, which may involve fixing deprecated code and possibly switching to a different theme.
- Making the Custom Modules Compatible: Address any issues with custom modules to ensure compatibility with Drupal 10.
- Making the Contributed modules compatible: Resolve any compatibility issues with contributed modules to ensure they work with Drupal 10.
- Updating Core to the latest Drupal 9.5.11: Ensure that the site is running on the latest version of Drupal 9 before proceeding to update to Drupal 10.
- Performing the update to Drupal 10: Once all compatibility issues are resolved, update the site to Drupal 10.
Common challenges and solutions
1. Upgrade Status to fix compatibility issues
Upgrade Status is a helpful tool for identifying and addressing compatibility issues when upgrading from previous Drupal versions. It provides links to issues on drupal.org where similar fixes have been implemented. Upgrade status provides a list of compatibility issues, including themes, custom, and contributed modules, which we’ll need to fix before performing the update. It also provides information on core and hosting environment issues as well.

Using Upgrade Status to see what needs to be fixed.
Upgrade status provides a clear list of modules that need an update,

and also those that need to be removed as well.

2. Drupal Rector to speed up the process
Automated compatibility fixes can be done using Drupal Rector which provides solutions for a few of the modules available on drupal.org.
For this, we will need to install using Composer,
$ composer require --dev palantirnet/drupal-rector
and copy the rector.php file to the docroot of the project, using
cp vendor/palantirnet/drupal-rector/rector.php
Once done we can begin using rector in the following way,
$ vendor/bin/rector process web/modules/contrib/[YOUR_MODULE]
3. Drupal lenient to support modules that don’t have Drupal 10 Releases
Upgrading to Drupal 10 may also require usage of Drupal lenient to support earlier versions of modules that don’t have proper Drupal 10 releases. There may be a few modules installed using Composer that doesn’t support Drupal 10 directly And you won't be able to install them after upgrading. In this case, use a tool called Drupal lenient which allows lenient composer checks against accepted versions. To use this, first install lenient using
composer require mglaman/composer-drupal-lenient
then add the module name to a list of allowed modules that bypass this composer check using,
composer config --merge --json extra.drupal-lenient.allowed-list '["drupal/gtranslate"]'
finally, install the module using the,
composer require drupal/gtranslate:^1.0.0
If we’re using Drupal lenient on a Drupal 9 site, remove unsupported modules from the composer using the composer remove command, update the Drupal core, and re-add the module using composer require commands. Then run database updates and configuration export/import using Drush as needed. This ensures all previous configuration settings work the same in Drupal 10 as they did in Drupal 9.
4. Removing modules that are not required or temporary removal for Drupal lenient
To remove the module in Drupal 9, use the composer remove command and pass in module names that are space separated such as
composer remove drupal/wordpress_migrate drupal/twig_extensions drupal/toolbar_anti_flicker
5. Resolving Composer dependencies
Another major part of the upgrade process is resolving composer dependencies. Once all upgrade status issues are fixed, try upgrading the site using the update commands.
If you see the update is getting blocked, get more information using both the following commands.
composer prohibits "drupal/core" ^10composer why-not drupal/core-recommended 10.0.2
Further, use the why-not command to find out specific package compatibility issues using
composer why-not drupal/gtranslate 3.0.0
5. While running the Drupal 10 update command, you may encounter packages that are dependent on each other, thereby blocking the updates. Here, updating one package may cause an error with the other, and vice versa. To resolve this issue, you must specify both package names, which are interdependent, check their correct versions on https://packagist.org/, and then run the composer command.
composer update "drupal/core-*" symfony/dependency-injection:"^6" drupal/drupal-extension symfony/error-handler:"^6" --with-all-dependencies
List out all packages in such a way using space-separated values with the correct versions and this will take care of the update.
Moving from Drupal 7 to 10 requires careful planning, but it's necessary for website security and functionality. By understanding the importance of the upgrade and following the outlined steps, one can successfully perform the update and migrate to Drupal 10 CMS for a modern, intuitive, and secure website.
References:

Container Queries: Harnessing Responsive Design at the Component Level
Responsive web design has evolved over the years to adapt to a wide range of devices and screen sizes. A new addition to the toolkit is the concept of Container Queries, a powerful feature that allows components to adapt their styling based on the dimensions of their containing element.
What is `container-type`?
In the world of container queries, the `container-type` is a pivotal attribute. It defines the nature of the container being queried and determines how the contained elements should react to changes in the container's dimensions.
Different Values of `container-type`
1. inline (Default):
- This is the default value when `container-type` is not explicitly set.
- Ideal for inline elements or components that naturally flow with surrounding content.
@container (min-width: 600px, container-type: inline) {
/* Your styles for larger inline containers go here */
}
2. block (Block-level Container):
- Used for block-level containers like divs or sections.
- Especially useful when styling components that are expected to take up the full width of their parent.
@container (min-width: 600px, container-type: block) {
/* Your styles for larger block-level containers go here */
}
3. grid (Grid Container):
- Suitable for containers that follow a grid layout, such as a multi-column grid.
- Enables fine-tuning styles for different grid structures.
@container (min-width: 600px, container-type: grid) {
/* Your styles for larger grid-based containers go here */}
4. Stack (Stacking Context):
- This type is used when components are arranged in a stacking context.
- Useful for scenarios where elements are layered on top of each other.
@container (min-width: 765px, container-type: stack) {
/* Your styles for larger stacking context containers go here */
}
Media query vs container query
Container queries are a powerful addition to the capabilities of CSS, particularly in the realm of responsive web design. They allow components to respond to the size of their containing element rather than the viewport, offering a more granular and dynamic approach to styling.
However, while container queries bring significant benefits, they are not meant to replace media queries but rather complement them. Both have distinct use cases and functionalities.
Media Queries:
- Media queries are designed to respond to the characteristics of the viewport, such as screen width, height, or device orientation.
- They are essential for adapting the overall layout and styles of a page based on the device or screen size.
- Media queries are well-established and widely supported, making them a fundamental tool for responsive design.
Container Queries:
- Container queries focus on adjusting the styles of individual components based on the dimensions of their containing element.
- They provide a more modular and component-centric approach, allowing for targeted adjustments within a larger layout.
- Container queries are particularly useful for components with varying sizes and positions within a flexible layout.
Coexistence
- Media queries and container queries can work together seamlessly. Media queries set the overall layout, and container queries fine-tune individual components within that layout.
- Media queries are still crucial for addressing global layout changes, such as switching between a desktop and mobile layout.
- Container queries shine when it comes to making components adapt gracefully within their containers.
In summary, container queries enhance the developer's toolkit for responsive design, offering more control at the component level. While they provide a powerful way to address certain challenges, media queries remain essential for handling broader layout adjustments based on the viewport. The combination of both allows for a comprehensive and flexible approach to responsive web design.
Container Queries in Action: Card Example
Let's illustrate the power of container queries with a practical example involving a responsive card layout.
We want different designs for card when the width is less then 766px
Vertical layout

Horizontal layout

Consider a content group with a dynamic column layout ranging from 1 to 4 columns. Within this layout, cards can be added, each specifying its width (`span1`, `span2`, `span3`, `span4`). Depending on the container width, the card layout adjusts for optimal user experience.
Below is the example of different layouts for columns and 4 column span functionality

Below is the html file
Below is the css file
In these examples, we have cards within 2, 3, and 4-column layouts (`col-2`, `col-3`, `col-4`). Each card specifies its span (`span1`, `span2`, `span3`, `span4`). The width of the cards adapts dynamically based on the specified span value, ensuring a responsive and visually appealing layout for different column structures.
Conclusion
In the ever-evolving landscape of web development, Container Queries emerge as a game-changer in responsive design. This feature empowers developers to tailor component styles dynamically based on the dimensions of their containing elements, providing a level of adaptability beyond traditional media queries.
Responsive Adaptability
Container Queries offer unparalleled adaptability, allowing components to respond dynamically to changes in container dimensions. This ensures a seamless user experience across various devices and screen sizes.
Versatility of container-type
The introduction of the `container-type` attribute enhances the flexibility of Container Queries. Whether dealing with inline elements, block-level containers, grid layouts, or stacking contexts, developers can precisely tailor styles to the nature of the container.
Practical Implementation: Card Layout:
The practical example of a responsive card layout showcases the versatility of Container Queries. The ability to seamlessly adjust the layout of cards within a dynamic column structure ensures a cohesive and optimized user experience.
Best Practices for Integration:
Effective utilization of Container Queries requires adherence to best practices. Embrace progressive enhancement, conduct thorough testing, and maintain a well-organized codebase for a smooth and maintainable implementation.
Looking Ahead: Future of Responsive Design:
As Container Queries continue to gain support, they signify a significant step forward in the evolution of responsive design. The feature promises a future where web layouts are more adaptable, context-aware, and user-centric.
Embrace the Responsive Revolution:
In conclusion, Container Queries empower developers to create designs that seamlessly adapt to diverse contexts and devices. As browser support grows, integrating Container Queries into your toolkit becomes an exciting prospect for staying at the forefront of responsive web development. Embark on the journey of the responsive revolution, experiment with Container Queries, and elevate the user experience on the web.

Improving Image Handling with ImageWidgetCrop: Drupal’s Image Optimization
Front-end developers are responsible for the presentation and layout of the images on a website's user interface. It is the front-end developer's job to provide a positive user experience by following best practices for image implementation on the website. This blog will help with two essential aspects of image optimization techniques by showcasing the usage of the Drupal module Responsive Image and Image Widget Crop. It aims to make images look great and load quickly on various devices like desktops, laptops, tablets, and mobile phones.
However, challenges arise when the same image needs to be used across diverse components with distinct size requirements. These challenges impact storage, server load, maintenance, and overall user experience.
Challenges in Image Management:
1. Storage Redundancy:
Uploading the same image for different components may lead to Drupal generating multiple copies at various sizes, causing unnecessary disk space usage.
2. Server Load and Performance:
Generating and delivering multiple image derivatives can strain the server, especially on high-traffic sites, compromising overall performance.
3. Maintenance Complexity:
Updates or changes to the image become intricate when used across multiple components, requiring consistency across all instances.
4. Page Load Impact:
Loading multiple versions of the same image with significant size differences can result in slower page load times, diminishing the overall user experience.
5. SEO Implications:
Multiple versions of the same image may generate additional URLs, complicating search engines' ability to determine relevance.
6. Workflow Challenges for Content Creators:
Handling numerous images in Drupal can be time-consuming, intensifying the workload for content creators.
In Drupal, to address these challenges and enhance image management, leveraging features such as Drupal's image styles, responsive images, crop styles, and the media library can significantly improve the situation.
Implement Crop Styles with Ratios:
Drupal allows you to create crop styles that define how images are cropped to fit specific dimensions. Instead of creating multiple crop styles for each component, consider using crop styles with ratios.
Define a ratio for each crop style, and Drupal will automatically adjust the crop based on the specified ratio. This ensures consistency across different components while reducing the number of individual crop styles you need to create.
Implement ImageWidgetCrop module:
To enhance the management of images in Drupal and empower content creators with more control, the integration of the ImageWidgetCrop module can be seamlessly achieved alongside responsive image styles and crop styles with ratios. By installing and enabling the ImageWidgetCrop module, content creators gain the ability to visually crop images directly within specified aspect ratios. Responsive image styles can be configured to accommodate various breakpoints or device sizes, ensuring that images adapt appropriately to different screens. Concurrently, crop styles with ratios define consistent aspect ratios for images, minimizing the need for multiple crop configurations.
Use Responsive Image Styles:
Responsive images are images on websites that automatically change and adjust their size and dimensions based on different screen sizes or devices. Instead of creating multiple image styles for different components, you can create responsive image styles. Responsive image styles allow you to define multiple breakpoints and corresponding image styles for each breakpoint.
By using responsive image styles, you can serve different image sizes based on the user's device or screen size, optimizing the delivery of images without redundancy.
Here's a guide on how to set the ImageWidgetCrop and Responsive Image Style module in Drupal:
1. Image Widget Crop Module:
Step 1: Installing & Enabling Image Widget Crop Feature
- Download and install the ImageWidgetCrop module from the official Drupal website or by using Composer.
https://www.drupal.org/project/image_widget_crop
composer require 'drupal/image_widget_crop:^2.4'

Step 2: Creating Crop Types
- Navigate to the "Configuration" page in your Drupal admin interface
Select ‘Media’ and then ‘crop type’
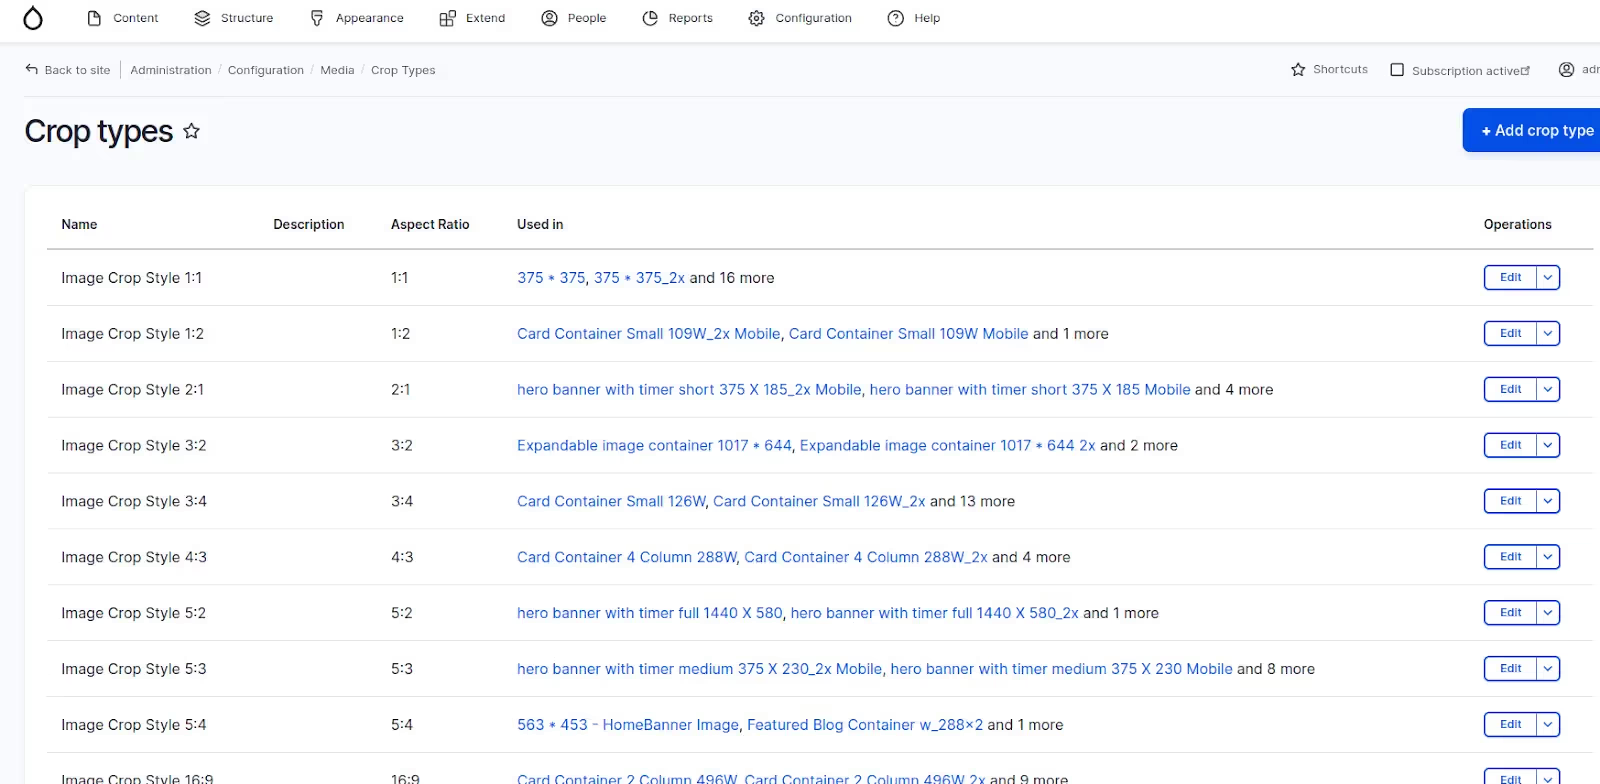
- Click on add crop type and mention name and aspect ratio
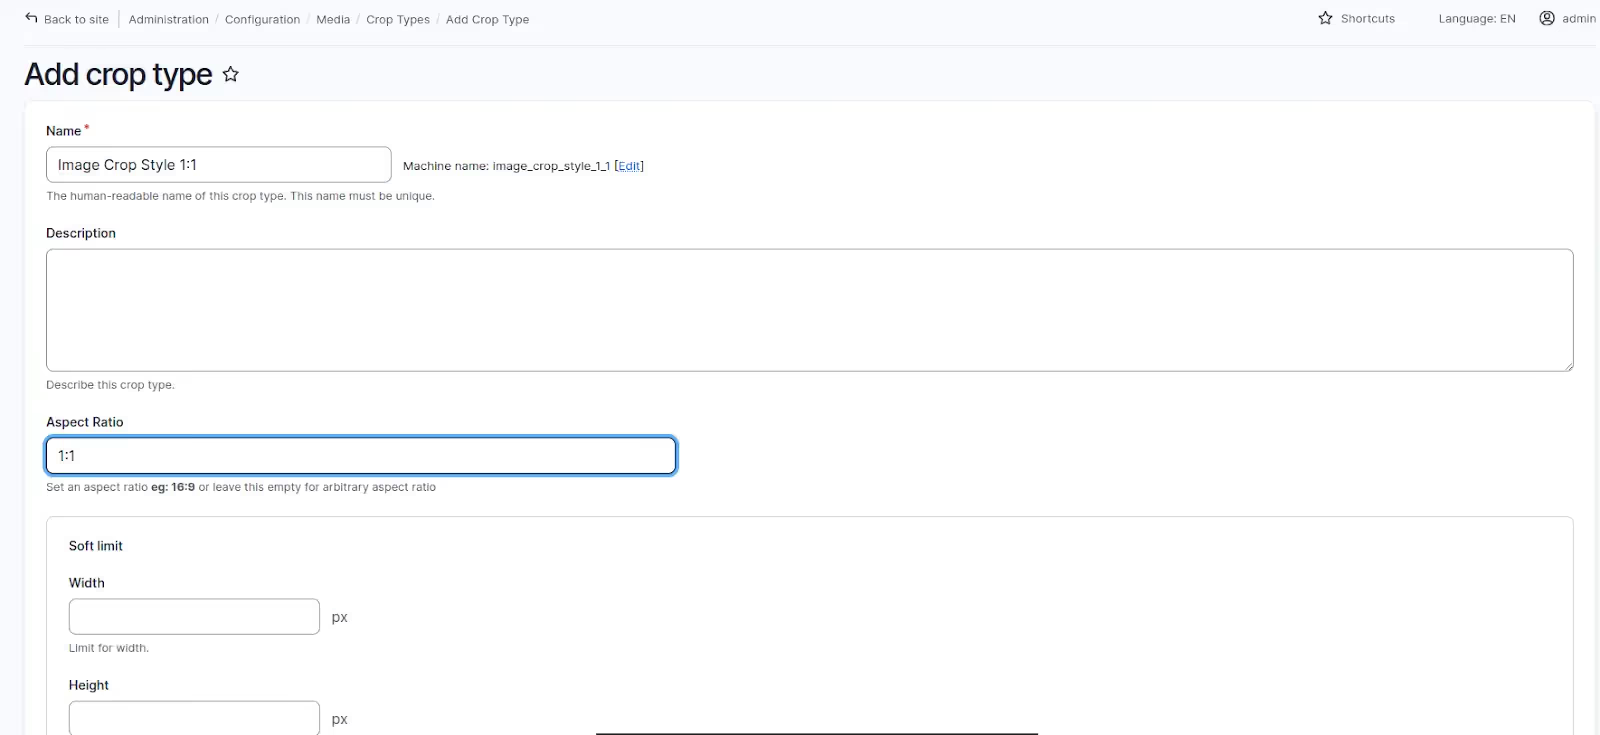
- Select Configuration > "Content Authoring" and then "ImageWidgetCrop."
Configure the default crop types or add new ones based on your requirements.
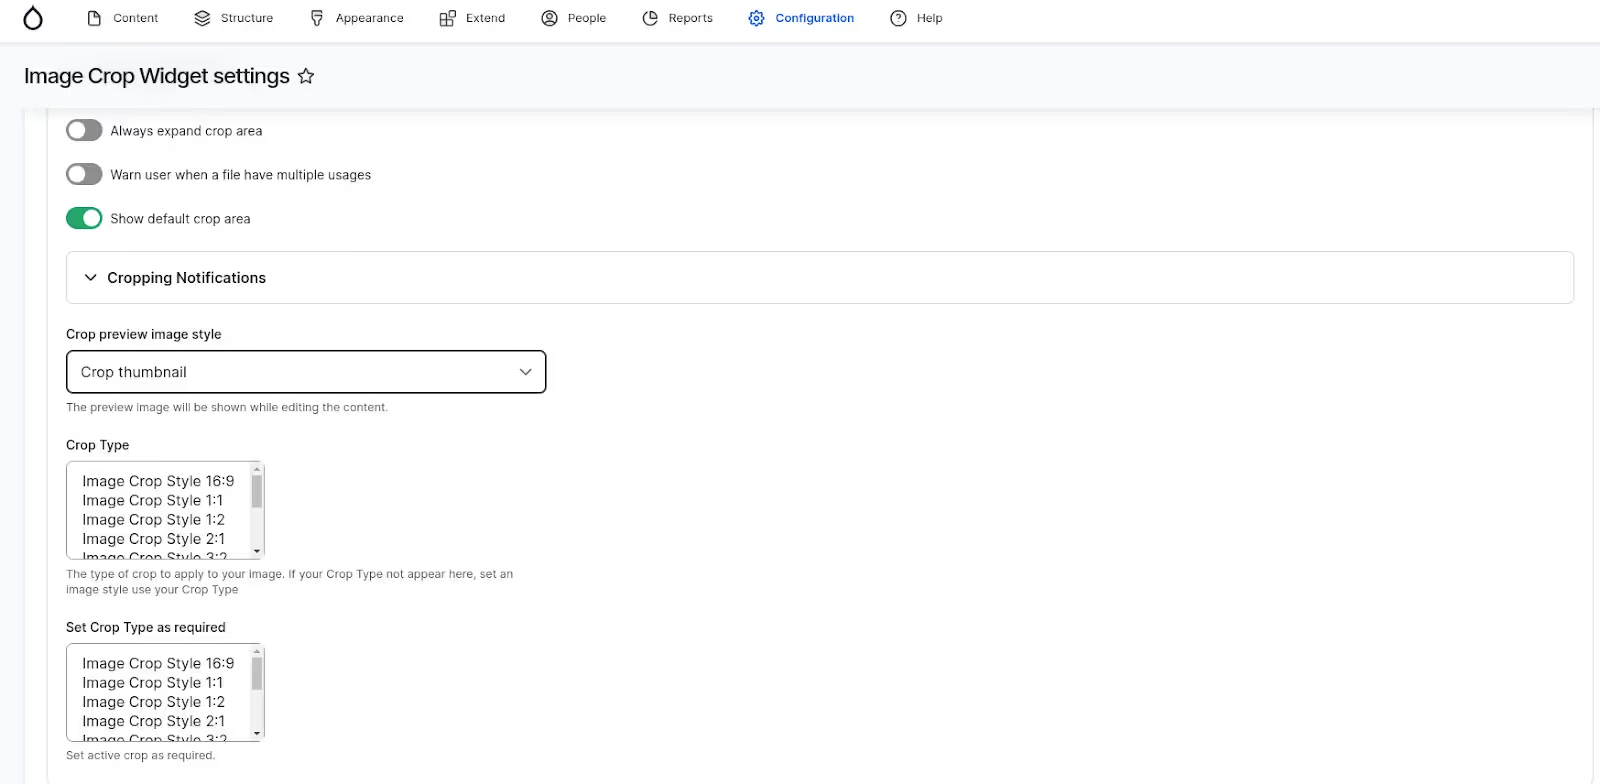
Step 3: Creating Drupal Image styles
Image styles are the tools that define how images are processed and displayed on your website. Here’s how you can configure them:
- Go to Configuration > Media > Image styles> ‘Add image style’

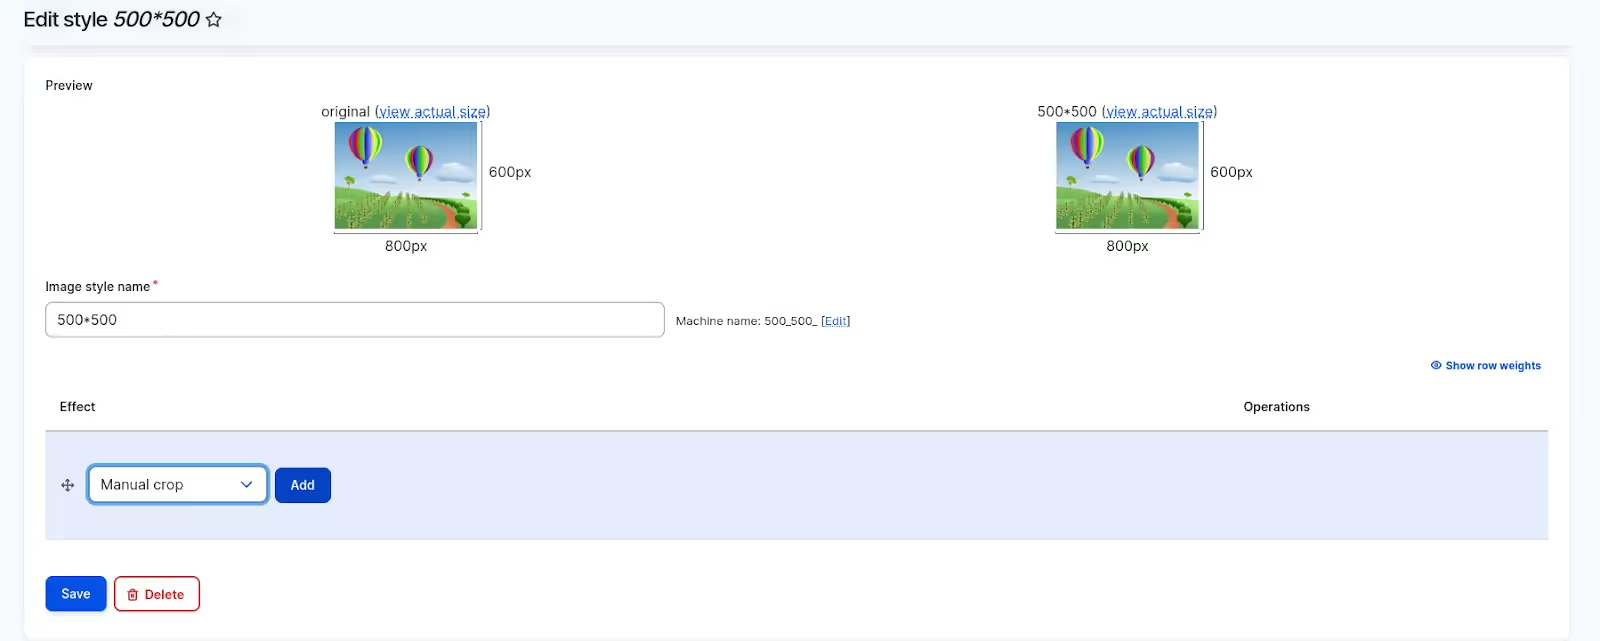
- Select Manual crop type option and choose crop type
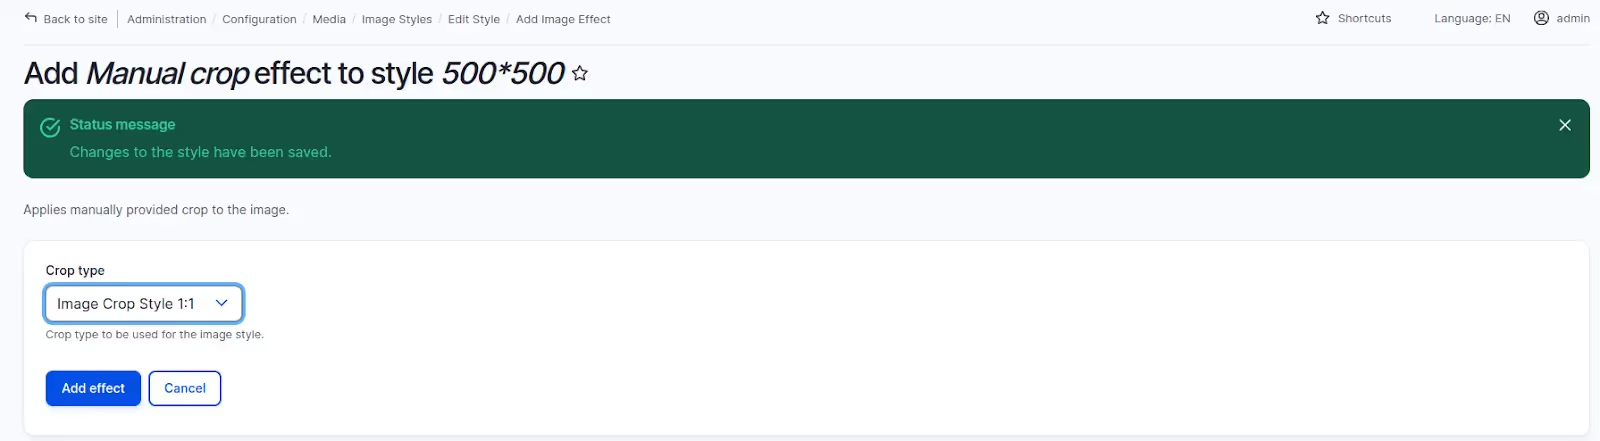
- Once crop type is selected, Add Scale effect with the required width
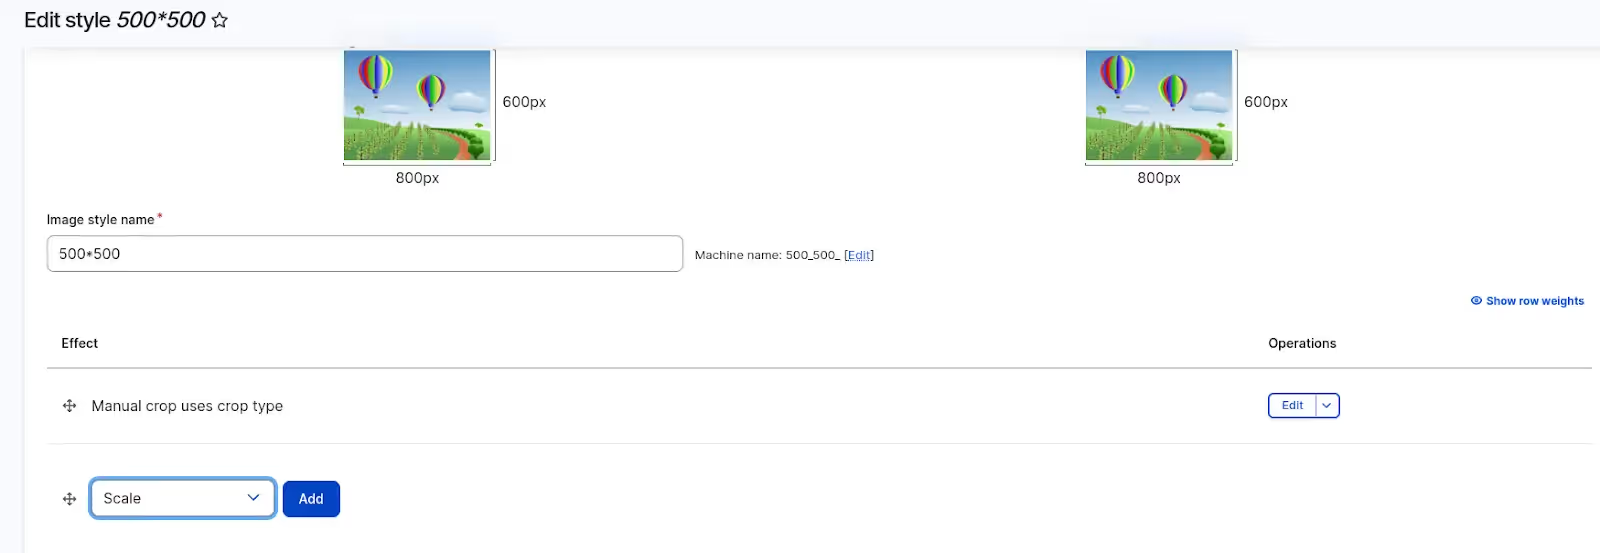
- Mention width value and keeping height value blank
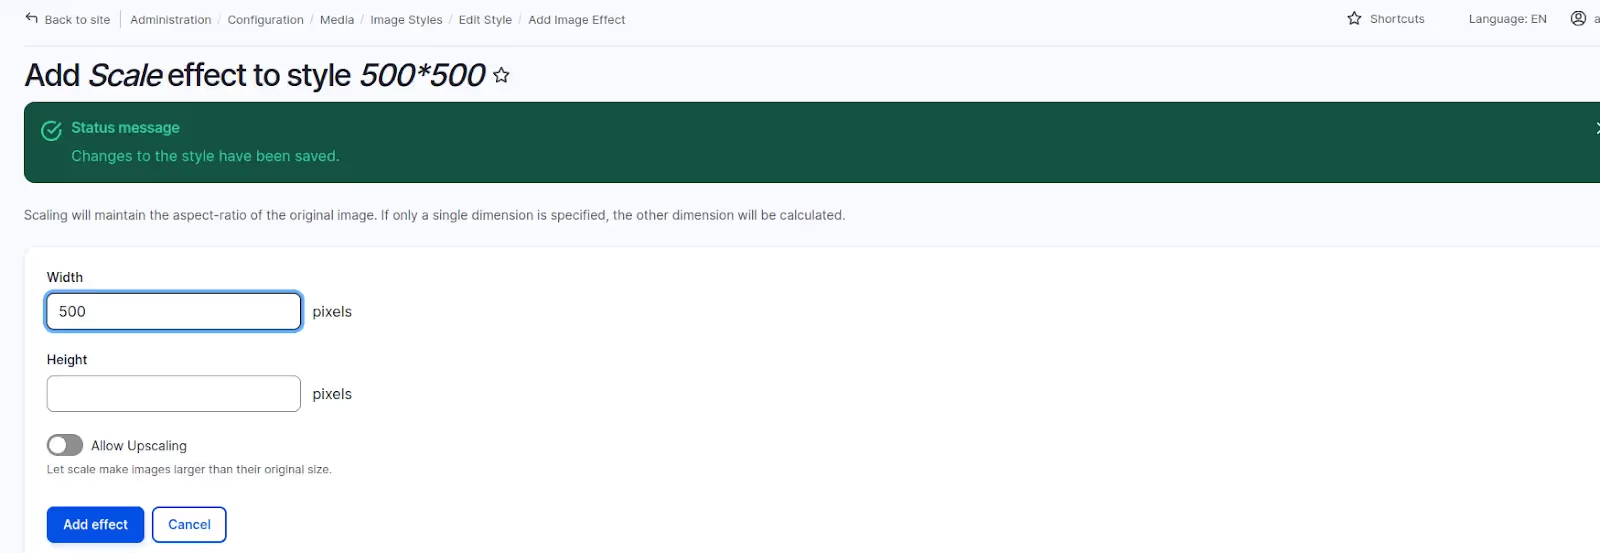
- Once cropping and scaling effects are added then just save it
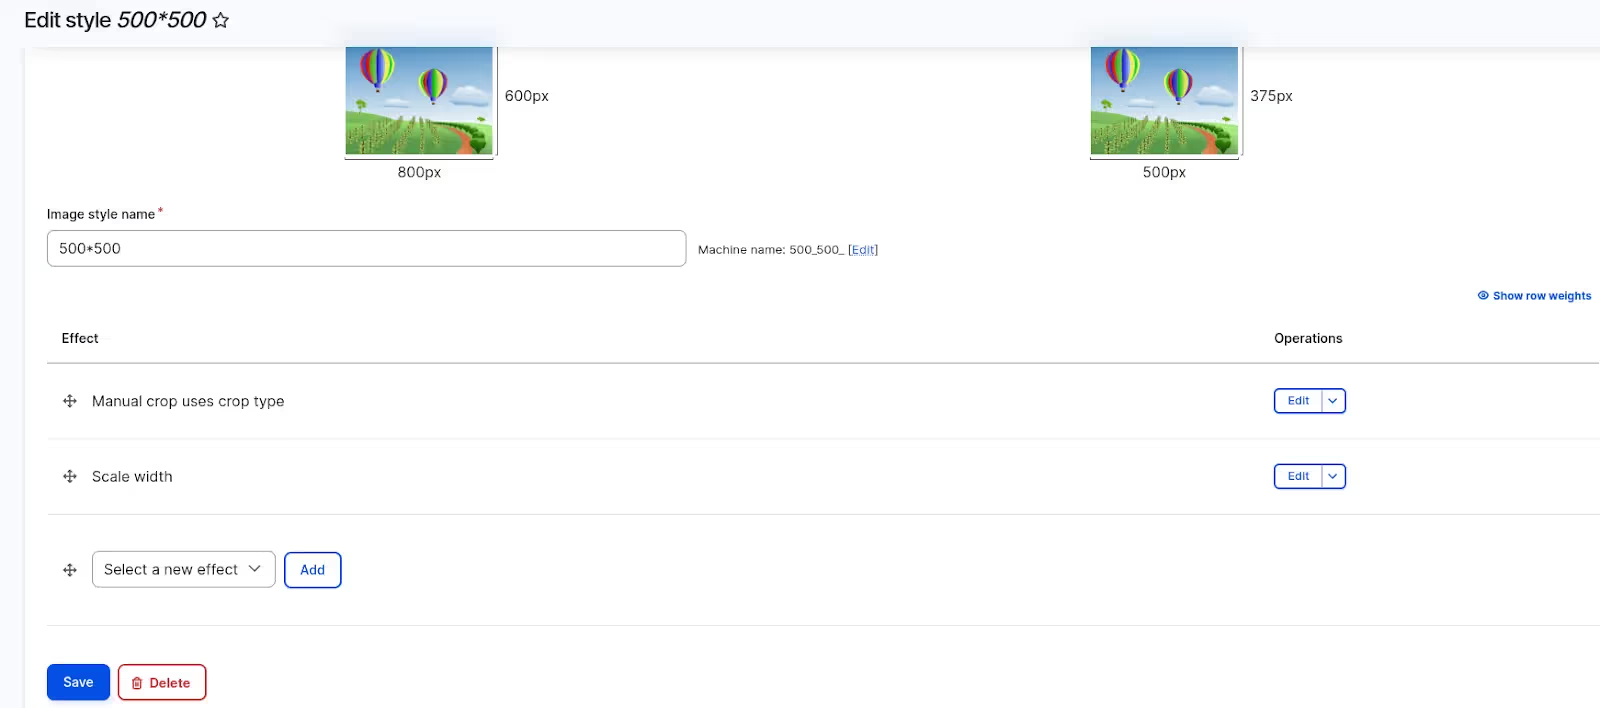
2. Responsive Image Style Module:
Step 1: Turn on the Responsive Image Feature
The Responsive Image module is now a core module for Drupal 8 and newer versions. By default, the responsive image module is disabled, so you just need to enable it to start using its features.
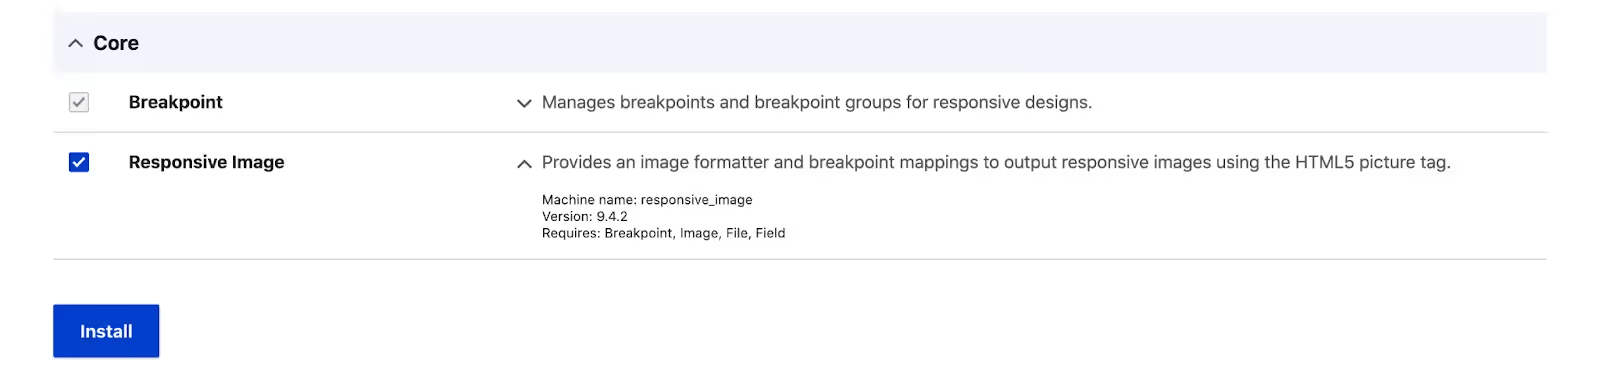
Step 2: Setting Breakpoints in your custom theme
Breakpoints are essential for deciding when images should change based on different screen sizes. If you're using the default theme, breakpoints might already be set. But if you have a custom theme, you'll have to define these breakpoints yourself.
Here's how to do it:
- Create or edit a YAML file named {theme-name}.breakpoints.yml in your theme's folder.
- Inside this file, define various breakpoints along with labels, media queries, weights, and multipliers.
Label: A label is like a name we give to different screen sizes. It helps us figure out how big or small the image should be rendered for each type of device.
Media queries: A media query is like a set of rules that decide when specific changes should happen on a website based on the device you're using. It's the condition that says, 'If the screen is this large then apply a particular layout or style.
Weight: Weight is like setting the order of instructions. It tells the website which rule to follow first in a specific sequence.
Multipliers: Multipliers show how much larger or smaller an image should be on different screens. For example, "retina" displays have a 2x multiplier, meaning they have twice the pixel density of standard displays.
For instance:
These entries assign different rules to different breakpoints, such as "Small," "Medium," and "Large." They specify when images should change based on screen sizes and the respective multipliers for varying resolutions.
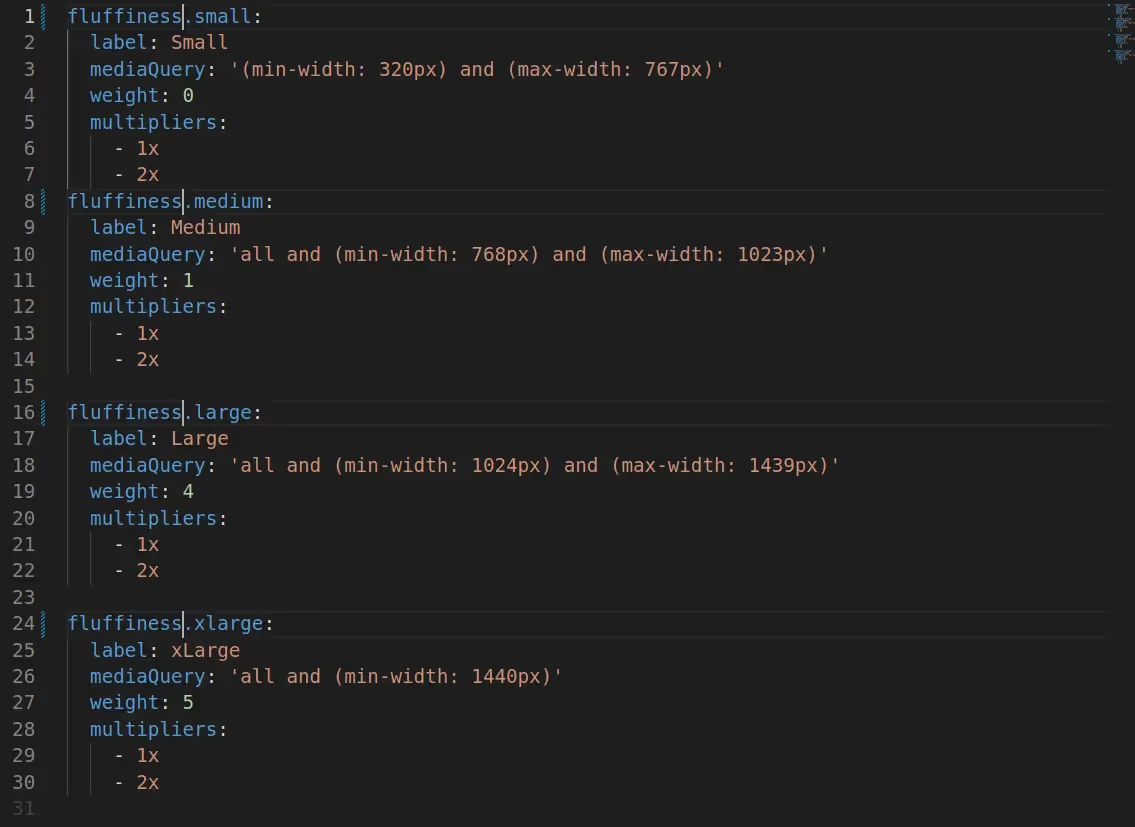
Step 3: Creating & Configuring Responsive image style - Mapping Image Styles with Breakpoints
Once you've established breakpoints and defined image styles, the next step is to create and configure a responsive image style that links these breakpoints and image styles. This ensures that the appropriate image style is applied based on the device's screen size.
To accomplish this in Drupal, follow these steps:
- Go to Configuration > Media > Responsive image styles.
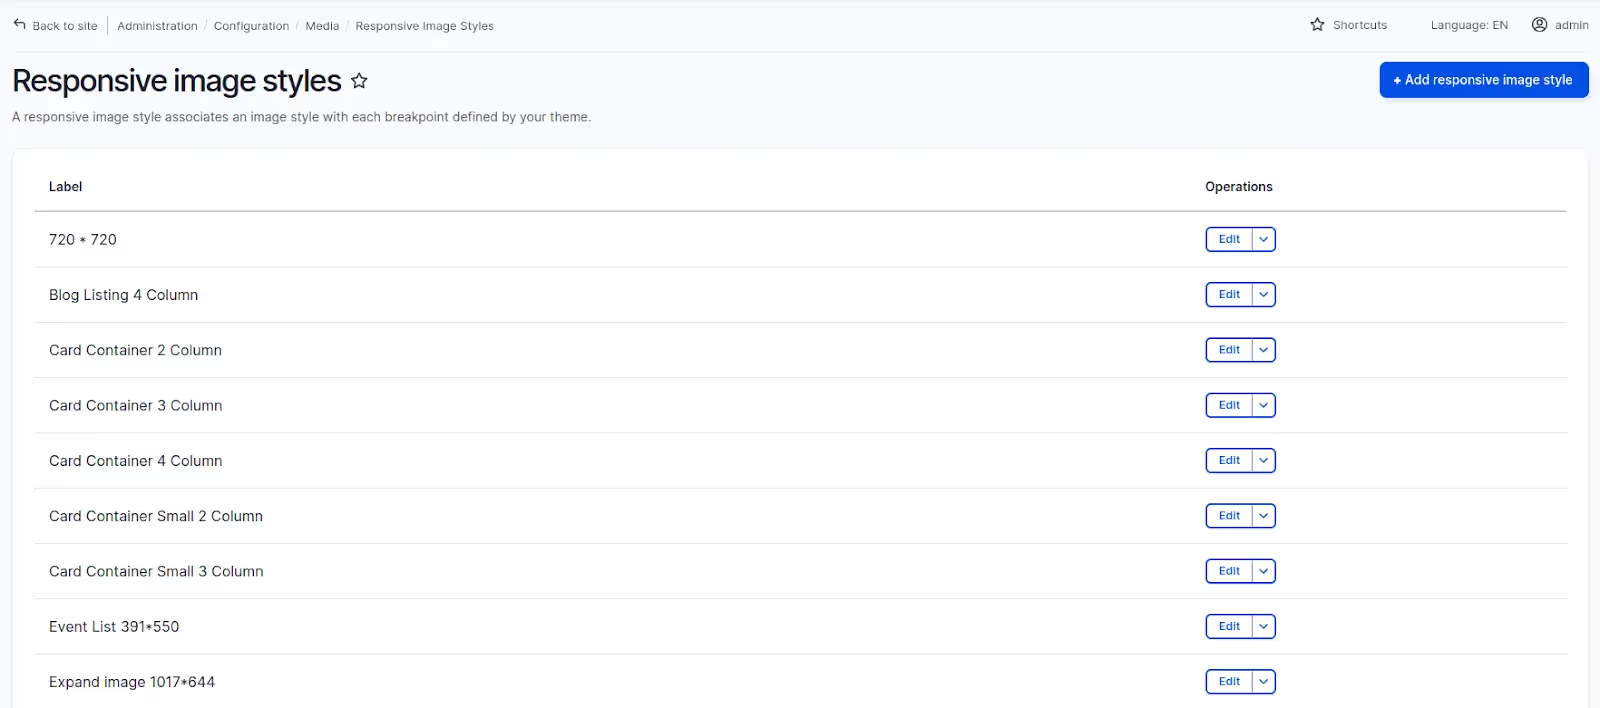
- Create a new responsive image style.
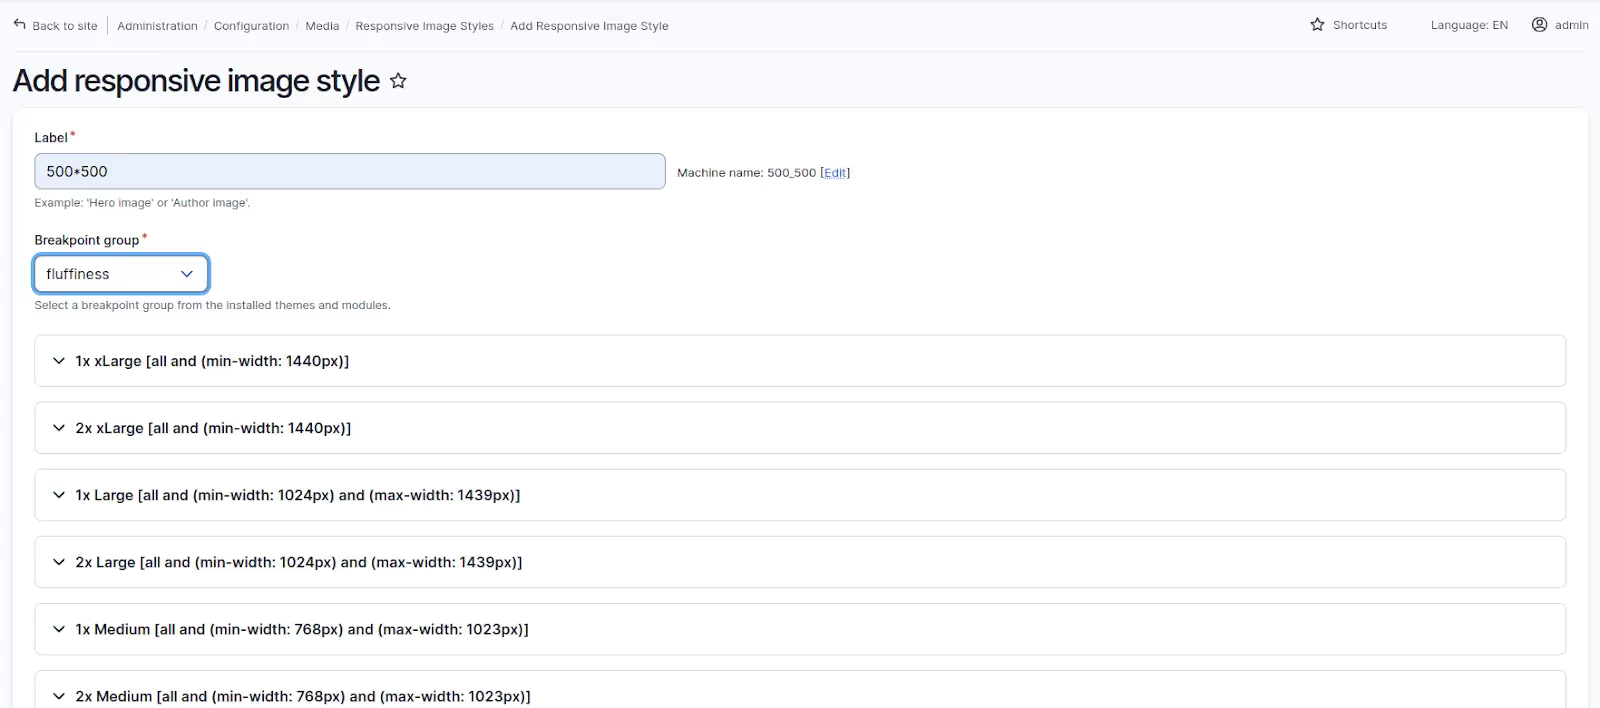
- Map breakpoints to specific image styles based on the defined screen size ranges.
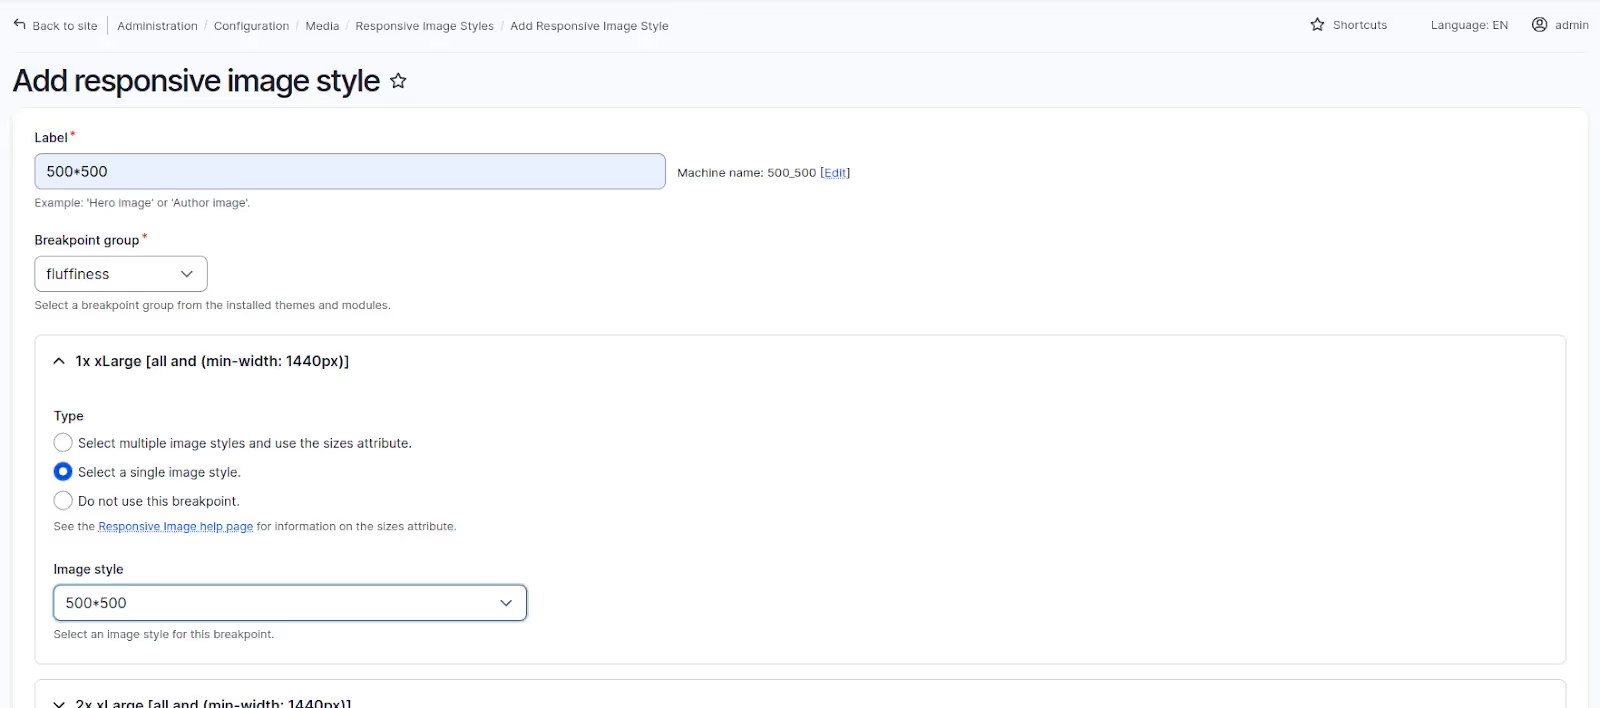
Step 4: Using the Responsive Image Style in an image field
Now that you've created and configured the responsive image style, it's time to apply it to your actual content. This is typically done through an image field in your content types. Here's how:
- Edit or create a content type that includes an image field.
- In the image field settings, select the responsive image style you previously configured.
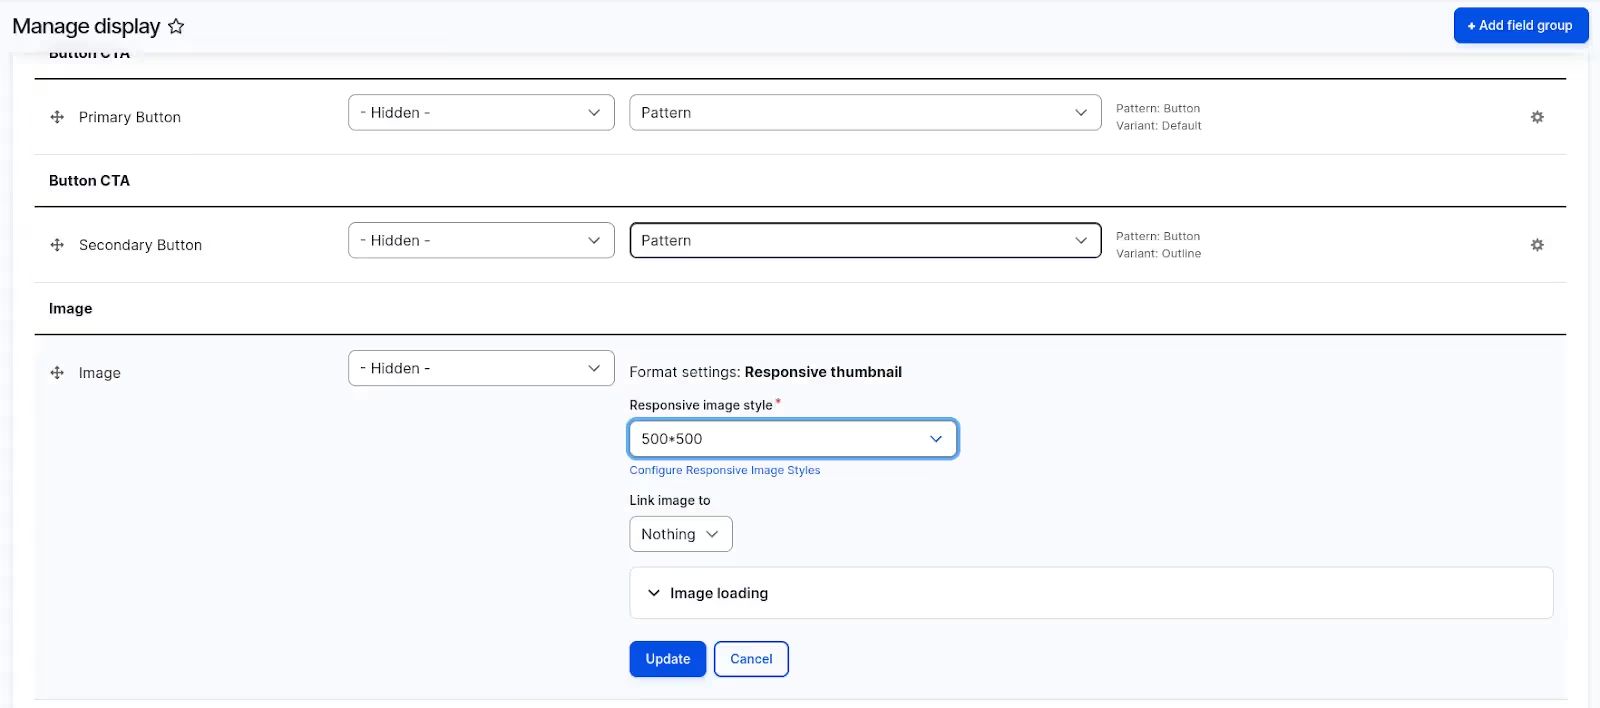
Step 5: Applying Crop Styles
Create or edit content with images and verify that the ImageWidgetCrop functionality is available on the image field, allowing users to crop images directly within the form.
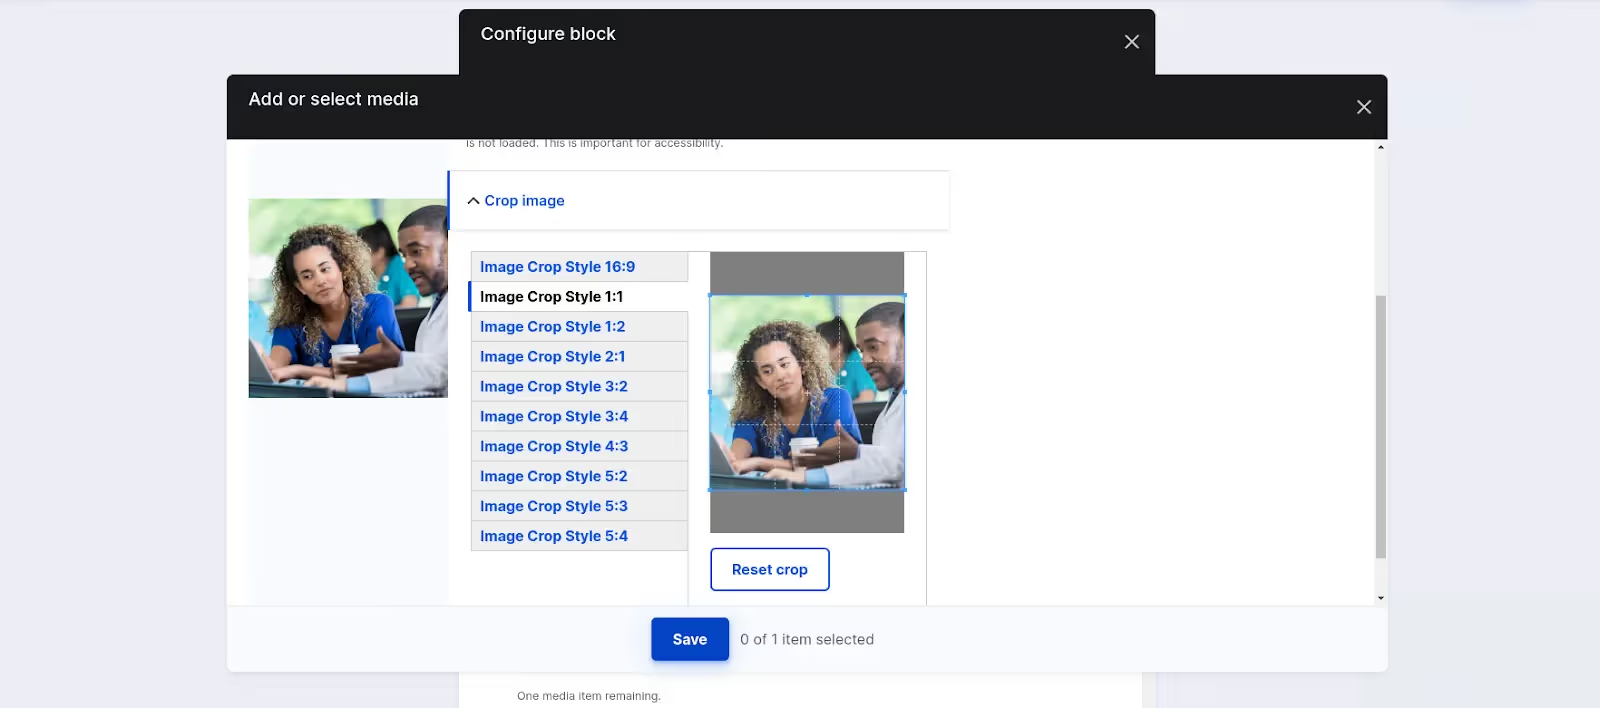
Result


Conclusion
In summary, our encounter with image-related challenges in Drupal – encompassing limited editing options, inconsistent sizes, manual cropping demands, and responsive design intricacies – underscored the crucial necessity for a comprehensive solution. Incorporating the ImageWidgetCrop module, particularly when paired with the responsive image module, stands out as a transformative remedy. This update not only effectively tackles our specific issues but also significantly streamlines the content creation process within the Drupal framework.
The ImageWidgetCrop module proves to be a pivotal advancement, providing enhanced editing functionalities, resolving sizing discrepancies, and simplifying manual cropping requirements. Its seamless collaboration with the responsive image module ensures consistent visual appeal across various devices. This transformative enhancement not only meets but surpasses expectations, exemplifying Drupal's adaptability and signaling a positive shift in our ability to deliver an optimized user experience.
This will make the user experience better, speed up loading times, and make sure images look good on different devices. It all adds up to a good browsing experience for everyone visiting your site.

Drupal Podcast Feeds Integration: A Step-by-Step Guide
Managing and importing podcast feeds into your Drupal website can greatly enhance your content diversity and keep your audience engaged. In this guide, we'll walk through the process of setting up a podcast feed integration using Drupal, covering important aspects such as parsing feed data, creating a custom parser, and saving relevant information as media entities.
Prerequisites
Before diving into the integration process, ensure you have the following elements in place:
- Drupal website (preferably Drupal 8 or Drupal 9)
- Feeds module installed and enabled
- Custom module for extending Feeds functionality
Setting Up the Podcast Feed Parser
1. Create a Feed Parser
Inside your custom module directory, create a Feeds/Parser subdirectory. Within this directory, develop a custom parser class to handle the podcast feed. This class should extend the Feeds\Parser\ParserBase class.
// CustomModule/src/Feeds/Parser/CustomPodcastParser.php
2. Implement Parsing Logic
Inside the custom parser, implement the parse() method to extract relevant data, such as podcast duration, from the feed. Additionally, use the getMappingSources() method to define the mapping source for the new podcast duration field.
// CustomModule/src/Feeds/Parser/CustomPodcastParser.php
Creating the Event Subscriber
3. Event Subscriber for Presaving
Create an event subscriber within your custom module to handle presaving of entities. This subscriber should fetch relevant information, such as the podcast thumbnail and audio URL, and save it as a media entity.
// CustomModule/src/EventSubscriber/CustomPodcastEventSubscriber.php
4. Configure Event Subscriber
Finally, configure the event subscriber to trigger the presave function when necessary. You can do this by creating a services YAML file.
# CustomModule.services.yml
Example Feed Data
Here's an example of podcast feed data for reference:
Steps to configure Feed on Drupal UI with custom parser.
Step 1: Navigate to the Feeds Page
To begin the configuration process, access the Feeds page on your Drupal site. This can be achieved by navigating to /admin/structure/feeds.
Step 2: Add a New Feed Type
Once on the Feeds page, click on "Add Feed type" to initiate the setup process for a new feed.
Step 3: Provide Feed Details
Enter the necessary details for the feed you're configuring. For example:
Name: Podcast
Fetcher: Download from URL
Parser: Custom Podcast
Processor: Node
Content Type: Podcast
These details ensure that Drupal knows how to handle the incoming feed data.
Step 4: Save the Feed Configuration
After entering the feed details, save the feed configuration to proceed to the next steps.
Step 5: Configure Field Mapping
Navigate to the Mapping tab, where you can map the fields from your feed to corresponding Drupal fields. Here, you'll find the Duration field in the source field list. Configure the source and target fields according to your feed data, and then save the mapping settings.
Step 6: Prepare for Feed Import
With the field mapping completed, your feed is now ready for import. You can proceed to the Feeds section under the Content tab (/admin/content/feed) and add a new feed.
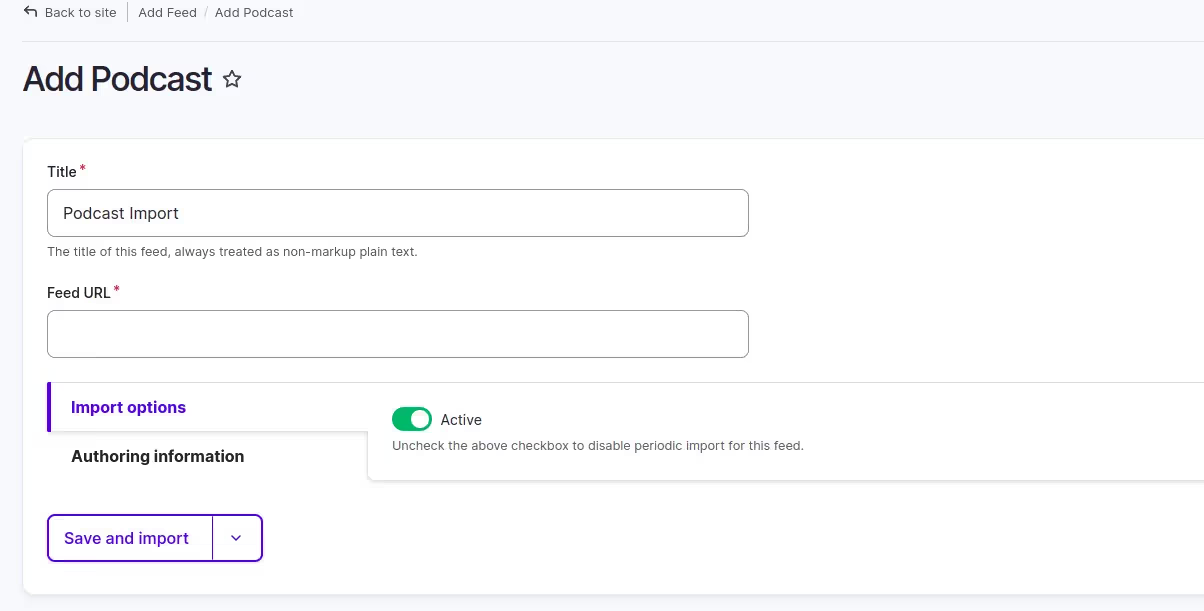
Step 7: Import and Verify
Initiate the import process for the added feed, and verify the imported data in the content list. This step ensures that the configured feed is successfully pulling in content according to your specifications.

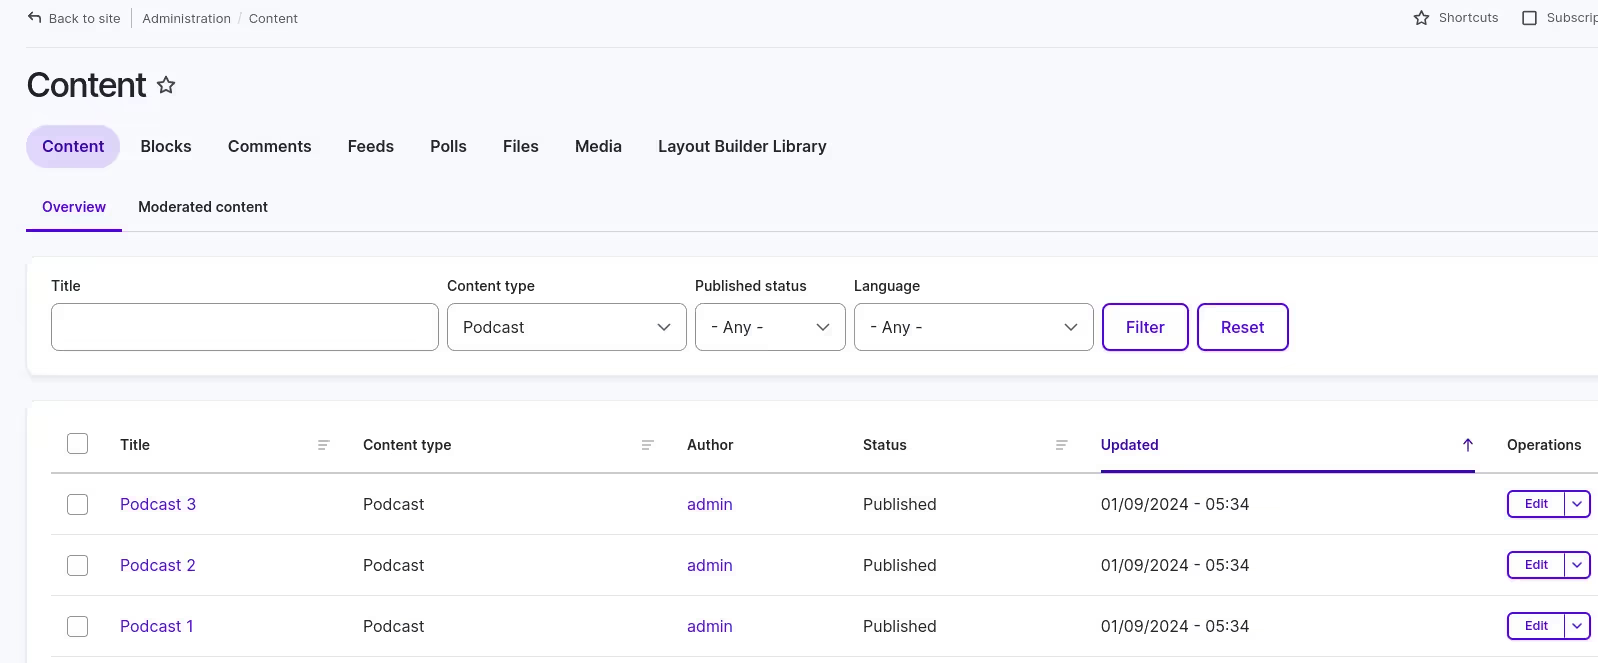
Conclusion
By following these steps, you'll have successfully set up a podcast feed integration in Drupal. This not only allows for seamless content updates but also enhances the overall user experience on your website. Adjust the provided examples according to your specific requirements and feed structures.
Happy podcasting!

Integration of SDC variations with Paragraphs
Single Directory Components (SDC) are like building blocks in Drupal. They bring together HTML, CSS, and JavaScript to create something you see on a webpage. The idea is to keep everything related to a specific element in one place, making it easy to find and manage.
To know more about the SDC component refer this blog SDC - Single Directory Component
Paragraphs Module:
Quoting from paragraphs module itself:
“Paragraphs is the new way of content creation! It allows you — Site Builders — to make things cleaner so that you can give more editing power to your end-users.
Instead of putting all their content in one WYSIWYG body field including images and videos, end-users can now choose on-the-fly between pre-defined Paragraph Types independent from one another. Paragraph Types can be anything you want from a simple text block or image to a complex and configurable slideshow”.
- To know more about paragraphs module refer to this link.
- To include the paragraphs module in drupal: composer require 'drupal/paragraphs'
Use Case (SDC with Paragraph type):
Use SDC with Paragraph needs some module:
- SDC Display
SDC Display enables site builders to utilize the components available on the site within the Manage Display tabs of entities. With SDC Display, you can easily configure which component a specific field uses or choose the component for a particular view mode. This allows for more flexibility and customization in displaying content on your website.
Command to include SDC Display: composer require 'drupal/sdc_display'
- Paragraphs View Modes:
This module includes a behavior plugin designed for the Paragraphs module. With this plugin, you can choose a different view mode for the paragraph directly in the content add/edit form.
Command to include Paragraphs View Modes: composer require 'drupal/paragraphs_viewmode'
How to Integrate SDC component with Paragraphs:
- First create two SDC components(You can have one or more components). For example,
hero-banner-with-image.component.yml

hero-banner-without-image.component.yml

To see complete SDC components example refer to this github link.
- Create the Paragraph Type Hero Banner and Create hero-banner related field**.**
E.g. : Title, Description, image, CTA Button etc.

- Create the View mode in paragraph /admin/structure/display-modes/view:

- Enable that view mode in Hero Banner paragraph in manage display and see the custom display setting have view modes which you have create in previous steps:

- In Paragraph view mode manage display you can see the option Single directory components options. In Single directory components option enable the option(Render using a component):
You can see the SDC components list in SDC options:

- Now select the component which you want to render in paragraph view mode
After selecting the component you have to map the paragraph field to SDC component:

Same for other paragraph view mode you can select the other SDC Component which you want to render for that view mode.
- After Map the paragraph field to SDC component field then edit the banner paragraph and search the paragraph view mode and select the view mode which you want to allow when you create the content for banner:

- When all the above steps is completed then you have to enable the banner paragraph in block type and content type as a reference which you want:

- After following the steps mentioned above you can create the content and add the banner data and select the behavior (Paragraph View mode):

- The final result of a component after following the steps mentioned above will look like:
For ‘Default’ (Banner with image) View Mode:

For ‘Banner Without Image’ view mode:

Summary/Conclusion:
The integration of the SDC Display module with paragraph types and view modes in Drupal offers a promising approach to streamlining content creation and management. By leveraging SDC for reusable components and custom view modes for paragraphs, developers can enhance the flexibility and efficiency of Drupal websites. While specific integration details may require further exploration, the potential benefits of this approach are evident.
References:
Paragraphs View Mode (Drupal.org)

Single Directory Components (SDC) Block module in Drupal 10
The Single Directory Components (SDC) Block module in Drupal allows you to integrate SDCs into a page using blocks. This includes the regular block layout, layout builder, and any other tool that renders blocks on a page. If you want a quick introduction to SDC you can refer to this blog.
The module provides one block type for each component tagged using SDC Tagging and and a configuration form is auto-generated for your block, even if your component uses props or contains slots.
By incorporating the SDC Block module into your Drupal site, you can take advantage of the benefits of SDCs while streamlining the process of integrating them into your page layouts. This unique approach to component management represents a significant advancement in Drupal development, providing a more efficient and organised method for working with components within the Drupal ecosystem.
How to install SDC Block module:
- To install a module run this command - composer require 'drupal/sdc_block:^1.0@beta’ .
- Enable the module and go to admin/structure/block.
- Click on the place block button on a region where you want to place the SDC block and select the SDC component that you have created.
- After that a configuration form is auto-generated where you to fill all the fields that you have defined in the component.yml file.
- Save the block layout and check the page. You will see you component block is created and placed on that particular region.
Let’s see a real use-case:
- I have created a component - hero banner without image.
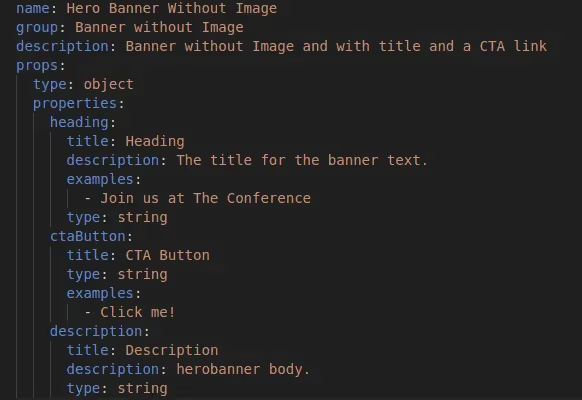
- After that navigate to admin/structure/block and click on place a block button. Search your component like in my case it is hero banner without Image.
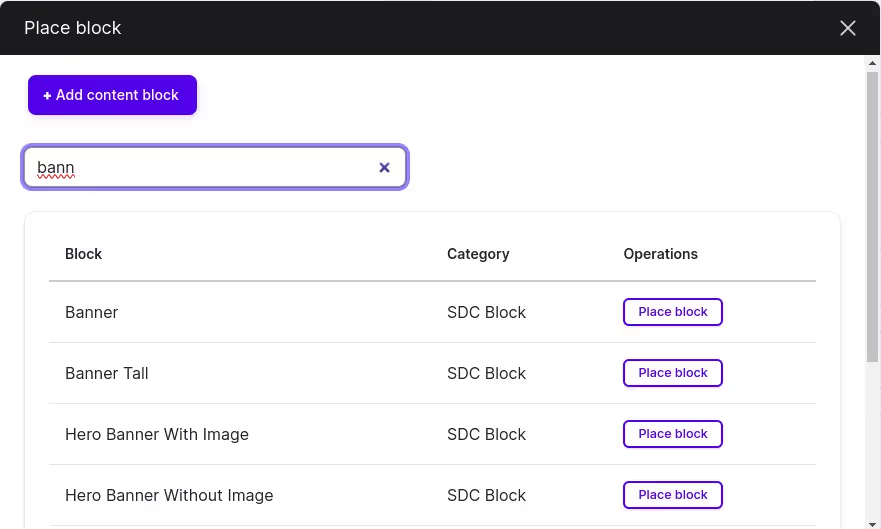
- Click on the place block button of a component that you want to add. You will see an auto-generated configuration form with the fields that you have mentioned in component.yml file. Fill all the fields and click on the save block.

- A SDC component block is created and placed on the region.

References:

What is SDC (Single Directory Components) in Drupal 10?
What is SDC (Single Directory Components) in Drupal 10?
SDC is a fresh way of theming in Drupal 10. It organizes all files needed to render a web component (like a button, carousel, menu) into a single directory. An SDC component’s directory includes YAML metadata, Twig templates, CSS stylesheets, and JavaScript scripts. Optionally, it can have a screenshot, PHP file, or media files related to the component.
What are we fixing and what benefits are we going to get?
As a frontend developer, navigating through a codebase can be a daunting task. Finding the right files, templates, and understanding variable changes in Twig files can sometimes feel like delving into a maze. Issues like deciphering how CSS and JS are loading, tracking down assets like files, Twig templates, and images can add to the complexity.
One of the challenges we often encounter is losing track of our location in the codebase. Jumping from one Twig template to another can be disorienting, and it's easy to get confused about where we were when writing a particular piece of code.
Understanding the data we're working with is crucial, and it can be a struggle to identify available variables in templates. Additionally, if modifications are needed, pinpointing the relevant variables for content changes becomes a puzzle. Locating the template itself poses another challenge – whether it resides in a module, the base theme, or buried deep within numerous directories.
To address these complexities, the Single Directory Components module in Drupal proves to be a valuable solution. It streamlines the organization of files, templates, and assets, offering a more intuitive and structured approach to frontend development. With this module, issues related to codebase navigation, variable identification, and template location become more manageable, providing a smoother and more efficient development experience.
Goals of SDC:
- Creating components that are reusable UI elements. Like twig templates are reusable, you can import, embed or extend them. Just like that we have a goal of SDC, to have reusable components so that we can import them in other components,
- Another goal is that we don’t replace everything or redo everything. We want to use components where they make sense which is largely with your site theme.
- The primary aim of Single Directory Components (SDC) is to facilitate the creation of reusable UI elements, much like Twig templates. Similar to the reusability of Twig templates through import, embed, or extend, SDC focuses on creating components that can be easily imported into other components.
- Another key objective is to avoid unnecessary replacements or redundant efforts. SDC emphasizes the strategic use of components, particularly within the context of your site theme.
Our central goal is to streamline the front-end development process, enhancing the manageability of custom, Core, and contrib themes. Simply put, we aim to simplify the lives of Drupal front-end developers and make it more accessible for those new to Drupal.
To achieve this, we will:
- Simplify the steps involved in generating HTML, CSS, and JS for a Drupal page.
- Clearly define component APIs, providing a mechanism to replace a component supplied by a module or theme.
Advantages:
How to work with Single Directory Components in Drupal?
To develop SDC:
- If you’re using Drupal 9 you have to install the module using this command composer require 'drupal/sdc:^1.0’.
- For Drupal 10 and later core versions, the Single Directory Component (SDC) module is included in the core.
- Enable the Single Directory Components module.
- Disable CSS and JS aggregation in the Drupal admin UI for development purpose.
- Enable Twig development mode and disable caching.
1. How to create a component:
- Create a directory called components/ at the root of your theme or module’s directory.
- Create a directory within the components/ directory with the name of your new component (e.g my-component).
- In the component directory, create a Twig file and a YAML file (These files are required). Optionally, add CSS and JS files.
- To load additional styles, scripts, and dependencies, use the libraryOverrides key in your YAML file.

A Single Directory Component is often referred to as a "component directory" due to its characteristic of consolidating all relevant information within a singular directory. This includes details about the component, its styling, structure, and the rendering process.

For e.g. in the above screenshot we can see that there is directory which is a component called hero-banner. It has .css file which contains all the styling, hero-banner.component.yml file which contains the details of the hero-banner component and a twig template.
The most significant advantage of SDC is its ease of discovery and deletion since everything is located in a single directory. Additionally, the Twig file and rendering process are specifically designed to exclude Drupal’s preprocessing and hook systems, ensuring that these components remain unaffected by external impacts.
METADATA:
The presence of the .component.yml file is important; in its absence, Drupal remains uninformed about the existence of your component. It is imperative that this file be created within the component's directory.
Lets go through the definition of .component.yml file.

MORE ABOUT SCHEMA PROPS AND SCHEMA SLOTS:
Within the Drupal Single Directory Component (SDC) framework, data can be transmitted to a component using two methods: "props" (short for "properties") and "slots." These concepts originate from JavaScript frameworks like Vue and React, embodying the notion of providing or feeding data into a component.
- Props adhere to a specified structure for transmitting data to the component, utilizing the JavaScript Object Notation (JSON) format with key-value pairs.
Example of Props:

- Slots serve the purpose of handling unstructured data, encompassing scenarios like nested components, Twig blocks, or HTML markup. Unlike props, slots do not require a JSON schema with key-value pairs and are not confined by JSON data types.
Example of Slots:

2. How to Render a Component:
To use a component in an *.html.twig template use Twig’s built in embed or include functions.
- Use include():
Use the Twig include() function if there are no slots or arbitrary HTML properties and the
data all follows a defined structure.
Example of how to use the sdc_custom:hero-banner component in a Twig template:

You’ll need to provide the component ID ([module/theme name]:[component]) of the
Component
- Use {% embed %}:
Use a Twig {% embed %} tag if you need to populate slots.
Example of how to pass in a slot (Twig block) in a card component:

The final result of a component after following the steps mentioned above will look like:

3. How to Override a Component:
Only themes can override components, and there are two important requirements to do so:
- Add a replaces key at the top in the .component.yml file you want to override

2. The component needs to have a defined schema.
It is important to note that modules cannot override components, and only components that have a defined schema can replace and be replaced by others.
Drupal 10's Single Directory Component is like a superhero that organizes your website's code, making it simpler to manage and understand. While there might be a bit of work involved in adopting SDC, the benefits of a tidy and well-organized codebase make it a valuable tool for Drupal developers.
NOTE:
- If you want a quick intro to the SDC BLOCK module & its implementation, click here.
- If you want to Implement the SDC Component with the Paragraphs module refer to this link.
REFERENCES:

Drupal 10 migration essentials: a concise handbook for 2024 and beyond
Given the transformative impact of Drupal 10 on the CMS landscape, it's important to remain informed and ready for change. Drupal 10, along with its latest version 10.2, represents a significant milestone in the evolution of the Drupal platform. Building upon the successes of its predecessors, Drupal 10 introduces a host of new features, improvements, and security enhancements, unlocking the latest capabilities and helping to maintain a secure and future-proof website.
As the title suggests, in this blog, we'll discuss Drupal 10's impact on the CMS landscape, sharing insights to facilitate a seamless migration journey, regardless of whether your website currently operates on Drupal or a different CMS platform like Joomla or WordPress.
Understanding the importance of migration:
Before delving into the specifics of the process, let's take a moment to understand why migrating to Drupal 10 is important by exploring the details of its features and functionalities.
- Future-Proofing Your Website: Drupal 10 is built on the rock-solid foundation of Symfony 5.4 LTS, which means extended support and stability for years to come. This ensures your website stays compatible with modern technologies and avoids the need for frequent migrations in the future. As of January 30, 2024, Symfony 5.4 LTS boasts over 3 years of remaining support, providing ample time for future advancements and adaptations within the Drupal ecosystem.
- Boosted Performance and Scalability: Drupal 10 introduces significant performance optimizations and caching mechanisms, resulting in faster page load times and improved user experience. The enhanced architecture allows for smoother website scaling, making it easier to handle growing traffic and complex functionalities without compromising performance. With the ever-increasing demand for responsive and efficient websites, this real-time benefit of Drupal 10 can be a game-changer for user engagement and conversion rates.
- The Headless Potential: While Drupal shines as a traditional CMS, version 10 opens doors to the exciting world of headless architecture. With its robust REST API and decoupled front-end capabilities, Drupal 10 empowers you to deliver content to any platform or device seamlessly. This flexibility unlocks incredible possibilities for building immersive web experiences, mobile apps, and custom integrations, making your website truly future-proof and adaptable to evolving digital landscapes.
- Streamlined Content Management: Drupal 10 introduces several user-friendly improvements that elevate content creation and management. The intuitive interface, powerful automation tools, and enhanced media handling features let you focus on crafting your message, not wrestling with technical hurdles. This translates to increased efficiency, improved team collaboration, and ultimately, a more engaging website for your audience.
- Embrace Accessibility and Inclusivity: Drupal 10 champions inclusivity with built-in accessibility features and adherence to WCAG 2.2 guidelines. This translates to a website that caters to a wider audience, including users with disabilities and diverse needs. As accessibility considerations become increasingly important from both legal and human aspects, upgrading to Drupal 10 allows you to stay ahead of the curve and commit to inclusivity.
Getting ready for Drupal 10
Now that we understand the importance of upgrading, let's explore the steps involved in preparing for the transition to Drupal 10
- Assess Your Current Setup: Start by evaluating your current Drupal setup, including the version you're using, installed modules, and any custom code. Look for potential compatibility issues or outdated features that might affect the upgrade process.
- Review System Requirements: Check the system requirements for Drupal 10, such as PHP version compatibility, database requirements, and server configurations. Make sure your hosting environment meets these requirements to avoid compatibility issues during the upgrade.
- Backup Your Website: Before upgrading, make a complete backup of your website and database. This ensures you have a secure backup in case anything goes wrong during the upgrade process.
- Update Contributed Modules: Review and update any contributed modules on your website to their latest compatible versions. Pay attention to modules with dependencies or compatibility issues with Drupal 10.
- Test, Test, Test: After preparing, thoroughly test your website to ensure it functions correctly post-upgrade. Test essential functions like content creation, user registration, and site navigation to identify and fix any issues promptly.

Migration Paths
Depending on the current Drupal version that is being used on your platform, there are different paths to upgrade to Drupal 10:
- From Drupal 9: Drupal 9 reached its end-of-life on November 1st, 2023. Upgrading from Drupal 9 is relatively easy with tools like Upgrade Status and Rector to fix any compatibility issues with Drupal 10.
- From Drupal 8: Since Drupal 8 is no longer supported, you can move directly to Drupal 10, considering the complexity of your website and necessary customizations.
- From Drupal 7 and Earlier: The official end-of-life date for Drupal 7 is January 5th, 2025. Upgrading from Drupal 7 or earlier versions requires a detailed plan. Ensure to allocate enough resources and involve a team of expert developers in the process.

Key Updates for 2024
In 2024, Drupal powers over 12 million websites worldwide, demonstrating its resilience and adaptability as its share continues to grow steadily. This year, several updates and enhancements are pertinent to the Drupal 10 upgrade process:
- Drupal 10.2 Release: Drupal 10.2 is now available, offering bug fixes and minor enhancements to further enhance stability and performance.
- Symfony 5.4 LTS Support: Drupal 10 leverages Symfony 5.4 LTS, ensuring long-term support and compatibility with the latest Symfony framework.
- CKEditor 5 Integration: CKEditor 5, the new default editor in Drupal 10, introduces improved accessibility and usability features for content creation and editing.
- Improved Content Modeling and Block Management: Streamline your content creation and organization with enhanced options for structuring and managing your website's content and blocks.
- Refined Menu and Taxonomy Organization: Navigate your website with ease thanks to improved menu and taxonomy structures, facilitating user accessibility.
- Granular Permission Administration: Fine-tune user permissions with greater control and precision, ensuring optimal access management for your team.
Upgrading to Drupal 10 may seem difficult, but reaching out to experienced Drupal establishments, developers and tapping into the wealth of resources available within the Drupal community and With careful planning and the right approach, your migration to Drupal 10 can be a smooth and successful endeavor.
Looking ahead
Drupal is driven by a commitment to open-source development and continuous improvement. Its modular architecture and extensive third-party integrations ensure relevance and adaptability, enabling enterprises to customize their websites to meet evolving user needs, particularly focusing on security, privacy, and impeccable speed.
As we move forward into 2024 and beyond, Drupal remains at the forefront of the CMS landscape with capabilities to embrace headless architecture, immersive web experiences, and personalized content delivery. It continues to pave the way, offering stability, security, community support, and endless possibilities for groundbreaking digital experiences, benefiting users and businesses alike.
This blog is an updated version of "How to Prepare and Upgrade from Drupal 9 to Drupal 10,". For more insights, feel free to refer to the older blog.

Streamlining the move from Drupal 7 to Drupal 10: simplifying decision-making
Drupal is constantly evolving, embracing change as its driving force. From older versions like Drupal 7 to the newest ones, Drupal 10 and 10.2, the people behind Drupal keep working hard to make it easier to use, relevant in web development, delivering advanced solutions, and meeting the evolving needs of businesses and users.
The latest versions, Drupal 10 and 10.2, enhance website building with improved editing tools, customizable pages, easier development, stronger security, and modern tech.
These improvements mean businesses get more out of their investment.
As Drupal 7 will stop getting support on January 5th, 2025, it's a good time to think about moving to a newer version. This blog aims to help streamline the decision making process.
Drawbacks of sticking with Drupal 7
It's essential to recognize the limitations of continuing with Drupal 7. Opting to stay with this version might subject both you and your users to various risks, including exposure to vulnerabilities, encountering bugs, and facing challenges when integrating with new web standards. Other issues could include:
- Unsupported modules, themes, and outdated Drupal frameworks can make security risks worse.
- Compatibility problems with newer technologies and browsers can affect user experience.
- Maintenance can become complicated and costly, needing custom fixes.
- Delaying migration could lead to data loss and website downtime.
- Unsupported software versions are often targeted by hackers.
- Compliance issues may arise with regulations like GDPR, HIPAA, or PCI DSS.
- Drupal 7 may become less compatible with modern environments over time.
Reasons to upgrade to Drupal 10
1. Strengthened security measures
The new version focuses on security, with stricter coding standards, better access controls, and regular security updates. Audits and patches keep websites protected from evolving security risks.
2. Better content management
Teams get enabled with easier content editing, customizable workflows, and improved revision controls. Streamlined workflows and collaboration help deliver engaging and better content.
3. Optimized performance
Drupal 10 and 10.2 prioritize performance by using BigPipe caching to speed up page loading for dynamic content. This, along with improved caching mechanisms and optimized database queries, reduces page load times and improves scalability.
4. Advanced dev tools
Updated APIs, better documentation, and expanded development frameworks support modern practices like decoupled architecture and headless CMS, allowing for modern digital experiences.
5. Native WebP image support
Drupal 10.2 adds native support for WebP images, making pages load faster and improving the user experience, especially on mobile devices. This ensures images are optimized for better performance.
6. Accessibility improvements
Drupal 10.2 includes an updated CKEditor with better accessibility features, meeting standards like WCAG. These improvements make it easier for content authors to create accessible content, ensuring inclusivity for all users.
7. Enhanced media library management
Drupal 10.2 improves media asset management with better categorization options, improved search, and enhanced metadata management. This streamlines content creation, making it easier to manage and organize media assets.
Potential ROI of migrating to Drupal 10 and other latest versions
Let's take a closer look at the numerous benefits of upgrading to Drupal 10 and other recent versions, including increased ROI, streamlined operations, and good UX.
- Cost-Effective Redesign — Save 30-40% on redesign costs by addressing user experience during site migration, making it the ideal opportunity to enhance UX.
- Efficient Administration — Simplified user management and permission settings minimize administrative time and effort.
- Streamlined Content Creation — User-friendly interfaces and optimized workflows make content creation easier and more engaging.
- Improved User Engagement — Faster loading times and better mobile responsiveness lead to lower website bounce rates.
- Higher Conversion Rates — Enhanced user journeys and improved experience result in increased conversion rates.
- Time-Saving Content Management — Advanced editing features and automated workflows reduce content management time.
- Enhanced Security and Compliance — Strengthened security measures and compliance ensure data protection and instill trust.
- Minimized Website Downtime — Improved stability and scalability guarantee uninterrupted website access.
- Resource Optimization — Reduced downtime and administrative burden free up resources for other essential functions.
These represent some potential benefits, and the actual ROI for your organization will vary based on your specific needs and goals. Schedule a consultation with our Drupal experts for an insightful conversation.
Should you wait for Drupal 7 to cease before migrating?
First, let’s look at the reasons to wait
- Migrating your website can be complex and require significant resources. If you're working with budget constraints or lack technical expertise, it might be more practical to wait until closer to the end of life.
- If your website depends on custom modules or features not yet compatible with Drupal 10, you may need to wait for compatibility solutions or develop alternatives before migrating.
- Starting a migration project too close to the end of life could be risky and stressful, especially if you have tight deadlines for website updates.
Reasons you should migrate to the latest version
- As Drupal 7 approaches its end, finding experienced developers becomes increasingly difficult and costly. Migrating to Drupal 10 now allows you to access a larger pool of developers and secure future support for your website.
- Initiating the migration process early ensures a more manageable and controlled transition. You'll have ample time to address compatibility issues, train your team, and prepare your users for the change.
- Drupal 10 offers significant performance improvements, enhanced scalability, and exciting new features such as CKEditor 5 and a modular architecture. This results in a faster, more flexible, and feature-rich website for your users.
- With Drupal 7 reaching its end-of-life on January 5th, 2025, waiting makes your website vulnerable due to the lack of security updates. Most importantly, upgrading to Drupal 10 ensures long-term security and peace of mind.
Looking ahead
Adjusting to change can feel uneasy initially, but the benefits often outweigh the initial challenges — this perspective is crucial when considering migration.
Ultimately, the decision to migrate is yours. Consider the potential security risks of delaying the upgrade versus the advantages of early adoption, and choose the timeline that best fits your resources, priorities, and website needs.
Even if you decide to postpone the migration, it's important to plan your strategy in advance to avoid any last-minute rushes and ensure a smooth transition.
Contact our Drupal Migration experts for further information or visit to explore our migration services.

Exploring the Power of PHP Attributes in Drupal Development
Introduction
PHP gets better over time, and one recent improvement is PHP attributes, which came with PHP 8. These attributes help organize things like classes, methods, and properties by adding extra information. This makes it easier for tools and frameworks to understand and work with the code. In this post, we'll look into PHP attributes, comparing them to Drupal annotations, talking about their advantages, and showing examples. Plus, we'll show you how easily attributes fit into Drupal.
Drupal Plugin Discovery mechanism:
In Drupal, the Plugin Discovery thing finds and adds plugins as needed. Plugins are like building blocks that help add new features to Drupal. The Plugin API is like a helpful tool that makes it easy to include these plugins in different parts of the system, like blocks and fields.
Annotations: Drupal plugins often use annotations for discovery. Annotations are special comments in PHP code that provide metadata about the class.
YAML Files: Some plugins are discovered through YAML files, where plugin definitions are specified in a structured format.
Annotations in Drupal
Drupal's plugin system, a robust and flexible component, heavily relies on annotations for various purposes. These annotations, often expressed as PHPDoc comments, convey metadata information to the system. Here's an example of an annotation:
Let's compare examples of annotations and attributes for a simple class definition:
Example of Annotations:
Example of Attributes:
In the attributes example, we see a more concise and integrated syntax for expressing metadata.
Why Use Attributes Instead of Annotations?
Several reasons make PHP attributes a compelling choice over annotations, even in Drupal development:
- Drupal currently utilizes the "doctrine/annotations" library for parsing annotations (https://github.com/doctrine/annotations). Attributes, which are a native feature of the PHP language, are employed, eliminating the necessity for parsing docblocks. This approach leads to code that is cleaner and more easily readable.
- The great thing about being able to create instances of objects in attributes is that we're not using attributes for this. We're using exactly the same objects as you would in regular PHP code. So for translatable strings that's \Drupal\Core\StringTranslation\TranslatableMarkup(). That means the way these strings are translated is exactly the same as regular PHP code. We've got rid a whole abstraction layer (i.e. \Drupal\Core\Annotation\Translation) and that's fantastic.
- The attributes language feature was added to php to do the kind of things we (and doctrine ORM) are using doctrine annotations for. It is therefore reasonable that doctrine annotations will be deprecated in the future.
- With Attributes finally we might be able to get IDE autocompletion and some amount of control and discoverability over the entity type annotations. Since attributes are part of the language, IDEs can provide better autocompletion and code navigation support. Developers can explore and use attributes more efficiently within their integrated development environment.
Example of Using Attributes in Drupal
Drupal is using something new called PHP attributes, and modules are beginning to use this cool feature.
Let us understand the process of creating a custom plugin type using Attribute and Annotation discovery mechanisms through the following example:
Plugins have several parts, in the example below we will cover only those aspects which are relevant for understanding the plugins discovery mechanism :
1. Plugin Definition
The first step is to define the definition for your plugin.
Annotation Definition:
This is a simple class that extends Drupal\Component\Annotation\Plugin to define the variables
you want listed in the annotation comments of the plugin. This file goes in [your_module]/src/Annotation, and file name and class name match. for example: Importer.php
Attribute Definition:
This extends Drupal\Component\Plugin\Attribute\Plugin class. The Attribute definition will go into the folder [your_module]/src/Attribute and
as always the file name and class name match. for example: Importer.php.
Similar to annotation the variables defined here are used while using Attribute discovery for your plugin type.
2. Plugin manager
Responsible for discovering and loading plugins, the most important part in any plugin type is the manager.This file resides inside the "[example_module]/src" folder mostly with a name ending with Manager.php.
We have the file ImporterPluginManager.php
This single file is responsible for discovering our "Importer" plugins of which are either using Annotation or Attribute based discovery mechanism.
Here the important line is
because we are supporting both (Annotation and Attribute discovery)Importer::class is used to discover plugins using "Attribute" discovery Drupal\example_plugin\Attribute\Importer;whereas 'Drupal\example_plugin\Annotation\Importer' is used for the plugins using traditional Annotation discovery
To remove support for either of the discovery mechanisms for your custom plugin type you can remove one of the parameters:Importer::class or 'Drupal\example_plugin\Annotation\Importer'
3. Implementation of plugin of type plugin_name (in this example plugin_name is “Importer”)
Now assume we have created all the required files for defining a custom plugin type let us see examples of the same plugin typewith one using Annotation and other one using Attribute discover
within the "[example_module]/src/Plugin" folder we can have one plugin for example JSONImporter.php using Annotation discover
While CSVImporter.php using Attribute discover mechanism
Complete code of the above example could be found on https://github.com/prashantdsala/example_plugin
Drupal Change record:
Plugin types should use PHP attributes instead of annotations
Plugin implementations should use PHP attributes instead of annotations
Plugin types are still being converted to Attribute Discovery. At the time of writing this blog post, only two of the plugin types support Attribute discovery which as mentioned below:
Conclusion
PHP attributes are like new tools that make the PHP language better. They help make the code cleaner, easier to read. In Drupal, using these new tools instead of the old way brings a bunch of benefits. It makes the code work better with the system, fits well with code editors, and makes the code more reliable. As PHP gets updated, using these tools in Drupal is a good idea. It helps keep the code up-to-date and in line with the newest features of the language.