All blogs

A Beginner's Guide to Sitemap Testing: Part 1
A sitemap is a comprehensive list of URLs on a website that provides information about the location and content of the website. It includes pages, videos, images, and files, along with their relationships to each other. This serves as a roadmap for search engines to navigate and understand the website's content.
There are different sitemap extensions, such as:
- XML Sitemap
- Mobile Sitemap
- Video Sitemap
- Image Sitemap
XML sitemap
An XML sitemap is a file that enumerates all the pages and other content present on a website, accompanied by metadata. It is aimed at assisting search engines in comprehending the site's structure. Google introduced the XML sitemap format in 2005 to streamline the process of crawling and indexing websites. XML sitemaps encompass metadata regarding URLs, which includes:
- The date of the last update
- The frequency of changes
- Its priority compared to other pages

Mobile sitemap
A mobile sitemap is tailored for mobile devices. It comprises a catalog of URLs from a website, optimized for seamless mobile viewing. This version may also include extra metadata about each URL, encompassing details like the last updated date, the frequency of changes, and its priority in relation to other pages.
It is important to note that a distinct mobile sitemap is required only if the website includes a feature phone (WAP/WML) version. For the majority of websites, a unified sitemap is adequate for both desktop and mobile URLs.
Video sitemap
A video sitemap is a specialized form of a sitemap that contains additional information about videos hosted on a website. It offers essential metadata about the video content, including the title, description, thumbnail URL, and runtime.
This information aids search engines like Google in comprehending and indexing video content, thereby simplifying users' direct discovery and access to videos from search results.
Through the creation of a video sitemap, website owners can enhance the visibility and discoverability of the video content, potentially resulting in increased traffic, engagement, and conversions.
The namespace that defines the tags for video sitemaps is as follows:

Image sitemap
An image sitemap provides search engines with information about the images on a website. This assists search engines in crawling and indexing images, potentially boosting visibility and attracting traffic from image search results.
The image sitemap includes metadata about each image, such as its URL, type, and caption. Using an image sitemap aids search engines in comprehending a website's content, contributing to improved overall search engine optimization.
The namespace establishes the image tags utilized in the image sitemap to relay metadata about website images to search engines like Google. For instance:

Advantages of sitemaps
SEO ranking
Sitemaps offer a clear overview of a website's structure, simplifying user navigation and content discovery. A properly organized sitemap can significantly impact website ranking. It contains a list of the most crucial pages on a site, ensuring search engines can locate and crawl them effectively.
User-friendly navigation
Sitemaps enhance website navigation for both search engine crawlers and human users by presenting an organized and easily-followed layout of website content.
Improved crawling
Without a sitemap, search engines might struggle to crawl and index all pages on the site, potentially affecting the site's rankings. The term "improved crawling" refers to how search engine crawlers navigate and index a website more efficiently and accurately when a properly organized sitemap is present, instead of relying solely on the site's architecture.
Notifying about updates
By including metadata in sitemaps — such as the last modification date and different language versions of a page — one can effectively communicate updates to search engines and provide precise information about a page's content.
Checklist for testing sitemaps
Manually check the location of the sitemap
The most common (and simple) way to locate the XML sitemap of a website is to check manually. To initiate the process, input the website URL into the browser and explore various iterations, experimenting with different variations such as:
http://www.{yourwebsiteurl}.com/sitemap.xml
Here are a few additional quick tests to attempt:
- /sitemap-index.xml
- /sitemap.php
- /sitemap.txt
- /sitemap.xml.gz
- /sitemap/
- /sitemap/sitemap.xml
- /sitemapindex.xml
- /sitemap/index.xml
- /sitemap1.xml
Best practices to follow
- The best practice for a sitemap is to place it in the root directory Baseurl/sitemap.xml
- The sitemap protocol format consists of XML tags. It is important to ensure that all data values in a sitemap are properly entity-escaped and the file is encoded in UTF-8 format. It will help ensure that search engines can correctly interpret the data in the sitemap, and accurately index the website.
Guidelines to follow
Format the sitemap correctly to ensure search engines can read and interpret it properly, and follow the steps below:
- Start the sitemap with an opening <urlset> tag and ending it with a closing </urlset> tag. Adhere to the proper protocol standard specified within the <urlset> tag.
- Specify the namespace (protocol standard) within the <urlset> tag.
- Add each URL as a parent XML tag <url>.
- Include a <loc> child entry for each <url> parent tag to specify the URL.
Check Robots.txt file
A robots.txt file is a text document that guides web robots or crawlers on which parts of a website they can or cannot access. It prevents the site from getting overwhelmed by requests.
Crawlers usually check the robots.txt file first when they visit a site. So, it's important to include a sitemap path there. This tells search engines about the pages you want them to find. To see if it's set up correctly, enter your site's URL followed by '/robots.txt' in your browser, for example, https://www.qed42.com/robots.txt.
For more details, check The Importance of Robots.txt.

Test mobile XML sitemap
To test a mobile XML sitemap, utilize online tools to check for validity and identify any errors or warnings. One useful tool is Google Search Console, offering a Mobile Usability report to pinpoint mobile compatibility issues on site.
Another option is the W3C mobileOK Checker, which assesses mobile sitemap and offers feedback on areas for enhancement. This tool measures the site's mobile usability against industry standards, suggesting improvements to enhance mobile compatibility.
Alternate language directive for XML sitemap
If there are different language versions of the website, use the "hreflang" tag in the XML sitemap to indicate the relationship between pages in various languages. This can help search engines understand which version of the website to display in search results based on user language and location preferences. Additionally, including this information in the XML sitemap can help search engines properly index the website for international SEO.
Pages added to optimize crawling and indexing
The sitemap should not include all pages. If everything is included, it may lead to poorly optimized crawling, which means crawling low-quality pages. This can hinder the indexing of high-quality pages on the site because search engines might not have the resources to crawl them
Ensure that the pages included in a sitemap:
- Respond with a 200 code
- Are not blocked by robots.txt
- Don't include a no-index meta robots tag
- Have canonical versions
Make sure that the sitemap is broken into smaller sections if it contains more than 50,000 URLs. The maximum size of the sitemap should be 10 MB.
Check uniformity and completeness of URLs within the sitemap by confirming the presence of the HTTP/HTTPS protocol and "www" in all URLs.
Utilize sitemap extensions for additional media content such as images, videos, and news.
Conclusion
In this blog, we've covered various sitemap types: XML, mobile, video, and image sitemaps. We've looked at how they can benefit SEO ranking, improve navigation, and enhance crawling. We've stressed the importance of correctly formatting and validating sitemaps to ensure search engines interpret and index the site accurately.
Don't forget to use the checklist we provided to test the sitemap! We've emphasized testing mobile XML sitemaps and using alternate language directions to enhance crawling and indexing.
In the 'A Beginner's Guide to Sitemap Testing: Part 2' blog post, we delve into the tools that assist with sitemap testing. These tools include Google Search Console, XML Sitemap Validator, and SEOptimer. Additionally, we demonstrate real-time examples using Screamingfrog to test a sitemap.
Remember, a well-tested and properly optimized sitemap is a valuable asset for improving your website's search engine visibility and user experience.

Headway: The Way Forward in Automation
Headway is an open-source automation framework by QED42 to build test scripts and generate reports for web applications. It primarily focuses on minimizing initial framework setup and coding efforts increasing automation efficiency. It supports a data-driven framework built using Selenium, TestNG and Java libraries.
Headway is the answer to
- Implementing automation from scratch in an existing project
- A cost-friendly framework - use of open-source libraries
- Reduce dependency on highly-skilled and technical automation QAs
How does it work?
Headway is a data-driven framework consisting of various components, such as Selenium, Java Language, TestNG framework, Maven dependency management tool, and utility libraries. It supports the Page Object Model pattern, where we have separate packages for pages and tests.
Configuration files are used to store environment and application generic data that remains static throughout the framework. All the test data can be stored in Excel or JSON files, and we can handle the data using appropriate libraries. At the end of the test suite execution, report and log files are generated with screenshots.
Headway architecture can be reused, and libraries can be extended for test automation. Utilities of Headway can be used directly or exported as jar files in your automation project.

Features of Headway
- Data-driven testing framework to run tests multiple times over a set of test data.
- Multiple browser testing on Chrome, Firefox, and Safari across various platforms.
- Supports sequential and parallel testing across multiple browsers to reduce overall execution time.
- Provides a detailed and graphical report dashboard and generates HTML reports with screenshots.
- In-house support to read and write various file types, such as Excel, JSON, and properties.
- Easily integrates with CI and 3rd party tools.
Benefits of Headway
- Framework development time is reduced by 40%.
- Reduced costs as the framework is built using open-source libraries and tools.
- Increases ROI by 30% due to automated framework, parallel testing, and shorter test cycles.
- Reduced dependency on QA experts, which provides flexibility in resources.
- Less execution time with parallel testing.
- QA resources can focus on test scripts and extending the framework.
- Increase in reliability and quality, accelerating validation and release of web applications.
- Easy to use and understand the utilities by less-skilled QA resources.
What is the wait for…
Try Headway and implement automation in your project with ease! The how-to-use guide will help you try Headway effortlessly!

A Complete Guide to Testing AI and ML Applications
Artificial Intelligence (AI) refers to the development of computer systems that can perform tasks that typically require human intelligence, such as visual perception, speech recognition, decision-making, and language translation. AI systems use algorithms, statistical models, and computational power to analyze data and make predictions or decisions based on that data.
Machine Learning (ML) is a subfield of AI that involves teaching machines to learn from data and improve their performance without being explicitly programmed. Machine learning algorithms can analyze large datasets, identify patterns, and make predictions or decisions based on that data.
Artificial intelligence and machine learning (AI/ML) have become increasingly important in testing software, resulting in increased automation and more lifelike results. AI/ML testing is essential to ensure that AI/ML models produce accurate and reliable results.
AI/ML models are trained using large datasets, and it can be challenging to ensure that they are working correctly and producing the expected results in different scenarios. The testing process helps identify errors, biases, and other issues in the model, making it more reliable and effective. Additionally, AI/ML testing helps improve the model's transparency and interpretability, making it more trustworthy and easier to use.
Imperatives for AI system testing
The global AI market is expected to reach nearly $126 billion by 2025, up from just $10.1 billion in 2016. With AI becoming more prevalent, it's crucial to ensure that these systems are tested thoroughly. Originally, AI was conceived as a technological concept to replicate human intelligence. It was mostly researched and developed within the confines of large technology companies.
However, in recent times, AI is transformed into an indispensable resource for every type of organization, thanks to significant advancements in data collection, processing, and computing power. In essence, AI has become the "new electricity" for businesses of all kinds.
Challenges of AI and ML testing
Non-Deterministic
AI and ML systems are non-deterministic. This means that they tend to show different behaviors for the same input.
Adequate and Accurate Training Data
One of the biggest challenges of AI and ML testing is the lack of test data. ML algorithms rely on vast amounts of data to learn, but it can be challenging to obtain sufficient data that accurately represents the real-world scenarios that the system will encounter. This can make it tough to test the system thoroughly and accurately.
Bias
Testing for bias can be challenging, as it requires a thorough understanding of the training data and the potential sources of bias.
Interpretability
There is a massive level of difficulty when extracting specific attributes. For example, finding what caused a system to recognize an image of a coupe as a sedan wrongly may not be possible.
Sustained Testing
After testing and validating traditional systems, we do not need to retest them until we modify the software. On the other hand, it is imperative to know that AI/ML systems constantly learn, train, and adjust to new data and input.
Common obstacles in AI application testing
Massive sensor data pose storage and analytics issues and result in noisy datasets. Here are some common obstacles faced while testing AI systems/applications:
- Data obtained during unplanned events is exceedingly challenging to aggregate, offering training problems to AI systems.
- Human bias is typically present in training and testing datasets. It should be identified and removed in AI model test situations.
- AI works well with sophisticated input models. If the inputs are not up to the mark, the defects are more complex, and a lot of time and effort is consumed to resolve them.
- AI is a complex system, and even minor defects are greatly amplified. The difficulty in this problem resolution also increases.
Challenges in testing ML applications
Testing machine learning applications are also difficult and pose several self-assessment challenges:
- The data, code, curricula, and frameworks that support ML development must be thoroughly tested.
- Traditional testing methods, such as test coverage, are often ineffective when testing machine learning applications.
- The behavior of your ML model may change each time the data training is updated.
- As domain-specific information is necessary, creating a test or test (e.g., labeling data) costs time and money.
- As it is challenging to identify trustworthy carpenters, ML testing frequently indicates false positives in defect reports.
Key factors to consider while testing AI-based solutions
When evaluating AI-based solutions, it's important to remember that data is the new code. For a well-functioning system, these solutions must be tested for any change in input data. This is similar to the classic testing approach, in which any changes in the code cause the improved code to be tested.
Several steps must be taken to create effective and accurate machine learning models, such as:
Semi-Automated Curated Training Data Sets
For this step, the input data and intended output are essential. We need to analyze data dependencies statically to annotate data sources and features. This analysis is crucial for migration and deletion.
Test Data Sets
Test data sets are created to determine the efficacy of trained models. These data sets are logically constructed to test all possible combinations and permutations. The model gets refined during training as the number of iterations and data richness increase.
System Validation Test Suites
Algorithms and test data sets are used to create system validation test suites. These test suites must include various test scenarios, such as risk profiling of patients for the disease in question, patient demography, and patient therapy, for a system designed to predict patient outcomes based on pathology or diagnostic data.
Reporting Test Findings
Test results must be presented in statistics since machine learning algorithm validation yields range-based accuracy or confidence scores rather than expected outcomes. For each development, testers must specify confidence criteria within a given range.
Taking note of fundamental biases
Fundamental biases are essential to take note of during AI/ML testing. For modern enterprises, developing unbiased systems has become critical. Supervised learning techniques, which make up more than 70% of AI use cases today, often rely on labeled data prone to human judgment and biases.
It creates a double-edged sword for measuring the bias-free quotient of the input training data sets. We miss out on experiential information if we don't factor the human experience into labeled data. And even if we do, data biases are likely to emerge.
Data Skewness
Data skewness is a common problem in machine learning, especially in sentiment analysis. Most data sets do not have equal or sufficient data points for different sentiments, leading to skewed training data.
Prediction Bias
In a well-functioning system, the distribution of predicted labels should match the distribution of observed tags. This diagnostic step is crucial to detect problems, such as sudden changes in behavior. If the training distributions based on historical data are no longer accurate, it can lead to prediction bias.
Relational Bias
Users' understanding of how to solve a data pattern or problem set is often constrained and biased by their knowledge of relational mapping, leading them to favor more familiar or simple solutions. This bias can result in a solution that avoids complex or unfamiliar alternatives.
Critical aspects of AI systems testing
Data Curation & Validation
The efficiency of AI systems is based on the quality of training data, including aspects like bias and variety. Car navigation systems and phone voice assistants find it quite troublesome to understand different accents. It proves that data training is critical for AI systems to get the correct input.
Algorithm Testing
Algorithms, which process data and provide insights, are at the heart of AI systems. This approach's primary advantages include model validation, learnability, algorithm efficiency, and empathy.
- Natural Language Processing
- Image Processing
- Machine Learning
- Deep Learning
Performance and Security Testing
AI systems require extensive performance and security testing. Aspects such as regulatory compliance are also included.
- Smart Interaction Testing
- Devices (Siri, Alexa, etc.)
- AR/VR
- Drones
- Driverless cars
The potential of AI
AI research used to be confined to large technology companies, and it was envisioned as a technical idea that could emulate human intelligence. On the other hand, AI has become the new electricity for every organization, thanks to significant breakthroughs in data collecting, processing, and computation power.
The AI sector has exploded in the last several years, with applications covering multiple industries. The widespread adoption of AI is expected to help uncover its full potential and increase efficiencies in various industries in the coming years.
Integration Testing
AI systems are created to work with other systems and tackle specific challenges. This necessitates a comprehensive analysis of AI systems. Integration testing is critical when numerous AI systems with competing agendas are deployed together.
Real-life Testing
AI systems are created to work with other systems and tackle specific challenges. This necessitates a comprehensive analysis of AI systems. According to Gartner, the worldwide business value of AI was expected to exceed $1.2 trillion in 2018, up 70% from 2017. By 2022, this market was estimated to reach $3.9 trillion. With more and more systems incorporating AI features, they must be adequately evaluated.
Non-Functional Testing
Semi-automated curated training data sets include input data and intended output. Static data dependency analysis is necessary to enable the annotation of data sources and features, a key aspect for migration and deletion.
Black Box and White Box testing
Like traditional test methods, black box and white box testing are used for ML models. Obtaining training data sets that are large and thorough enough to suit the objectives of ML testing is a significant difficulty.
Data scientists test the model's performance during the development phase by comparing the model outputs (predicted values) to the actual values. The following are some of the strategies used to do black box testing on ML models:
Model Performance Testing
It entails comparing the model's performance in terms of precision-recall, F-score, and confusion matrix (False and True positives, False and True negatives) to that of a predetermined accuracy with which the model was previously constructed and placed into production.
Metamorphic Testing
It attempts to solve the problem of the test oracle. A test oracle is a method that allows a tester to assess whether a system is functioning correctly. It is challenging to determine the expected outcomes of selected test cases or know if the actual output matches the expected results.
Dual Coding/Algorithm Ensemble
Given the same input data set, multiple models utilizing various algorithms are created, and predictions from each one are compared. Numerous methods, such as Random Forest or a neural network like LSTM, could design a typical model to address classification difficulties. However, the model that gives the most expected outcomes is ultimately chosen as the default.
Coverage Data
Data fed into the ML models are designed to verify all feature activations using guided fuzzing. Test data sets that result in the activation of each of the neural network's neurons/nodes, for example, are required for a model produced with neural networks.
Model Backtesting
A predictive model based on historical data is known as backtesting. This method is widely used in the financial sector to estimate the performance of previous models, particularly in trading, investment, fraud detection, and credit risk evaluations.
Testing for Non-Functional Requirements (NFR)
A representative sample view of things and the deployment approach must be considered while evaluating ML Models with performance and security testing. AI systems require extensive performance and security testing. Aspects such as regulatory compliance are also included.
HSBC's Voice Recognition System was recently hacked by a customer's non-identical twin, who gained access to balances, recent transactions, and the ability to transfer money across accounts. Chatbots can be influenced into providing business-sensitive information without proper testing.
AI/M-based tools for testing
There are many AI-based QA products on the market, each with its own set of features. Here's a quick rundown of the three most commonly used AI tools in software quality assurance.
Applitools
Applitools is a visual UI testing and monitoring program powered by artificial intelligence. It is a visual AI-powered end-to-end software testing platform that can be used by engineers and manual QA, as well as test automation, DevOps, and Digital Transformation, teams. Furthermore, the AI and ML algorithm is completely adaptive - it scans and analyses the app displays just like a human eye and brain would but with the power of a computer.
Testim
It's an AI and ML-based automated functional testing platform that speeds up automated tests' creation, execution, and management. Chrome, Firefox, Edge, IE, Safari, and Android are among the browsers and operating systems that can use the tool. This AI-powered software testing platform lets customers develop robust end-to-end tests that can be programmed or left codeless, or both. Testim's original cycle model is responsible for its success and popularity.
Sauce Labs
Another popular cloud-based test automation solution that uses ML and AI is Sauce Labs. It supports a wide range of browsers, operating systems, mobile emulators, simulators, and mobile devices. It works at the pace that its consumers require. It also claims to be the world's largest continuous testing cloud, with over 800 browser and operating system combinations, 200 mobile emulators and simulators, and hundreds of genuine devices available.
Summing Up
As AI and ML become more prevalent in our lives, it's crucial to ensure these systems are thoroughly tested to work as intended. The regularity with which the AI model is tested for accuracy affects the previous 'test once and deploy forever' strategy.
As businesses increasingly use AI to construct systems and applications, testing approaches and procedures will evolve and improve over the next few years, eventually approaching the maturity and standardization of traditional testing methods.

How to reduce User Acceptance Testing bugs? A QAs worst nightmare!
There is always a world of difference between the test environment conditions and real environmental conditions. For example, we cannot trust the efficiency of a robot, car or any other equipment that is tested only in laboratories (test environments). And when these are brought to the real world or tested under real-world scenarios, there are 90-95% chances of failure.
The efforts of repairing this damage or loss are very high as compared to the efforts required to repair if the same issue were found in the earlier testing stage.
You can come across a similar case in software development, even after testing the software in all possible ways there are chances that some bugs escape to User Acceptance Testing (UAT).
What is User Acceptance Testing?
User Acceptance Testing (UAT) is the testing phase conducted by the client to validate the developed software system before its deployment to the production environment. This testing phase occurs during the final stage of the testing process, following the completion of functional, UI, and integration tasks.
Why is User Acceptance Testing necessary?
As all know User Acceptance Testing occurs in the final stage of testing. Its purpose is to ensure that the developed software system meets the client's and end-users real-time requirements and acceptance criteria. Involving the client/stakeholders in testing the system against the specified requirements, can identify issues or areas of poor usability in the testing stage before production deployment, and it helps to save the cost and time of issue fixing. This collaboration allows the development team to make necessary improvements based on the UAT feedback, ensuring that the final product meets the highest standards before its successful launch into production.
Here are a few cases that might introduce bugs in User Acceptance Testing and how to tackle them:
Case 1: Acceptance criteria not understood
- Acceptance criteria should be understood from the customer's perspective. For this QAs should be part of the Sprint 0 activities.
- The customer requirement must be clear, and accordingly need to work on Acceptance criteria.
- If the requirements provided to the user for testing are incomplete or unclear, it can result in bugs or missing functionalities.
- To tackle this, clear communication channels should be established between the development team/ team representative and the customer, allowing any questions or clarifications.
Case 2: Testing "n" number of times is not sufficient
- For overcoming this, the project management team should be proactive and make an effective plan. QA timelines should be considered.
- QA timelines should be considered.
Case 3: Negative test cases suite is missing
- Test cases suite should be included in the negative test cases. These test cases that are designed for validating the software behaviour against unacceptable, abnormal, or unexpected condition data input.
- Need to cover negative test cases to ensure that the developed software/Application output response should be expected when providing an invalid or random input.
- Eg. A software development team has built an e-commerce platform which has Login functionality with Mail ID and Password but while testing they miss the negative test case like “if the mail Id/ Password fields are empty and try to the Login, what is the response”, “if both the mail Id/ Password fields are empty and try to the Login, what is the response”, “if enter invalid/wrong mail Id”. Aforementioned scenarios, the response should be an error message.

Case 4: Collaboration between QAs and other team members
- QAs don't collaborate equally in the team and they end up working either completely or partially on their own. QAs should always communicate clearly about the testing scenarios, testing strategies with other team members and also share their research work and ideas that can be helpful for the project.
- Always keep visibility in QA activity so other team members know about testing strategies.
- As a QA if you have any suggestions for improvement of the project functionality/usability, it should be discussed with team members.
- Eg. All sites have a Header section, when the user scrolls down, and then the wants to check the header section then at that time the user needs to scroll up the page; QA can give a suggestion to add a “Back to Top” button on the screen after one scroll of a page.
.avif)
Case 5: Participate in all project meetings
- QAs should participate in all meetings, this allows them to acquire in-depth knowledge of the project from an end-user perspective and also develop a collegial network with other stakeholders on the project.
- They can ensure that the requirements are clear, testable, and aligned with the overall goals of the project.
- QA plays the role of a gatekeeper, responsible for understanding all customer and stakeholder requirements. Knowing the requirements empowers to raise qualitative issues during testing, ensuring the product meets the highest standards of quality.
- QA involvement in project meetings allows them to track the progress of development and testing activities. They can provide updates on the status of the deliverables, identify any issues, and suggest any new ideas for improvement.
- Overall when QA participates in Projects meetings, it helps in Project quality management, raising issues early and timely resolutions of issues, resulting in the delivery of a high-quality end product by the team.
Case 6: Checklists for common scenarios are missing
- Always keep test cases or checklists handy for common scenarios that a user will come across during the testing. These checks should cover all the scenarios across that feature.
- Eg. For every website, the Logo of the site must be clickable and navigate the user to the homepage. Though this scenario is common, it can sometimes be overlooked during testing. However, by including it in the QA checklist, the chances of missing this scenario is reduced.

Case 7: Test data is not sufficient
- Seldom the test data created by QAs is not sufficient. Try to test by restoring production databases i.e with real-time data.
- Test data needs to be precise to uncover the defects.
- Test data helps QA to conclude whether the developed system is relatable or not with the expected output.
- If a QA has sufficient test data before they begin testing activities, then the quality of the product will be up to the mark and makes sure all scenarios are covered.
- Eg. During the testing of an E-commerce website, the checkout flow represents an important scenario that requires examination. As part of this process, testing the "Payment" step is crucial. However, QA may encounter challenges if they lack the necessary testing data, such as card details, to proceed with the payment verification and to complete checkout.
.avif)
Case 8: Poor site performance
- Try to increase the load on the system by setting up performance tests and by sending multiple requests in parallel.
- QA needs to test site performance for heavy traffic, for different networks, and for site response time.
- Eg. If the developed site/application performance is high, then the site can handle heavy traffic.
Case 9: UAT and QA environment metrics differ
- QAs and customers should follow the same environment and device metrics. This should be defined and approved as a part of the test plan.
Case 10: Regression tests are missing
- Extensive regression testing before UAT is very important. By chance if any issue is missed while testing or any functionality is not working as per requirement that will be found while doing regression testing.
- Regression testing should be performed to reduce the risk of poor user acceptance.
- Eg. In the Checkout process, there is a mandatory "Checkbox" that users must check. Despite conducting functionality testing for all positive and negative scenarios, one crucial test case was overlooked: verifying the scenario when the 'checkbox' is unchecked, and the user attempts to checkout, the User is able to do the checkout process. Unfortunately, it resulted in a test case failure.
- To enhance the overall quality of the end product, it is important for QA to perform regression testing, identifying and resolving such issues. Doing so can significantly reduce the risk of poor User Acceptance.
.avif)
We should always focus on breaking the system in all possible ways to reduce the count of User Acceptance Testing bugs.
Happy Testing!

Ten Drupal issues that pass initial validation but break for real users
One of the most frustrating Drupal issues I have encountered during testing looked completely correct in the administration interface. The content was published, permissions appeared correct, and the Views preview showed the expected results. Yet when I tested the same feature as an anonymous user, the content was missing because of a configuration issue that was invisible from the backend.
What looked like a permissions problem turned out to be correct configuration behaving differently for anonymous users. Since then, I have found the same pattern behind almost every Drupal defect that survives initial testing, and each issue in this article is another example of that gap between the administrator view and the real user experience.
This article covers the ten Drupal issues I deliberately test during every QA cycle because they consistently expose defects that are easy to miss during initial validation.
What this article covers
After enough Drupal QA cycles, I noticed the same pattern repeating itself. Most defects that survive initial validation are not caused by custom code. They appear when permissions, caching, Views, taxonomy, multilingual configuration, and editorial workflows interact under real user conditions.
The ten issues below are the ones I deliberately test because they consistently expose that gap between what administrators see and what users actually experience.
Role testing matrix
Before validating individual bugs, I test key Drupal functionality across multiple user roles because many issues only appear when content is viewed from the perspective of actual users rather than administrators.
1. Incorrect User Role Permissions
One of the most common issues I encounter during Drupal testing is permissions behaving differently than expected for specific user roles. The configuration often looks correct in the admin interface. In practice, anonymous users may gain access to restricted content, or editors may be blocked from actions they should be able to perform.
Scenario
One issue I have encountered in Drupal projects is permission inheritance through multiple roles. A user may appear to have limited access based on one role. Permissions inherited from another role can unintentionally grant access to administrative functionality.
For example, I have seen users assigned both Content Editor and Site Manager roles. The Content Editor role was correctly restricted, but the Site Manager role granted permissions that exposed administrative functionality unexpectedly.
Common symptoms
- Anonymous users accessing private pages
- Editors deleting content they should not be able to modify
- Permission denied errors for valid actions
- Users accessing administrative functionality unintentionally
Anonymous Role Permissions
If permissions such as administrative access, content editing, or restricted content viewing are assigned to the Anonymous role, I report it as a permission configuration issue.

- Click on the Anonymous and Content Editor roles and see their permissions
- Anonymous Role Permissions: If the below permissions are assigned to the anonymous Role, then this is the Bug.

Content Editor Role Permissions
Content Editors should only have permissions required for their workflow. I review any elevated permissions that allow administrative actions, user management, or unintended content access because they can introduce security risks.

How I Test Permissions
- Test the same workflow using Anonymous, Content Editor, and Administrator accounts
- Compare expected behavior against actual behavior for each role
- Verify both allowed and restricted actions
- Test direct URL access to restricted pages instead of relying only on navigation menus
- Use Incognito mode to test anonymous access separately from authenticated session
For larger Drupal websites, manual testing alone is rarely enough. I usually combine manual testing with automated scanning tools to catch issues that a scripted walkthrough misses.
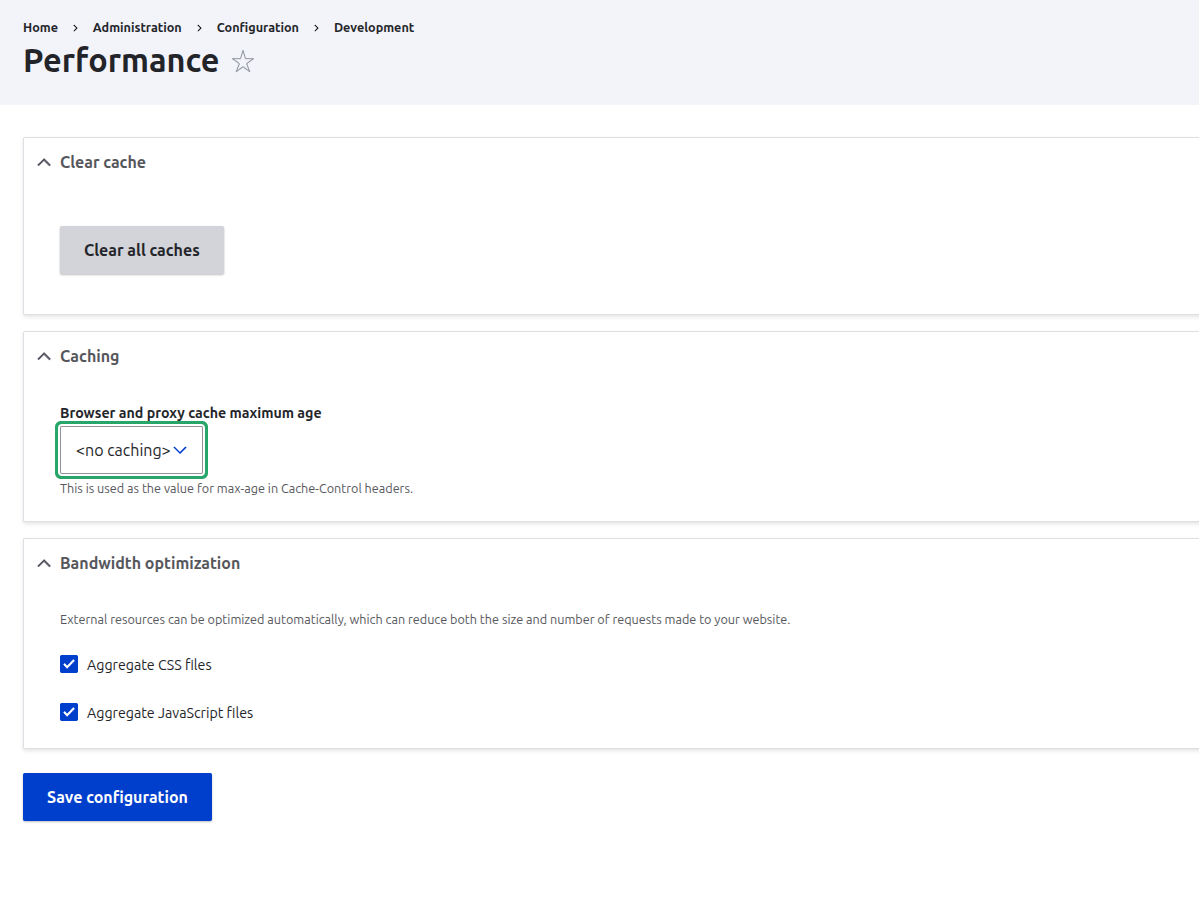
2. Caching showing outdated content
Content is updated correctly in the backend, but users continue seeing older versions on the frontend because one or more caching layers have not been refreshed.
Scenario
Content editors update a page successfully, but the frontend continues displaying older content because one or more caching layers have not been refreshed.
In one project, content editors confirmed their updates were saved correctly, but anonymous users continued seeing an older cached version for several hours because the cache was not invalidated properly.
Examples
- Updated pages not displaying the latest content
- Views showing outdated content
- Deleted content still appearing in listings
- Homepage components displaying old information
How I Test Cache Behavior
- Update existing content and verify changes on the frontend
- Compare page behavior between Administrator and Anonymous users
- Test listing pages and Views after content updates
- Verify whether deleted content still appears in cached listings
- Check if homepage components reflect the latest published content
How I Reproduce the Issue
- Login as an Administrator.
- Update content such as the title, image, or body field.
- Save the content.
- Open the frontend page and verify whether the update is visible.
- Test the same page as an Anonymous user.
- Compare the results between user roles.
- Verify any related Views or listing pages.
Browser-Level Validation
For deeper troubleshooting, I also use browser tools to determine whether the issue originates from browser caching or Drupal caching.
I usually:
- Test in an Incognito window
- Compare behaviour across multiple browsers
- Disable browser cache and refresh the page
- Compare behaviour before and after clearing Drupal caches
3. Form Validation Issues
Form validation issues are often easy to overlook because the form appears to function correctly at first glance. Users can enter data, click Submit, and receive a successful response, but the system may still accept incomplete or invalid information.
In Drupal projects, I have seen required fields bypassed and validation rules behave inconsistently. Even more frustrating, frontend validation worked correctly while backend validation silently accepted invalid data.
Scenario
Forms sometimes accept incomplete, invalid, or incorrectly formatted data even though validation rules appear to be configured correctly.
Common symptoms
- Required fields accepting empty values
- Invalid email formats being accepted
- Missing validation messages
- Forms accepting unexpected special characters
- Frontend validation working while backend validation fails to enforce the same rules

- Verify that required fields display validation messages when left empty and that invalid email formats are rejected before the form can be submitted.

How I Test Form Validation
- Submitting forms with empty required fields
- Testing invalid email formats
- Entering special characters and unexpected values
- Verifying validation messages appear correctly
- Confirming validation works consistently on both frontend and backend
- Testing field length limits and boundary conditions
4. File Upload Problems
File upload functionality often looks straightforward during development but can introduce unexpected issues when tested with real-world content. In Drupal projects, I have encountered cases where upload restrictions were configured incorrectly, allowing unsupported file types to be uploaded or bypassing intended size limitations.
Scenario
Editors are able to upload unsupported file types, exceed configured size limits, or receive unclear validation messages when uploads fail.
One issue I encountered involved SVG files. Upload restrictions appeared correct in the configuration, but SVG uploads were still accepted through a custom workflow. The issue only became visible when testing file types outside the expected content editor journey.
Examples
- Unsupported file types uploaded successfully
- File size restrictions not enforced
- Missing or unclear validation messages
- Upload failures without meaningful error feedback
- Inconsistent behavior across different file formats
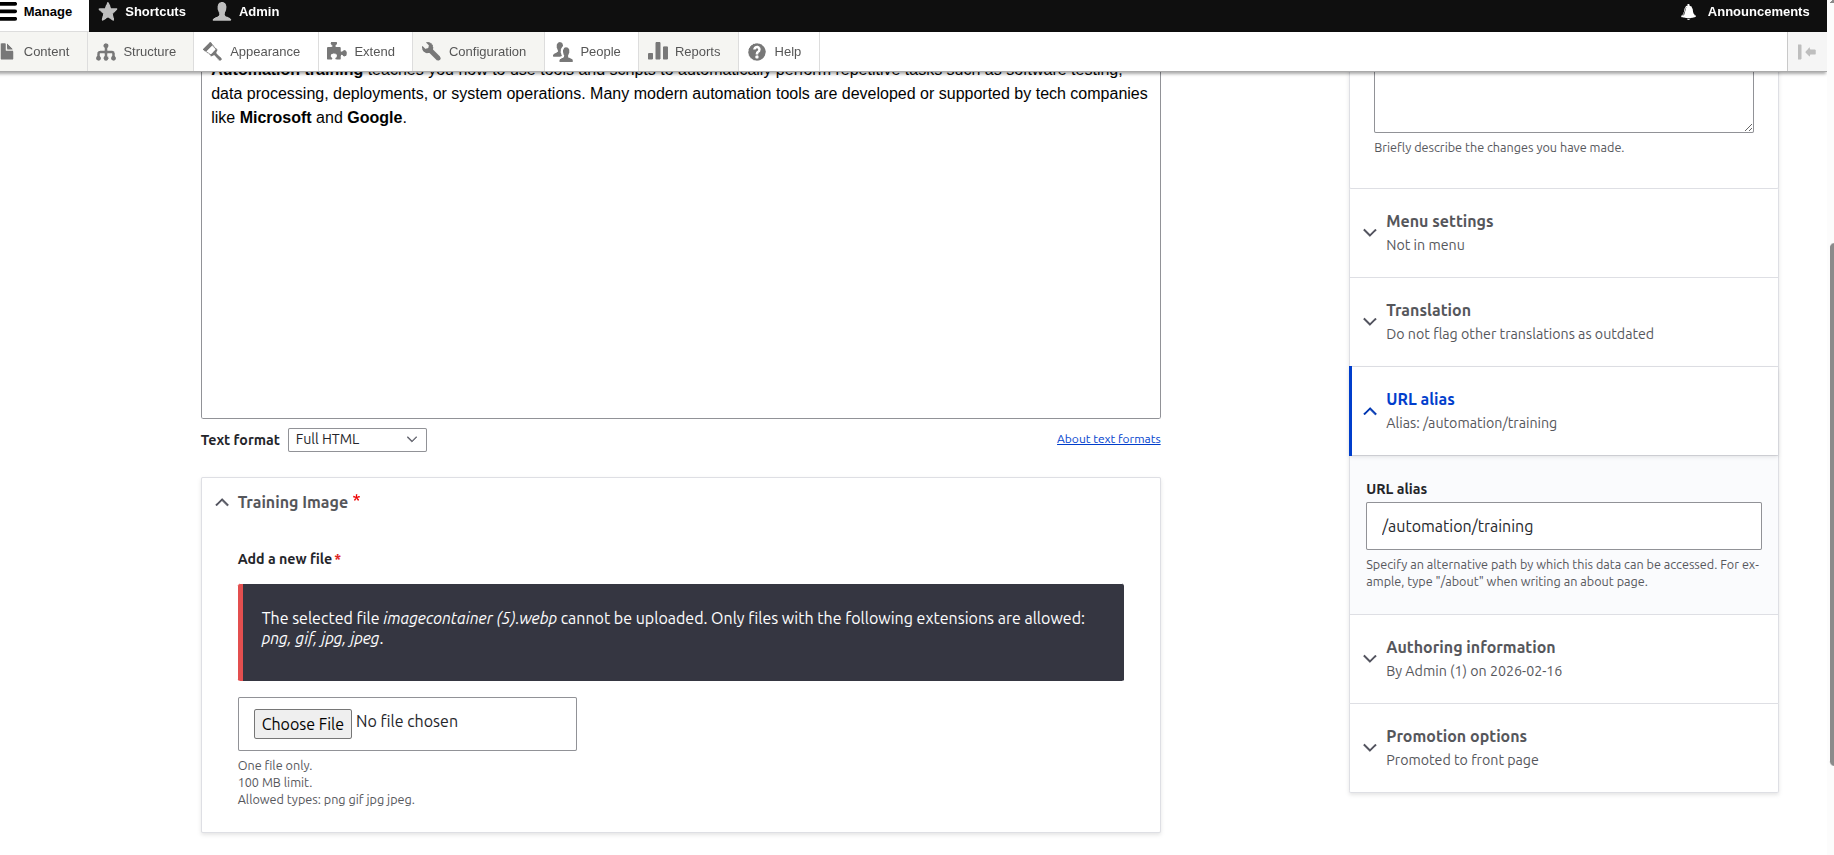
Verify that only approved file extensions can be uploaded and that invalid files are rejected with appropriate validation messages.
How I Test File Uploads
- Uploading supported file formats
- Uploading unsupported file formats
- Testing files that exceed configured size limits
- Verifying validation messages for failed uploads
- Confirming uploaded files can be accessed and downloaded correctly
- Testing uploads across different user roles when permissions are involved
5. Image Style Rendering Issues
Image-related issues are often difficult to identify because the original image exists in Drupal, but one or more generated image styles fail to render correctly on the frontend. The content appears complete in the admin interface while users encounter broken images, missing thumbnails, or incorrectly sized media.
Scenario
Images display correctly in one location but fail in another because a specific image style is not generated or rendered correctly.
Common symptoms
- Thumbnails not generated
- Broken image links
- Incorrect image dimensions
- Missing image derivatives
- Images displaying correctly in the Media Library but failing on the frontend
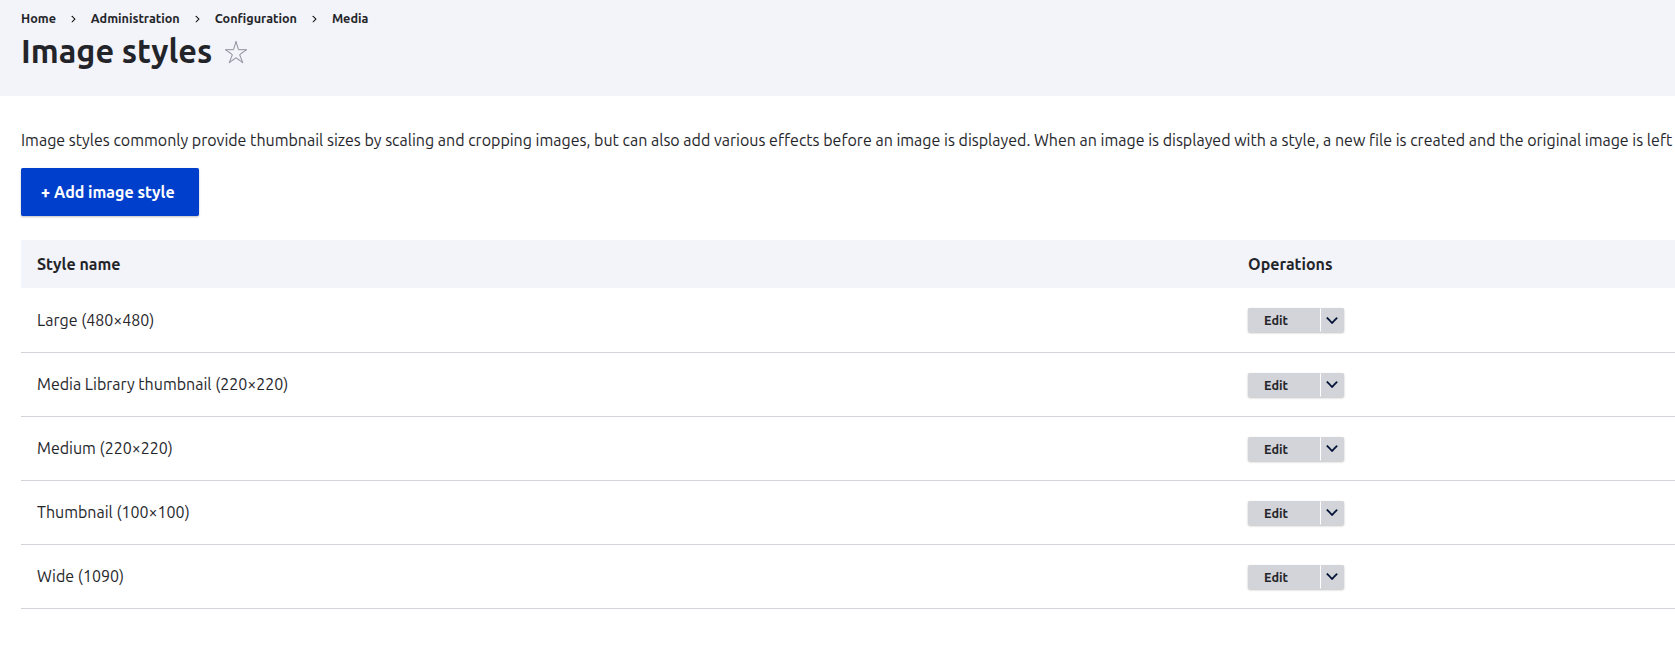
- The image style configuration may appear correct in Drupal, but if the generated image is missing, broken, or displaying unexpected dimensions on the frontend, I report it as an image style rendering issue.

How I Test Image Styles
- Test multiple image styles such as Thumbnail, Medium, and Large
- Check images across listing pages, content pages, and media displays
- Compare rendered images against expected dimensions
- Inspect image URLs to confirm the correct image style
- Verify image behavior after media updates or migrations
6. Views Displaying Incorrect Data
Views are one of the most powerful features in Drupal, but they are also responsible for many of the content display issues I encounter during QA. A View may appear perfectly configured in the administration interface while displaying unexpected results on the frontend. Filtering, relationships, permissions, or caching can all be responsible.
I have spent hours debugging View filters only to discover the View was correct. The cache caused the mismatch the whole time. It created the false impression that the filters were broken.
Scenario
Published content may be missing from a View, displayed in the wrong order, or appear multiple times because of filtering, relationships, permissions, or caching behavior.
Examples
- Missing content in listings
- Incorrect filtering results
- Duplicate content appearing in Views
- Incorrect sorting order
- Unexpected content visible to specific user roles

- Review the View configuration and compare the configured filters, sorting criteria, and display settings against the frontend output. If I find a mismatch between expected and actual results, I investigate the View configuration, permissions, and caching behavior.
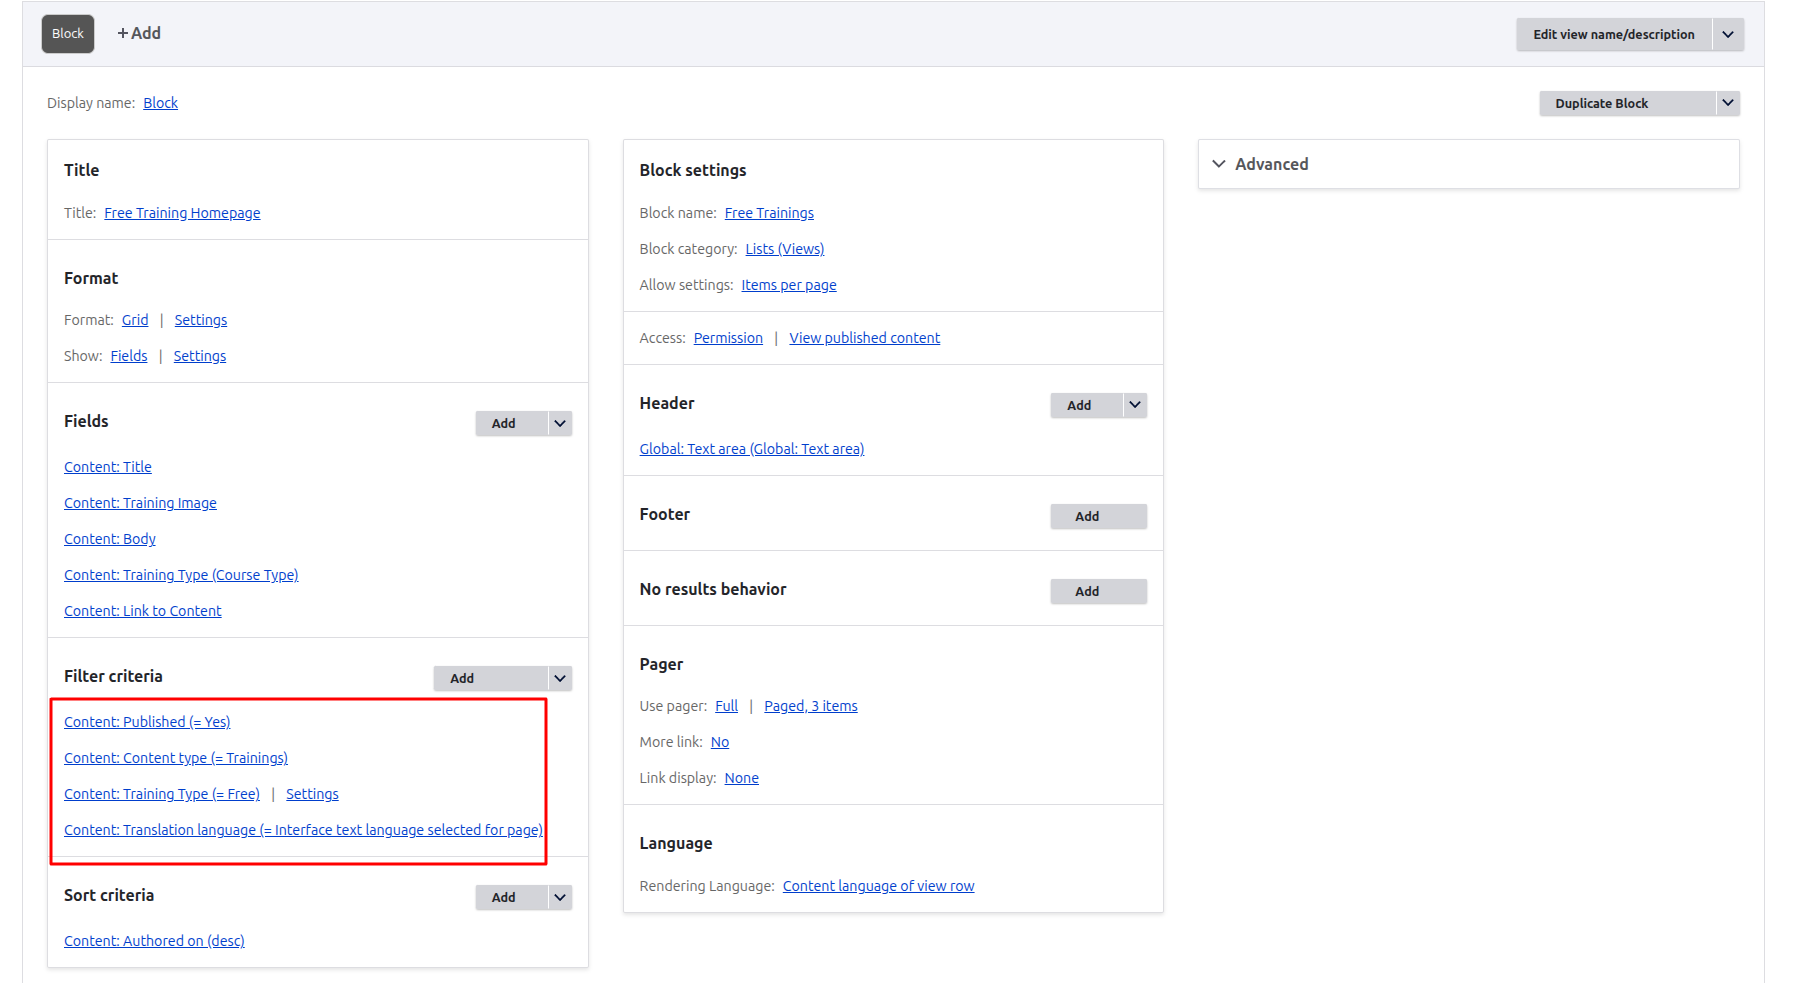
My Views Troubleshooting Workflow
- Test multiple filter combinations
- Verify sorting behavior
- Compare frontend output against View preview results
- Test behavior across different user roles
- Test content visibility after creating, updating, or deleting content
Additional Checks
- Review filter and sorting configurations
- Check contextual filters
- Compare preview results with frontend rendering
- Test Views after content updates
- Check whether caching affects displayed results
The mistake I made was assuming the Views preview was the source of truth. I spent hours reviewing filters before checking the cache headers. Since then, comparing the preview with the frontend has become my fastest way to separate configuration issues from caching problems.
The lesson I carried into every project after that was simple: if the preview and the frontend disagree, investigate caching before changing the View configuration.
That one mistake changed how I troubleshoot every Drupal project. I now compare the frontend with the View preview before changing any configuration because it tells me whether I'm dealing with caching or with the View itself.
7. Search Functionality Issues
One search issue I frequently encounter is newly published content failing to appear in search results even though the content is accessible through direct URLs. The search feature may appear functional, but users struggle to find information because results are incomplete, outdated, or unrelated to their search terms.
Scenario
Published content is accessible on the site but does not appear in search results, or search returns unrelated content.
Examples
- Newly created content missing from search results
- Irrelevant search results displayed
- Published content not searchable
- Search results showing outdated content
- Unexpected content appearing for specific keywords
- If search results are incomplete or irrelevant, I review indexing, permissions, and search configuration.
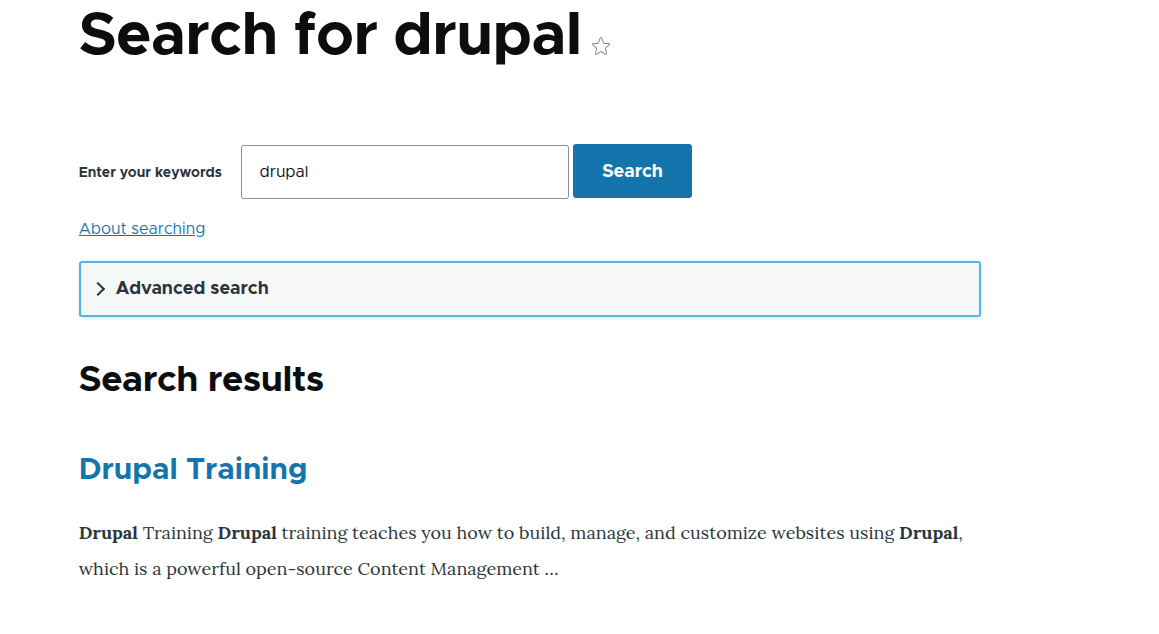
How I Check Search Results
- Test multiple search keywords
- Search for newly published content
- Verify search behavior after content updates
- Compare expected results with actual results
- Test content visibility using different user roles when permissions affect search results
8. Multilingual Content Problems
Multilingual functionality is one of the areas where I frequently encounter issues during Drupal testing. Content may appear translated correctly in the administration interface, but users still see the default language on the frontend, incomplete translations, or inconsistent language switching behavior.
Scenario
Translated content exists in Drupal, but users continue seeing the default language or inconsistent language switching behavior.
One lesson I learned is that translated content often exists correctly in Drupal while language negotiation settings cause users to see the wrong language version. In one project, the URL changed to the selected language, but the content continued displaying in English.
Common symptoms
- Missing translations
- Language switcher not working
- Content displaying in the wrong language
- Translated pages showing default language content
- Inconsistent language behavior across pages
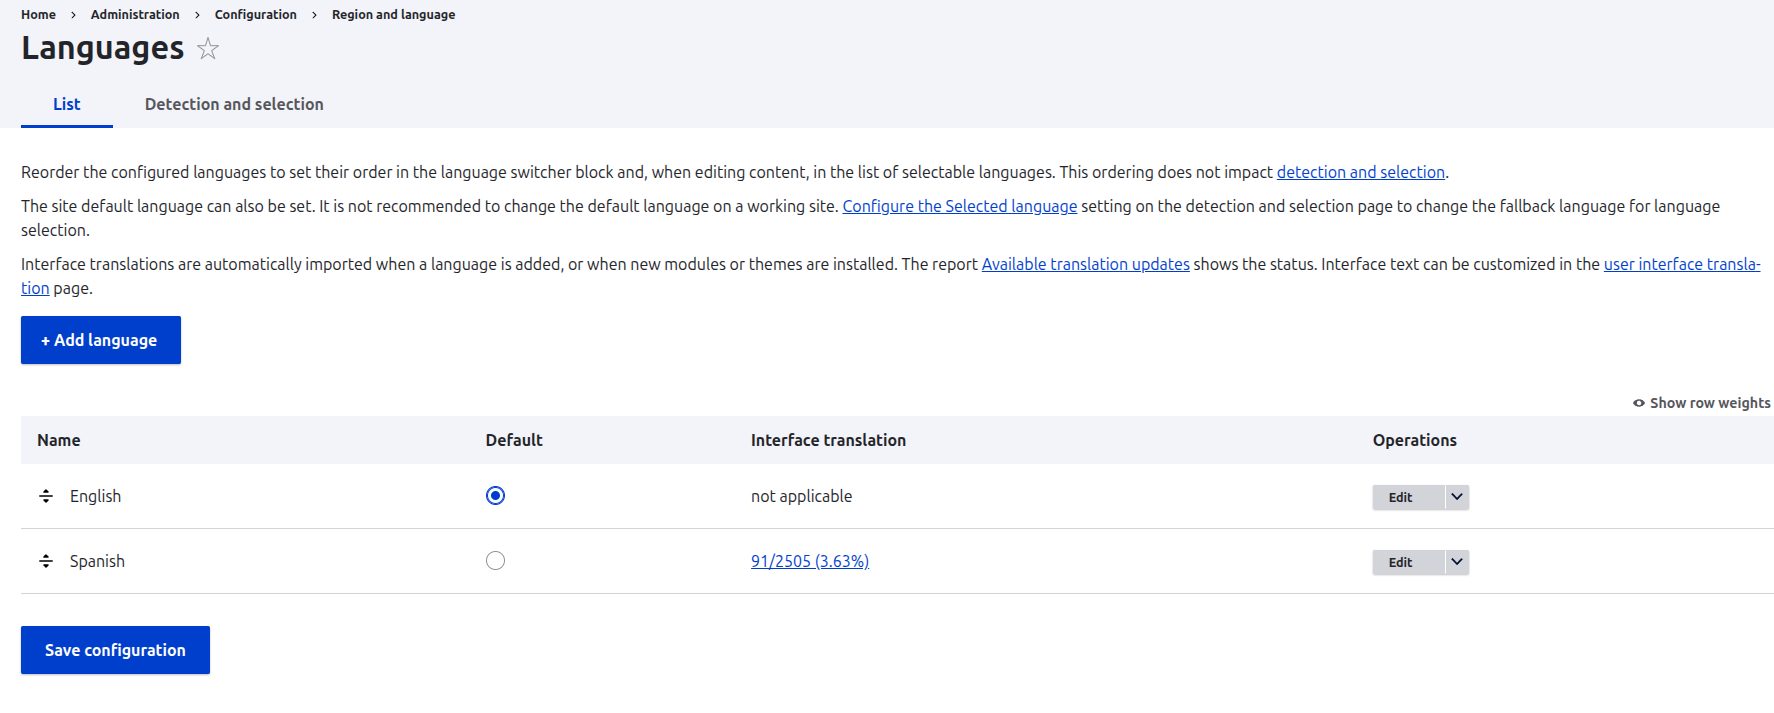
- Verify that all configured languages are available and that translated content displays correctly when users switch between languages.
- When testing translations, ensure that the translated version of the content is displayed instead of the default language version. If the translation exists but users continue seeing the original content, I investigate translation configuration, language negotiation settings, and caching behavior.
- Similarly, verify that the language switcher updates the page correctly and loads the expected translated content.


My Multilingual Testing Approach
- Switch between all supported languages
- Verify translated content on both listing and detail pages
- Test language switching from different entry points
- Check translated menus, labels, and content
- Compare behavior between authenticated and anonymous users
9. Webform Submission Issues
I have encountered Webforms that displayed a success message even though submissions were never stored or notification emails were never sent. These failures often remain unnoticed until someone reports that expected submissions are missing.
Scenario
Forms display a success message, but submissions are not stored correctly or notification emails fail to reach the intended recipients.
Examples
- Submissions not saved
- Email notifications not sent
- Success messages displayed despite processing failures
- Missing confirmation emails
- Incomplete or incorrect submission data

- Verify that the confirmation message appears after form submission and confirm that the submitted data is stored correctly within the Webform submissions area.

How I Check Webform Submissions
- Submit forms using different input combinations
- Verify confirmation messages
- Review stored submission data
- Confirm notification emails are sent
- Test both successful and invalid submission scenarios
10. Taxonomy Filtering Issues
Taxonomy terms drive content listings, search filters, related content, and Views. A single misconfigured vocabulary can affect all of them, making taxonomy issues difficult to trace.
Scenario
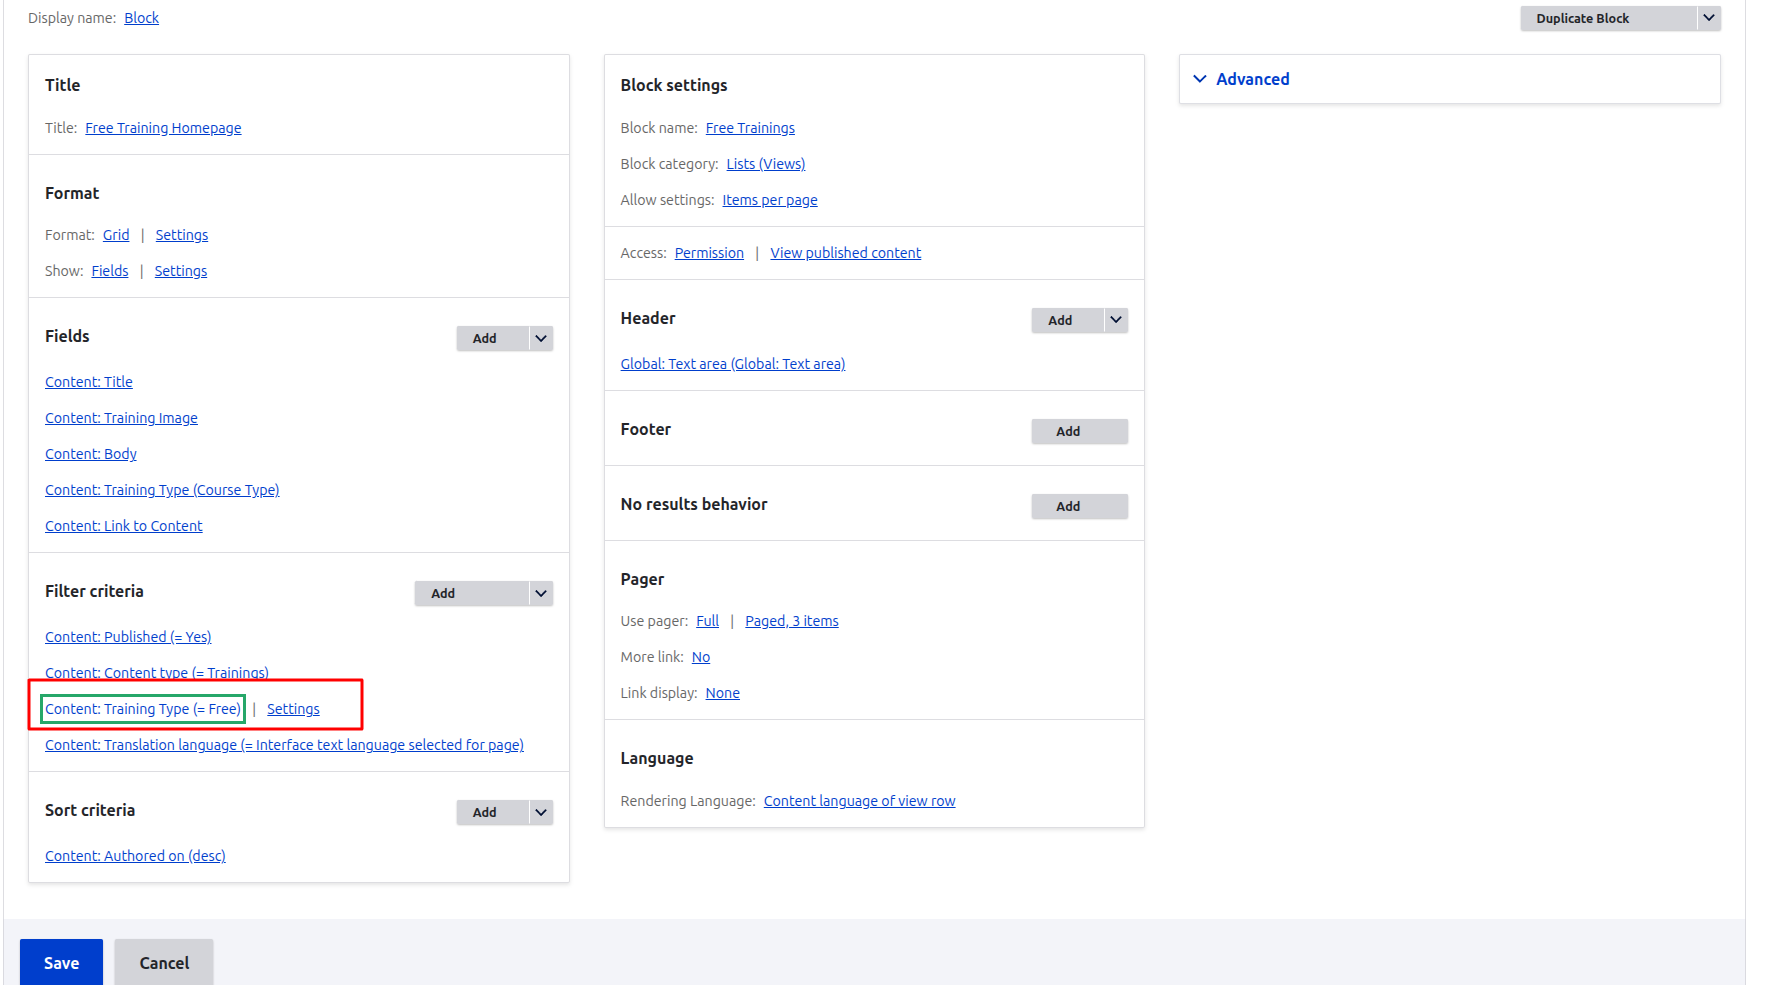
Content tagged with the correct taxonomy terms does not appear in filtered results, or filters return incomplete or unexpected content.
I have seen cases where taxonomy terms were assigned correctly, but a View filter was configured against the wrong vocabulary. The content existed, but users could never find it through filtering.
Examples
- Filters not working in Views
- Tagged content not appearing in filtered results
- Incorrect content displayed under taxonomy terms
- Empty results returned despite matching content existing
- Inconsistent filtering behavior across pages
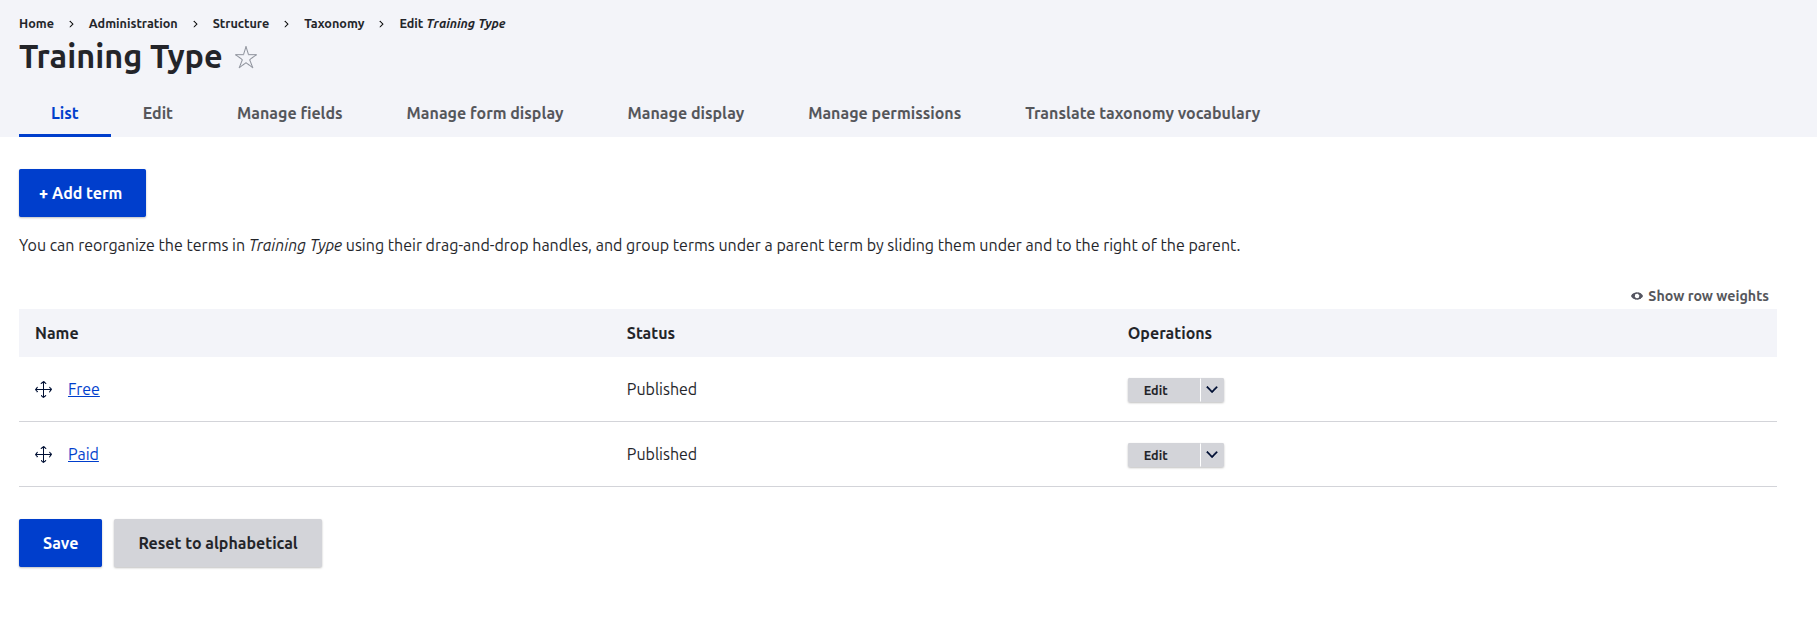
- Review the taxonomy vocabulary, associated terms, and View configuration to confirm that content tagged with a taxonomy term appears correctly when the corresponding filter is applied.
- If content exists but does not appear in filtered results, I review the View configuration, taxonomy terms, and filtering logic to identify the cause.

How I Test Taxonomy Filters
- Test content tagged with multiple taxonomy terms
- Verify filtering behavior across different Views
- Compare expected results against actual results
- Test newly created and updated taxonomy terms
- Test content listings that use taxonomy filters
Drupal QA testing checklist
The issues covered in this article are the areas I consistently check during Drupal testing because they are responsible for a large percentage of content, configuration, and user experience defects that reach staging environments.
Frequently asked questions
How do I test Drupal user permissions without creating separate browser sessions for each role?
Use Chrome profiles or Firefox Multi-Account Containers to maintain multiple authenticated sessions simultaneously. This allows you to test Administrator, Content Editor, and Anonymous user experiences side by side without repeatedly logging in and out. Incognito mode is useful for testing Anonymous user access.
How do I test Drupal caching issues when a CDN or reverse proxy is in front of the site?
Start by comparing the page as an Administrator and as an Anonymous user. Then check the response headers, such as X-Drupal-Cache, Age, or CDN-specific cache headers, to identify whether the response is coming from Drupal, a reverse proxy, or the CDN. This helps isolate the caching layer before investigating the application configuration.
Why does the Views preview show correct data while the frontend page shows different results?
Views preview often bypasses frontend caching layers. The frontend may display cached content, role-specific results, or outdated data. If preview and frontend output differ, verify caching, permissions, filters, and View configuration before reporting the issue.
How do I verify that a Drupal webform submission triggered an email notification?
First, confirm that the submission is stored correctly in Drupal. Then verify that notification handlers are configured and test whether emails are delivered to the intended recipients. If submissions are recorded but emails are not received, check the site's SMTP configuration.
What Drupal modules or tools help automate permission and cache testing?
While most permission and caching issues still require manual verification, tools such as Drupal's Devel module, browser developer tools, automated browser testing frameworks like Playwright, and CI pipelines can help identify permission regressions, caching inconsistencies, and frontend rendering issues more efficiently.
What is the fastest way to confirm whether a Drupal Views issue is caused by caching or filter configuration?
Compare the Views Preview with the frontend page. If the preview returns the expected results but the frontend does not, investigate caching, permissions, or user context before changing the View configuration. If both show incorrect results, review the View filters and relationships.
Can I test multilingual Drupal content before every translation is complete?
Yes. I usually verify language negotiation, menu translation, URL aliases, and fallback behaviour even when only part of the content has been translated. This helps identify multilingual configuration issues before all translations are available.
Conclusion
Most of the ten issues in this list have one thing in common: they looked correct from the administration interface. The content was published, permissions were configured, and the View preview returned the expected results. Then I switched to an anonymous user and discovered something important was missing.
That switch from administrator view to actual user view is still the most valuable QA action in Drupal. Every issue in this article is a variation of the same lesson: stop looking only at the configuration screen and start testing what users actually see.
Test as the user who will use it. Everything else follows from that.

Playwright auto-waiting: what it checks before every click
You know exactly how this goes. You write a test. It passes once, then fails the next morning.
TimeoutError: Waiting for selector ".submit-btn" failedYou add sleep(1000). It passes. You push it. Fails on a slow machine. You bump it to sleep(3000). Now your suite takes 12 minutes. Still fails on staging when the server is having a bad day. You bump it again.
I've been in that loop. The problem isn't the numbers. The root cause is a mismatch: your test runs at code speed, but your UI moves at human speed. Buttons appear after API responses. Modals open at varying times. Form fields stay disabled until validation passes. Every one of those gaps is waiting to break your test.
The playwright's answer isn't a bigger sleep. It's auto-waiting and once you understand how it actually works, you'll know what to do the next time a test breaks instead of just guessing at the number.
By the end of this, you'll know exactly which of five checks failed when Playwright times out and the fix will almost never be a bigger sleep.
TLDR
Playwright checks five things before every action attached to DOM, visible, stable, enabled, not covered automatically, on a retry loop every ~100ms up to 30 seconds. When something fails, the error tells you which check timed out. Read it. The fix is almost always one line.
What auto-waiting actually is
When you write this:
await page.getByRole('button', { name: 'Submit' }).click();
The playwright doesn't fire a click event straight away. It runs a polling loop checking every ~100ms, up to 30 seconds and only fires when the element passes all five actionability checks.
It's not magic. It's a retry loop with smart conditions built in. Every action — click, fill, check, hover, selectOption, dragTo — runs this loop automatically.
The default timeout is 30 seconds. You can override it per-action or globally:
// Per-action
await page.getByRole('button').click({ timeout: 5000 });


// Global config
export default defineConfig({
use: { actionTimeout: 10_000 },
});
What each actionability check actually does
Let's go through each check, because knowing them is what turns a confusing timeout into a one-line fix.
1. Attached to the DOM
The element must exist in the document not hidden via CSS, but actually present in the DOM tree.
// Waits until the element is rendered into the DOM
await page.getByTestId('user-card').click();
This handles lazy-loaded components, skeleton loaders replacing real content, and anything injected by JavaScript after the page loads.
2. Visible
The element must be visible. Playwright checks:
- Display is not none
- Visibility is not hidden
- Opacity is not 0
- The element has a non-zero bounding box (width > 0, height > 0)
// Fails if the modal is hidden; waits if it's animating in
await page.getByRole('dialog').getByRole('button', { name: 'Confirm' }).click();
3. Stable (not animating)
If an element is sliding in, fading up, or otherwise moving, Playwright waits for it to stop. It does this by comparing the element's bounding box across two consecutive frames. If the position changed, it's unstable keep waiting.
// The dropdown animates open. Playwright waits for it to settle.
await page.getByRole('listbox').getByText('India').click();
In practice, this is the check that trips people up most on component libraries with heavy CSS transitions. The element is visible but the playwright won't touch it because it's still moving.
4. Enabled
Form elements input, button, select, textarea must not be disabled.
// Waits until the submit button becomes enabled after form validation passes
await page.getByRole('button', { name: 'Submit' }).click();
// Waits until the submit button becomes enabled after form validation passes
await page.getByRole('button', { name: 'Submit' }).click();
5. Editable (for fill and type)
For input actions, Playwright also checks that the element is not readonly and not disabled.
// Waits for the OTP field to become editable after the SMS is sent
await page.getByLabel('Enter OTP').fill('123456');
How Playwright compares to Selenium and Cypress
Selenium makes you write every wait yourself:
await driver.wait(until.elementLocated(By.css('.submit-btn')), 10000);
await driver.wait(until.elementIsVisible(
driver.findElement(By.css('.submit-btn'))), 5000);
await driver.wait(until.elementIsEnabled(
driver.findElement(By.css('.submit-btn'))), 5000);
const btn = await driver.findElement(By.css('.submit-btn'));
await btn.click();
Cypress is better , it retries get() automatically but you still declare the conditions yourself:
cy.get('.submit-btn', { timeout: 10000 })
.should('be.visible')
.should('not.be.disabled')
.click();
Playwright:
await page.getByRole('button', { name: 'Submit' }).click();
One line. All five checks happen automatically.
When auto-waiting saves you without extra code
Scenario 1: Button appears after an API response
await page.getByRole('button', { name: 'Load More' }).click();
// Waits until the new items actually appear in the DOM
await expect(page.getByTestId('product-card')).toHaveCount(20);
No sleep. No explicit wait. The assertion retries until it's true.
Scenario 2: Multi-step form with dependent fields
// Country field enables State field
await page.getByLabel('Country').selectOption('India');
// State dropdown is disabled until country is selected
// Playwright waits for it to become enabled automatically
await page.getByLabel('State').selectOption('Karnataka');
// Submit is disabled until both are filled
await page.getByRole('button', { name: 'Continue' }).click();
Where auto-waiting won't save you
These are the three cases where you need to help Playwright along.
Case 1: Element is visible but covered by an overlay
The cookie banner and chat widget problem. The element is in the DOM and visible but something is sitting on top of it.
Error: locator.click: Element is not visible
Locator: getByRole('button', { name: 'Sign Up' })
Element: visible
Covered by: <div id="chat-widget" />
await page.locator('#chat-widget .close-btn').click();
await page.getByRole('button', { name: 'Sign Up' }).click();
Case 2: Element that never becomes stable
Some animations loop indefinitely spinners, pulsing indicators. Playwright waits for stability and eventually times out.
// Clicking inside a looping spinner will always timeout
await page.locator('.loading-spinner .inner-text').click();


// Wait for the spinner to disappear first
await expect(page.locator('.loading-spinner')).not.toBeVisible();
await page.locator('.inner-text').click();
Case 3: Page navigations need explicit waits
After a form submit, Playwright doesn't automatically wait for the page to fully navigate before running the next action.
// This might proceed before the page fully navigates
await page.getByRole('button', { name: 'Login' }).click();
await page.getByRole('heading', { name: 'Dashboard' }).waitFor(); // might fail


// Better: wait for the URL change explicitly
await page.getByRole('button', { name: 'Login' }).click();
await page.waitForURL('**/dashboard');
await page.getByRole('heading', { name: 'Dashboard' }).waitFor();
Note: waitForNavigation is soft-deprecated in Playwright v1.26+. Use waitForURL() or waitForLoadState() instead.
How to debug a failed actionability check
When Playwright times out, here's the actual workflow:
Step 1 - Read the error
Playwright's error messages are specific. "Element is not visible", "Element is covered by", "Element is not stable" each one points to a different check. Don't jump to a fix before you read which check failed.
Step 2 - Run with --headed and --slowmo
Watch what actually happens in the browser. Nine times out of ten, you'll see exactly what's blocking the element.
npx playwright test --headed --project=chromium -- test-name
Step 3 - Fix the root cause, not the symptom
If the element is covered, dismiss the overlay. If it's not stable, wait for the animation to finish. If it's disabled, wait for the condition that enables it. Never reach for sleep() to patch a timing issue you don't understand yet.
FAQ
Does auto-waiting work with iframes and shadow DOM?
Playwright's locators handle shadow DOM natively. For iframes, use frameLocator() to scope your locator auto-waiting then applies to the element within that frame.
What happens when the 30-second timeout expires?
Playwright throws a TimeoutError and the test fails at that step. To retry the whole test, configure retries in playwright.config.ts.
Can I disable auto-waiting for a specific action?
Not directly. You can set a very low timeout to fail fast, but there's no flag to skip actionability checks entirely.
How is expect().toBeVisible() different from the auto-waiting visibility check?
The actionability check runs internally before actions like click and fill. expect().toBeVisible() is an explicit assertion that also retries use it when you need to assert state without triggering an action.
Why do my tests pass locally but fail in CI?
Usually two causes: CI machines are slower and hit the default 30s timeout, or overlays (cookie banners, chat widgets) appear in the test environment but not locally. Check which actionability check failed that tells you which environment difference to investigate.
Does auto-waiting apply to page.evaluate() calls?
No. page.evaluate() runs JavaScript directly in the browser and bypasses all actionability checks.
Conclusion
The next time a test fails and someone reaches for sleep(3000), stop. Read the error. Playwright is telling you exactly which check failed attached, visible, stable, enabled, or covered. The fix is almost always one line that addresses the actual condition, not a number that masks it.
sleep() was always a guess. Auto-waiting is Playwright already knowing how to wait. Let it.

WCAG 2.0 to 2.2: what’s new and how to upgrade your website accessibility
In today’s digitally connected world, accessibility is not a “nice to have,” but a legal and moral imperative. The Web Content Accessibility Guidelines (WCAG) offer a set of guidelines to assist in making your website accessible and inclusive for all users, including those with disabilities.
In our earlier blogs, we learned how accessibility laws across the countries comply with the WCAG and how it helps in selecting the correct WCAG level (A, AA, or AAA) for your website.
But how do we handle situations where new versions are released, which might have new features to comply with?
If we have a website that has already been developed according to WCAG 2.0, it is essential to understand how WCAG 2.1 and 2.2 have updated their features compared to their earlier version.
Accessibility core principles and conformance level

Accessibility principles ensure content is perceivable, operable, understandable, and robust so all users can access and use it.
WCAG defines three levels: Level A (basic requirements that remove major barriers), Level AA (standard level with better usability, like good contrast and readable text), and Level AAA (highest level with advanced accessibility features, though not always practical for all content).
WCAG 2.0: the foundation of web accessibility (2008)
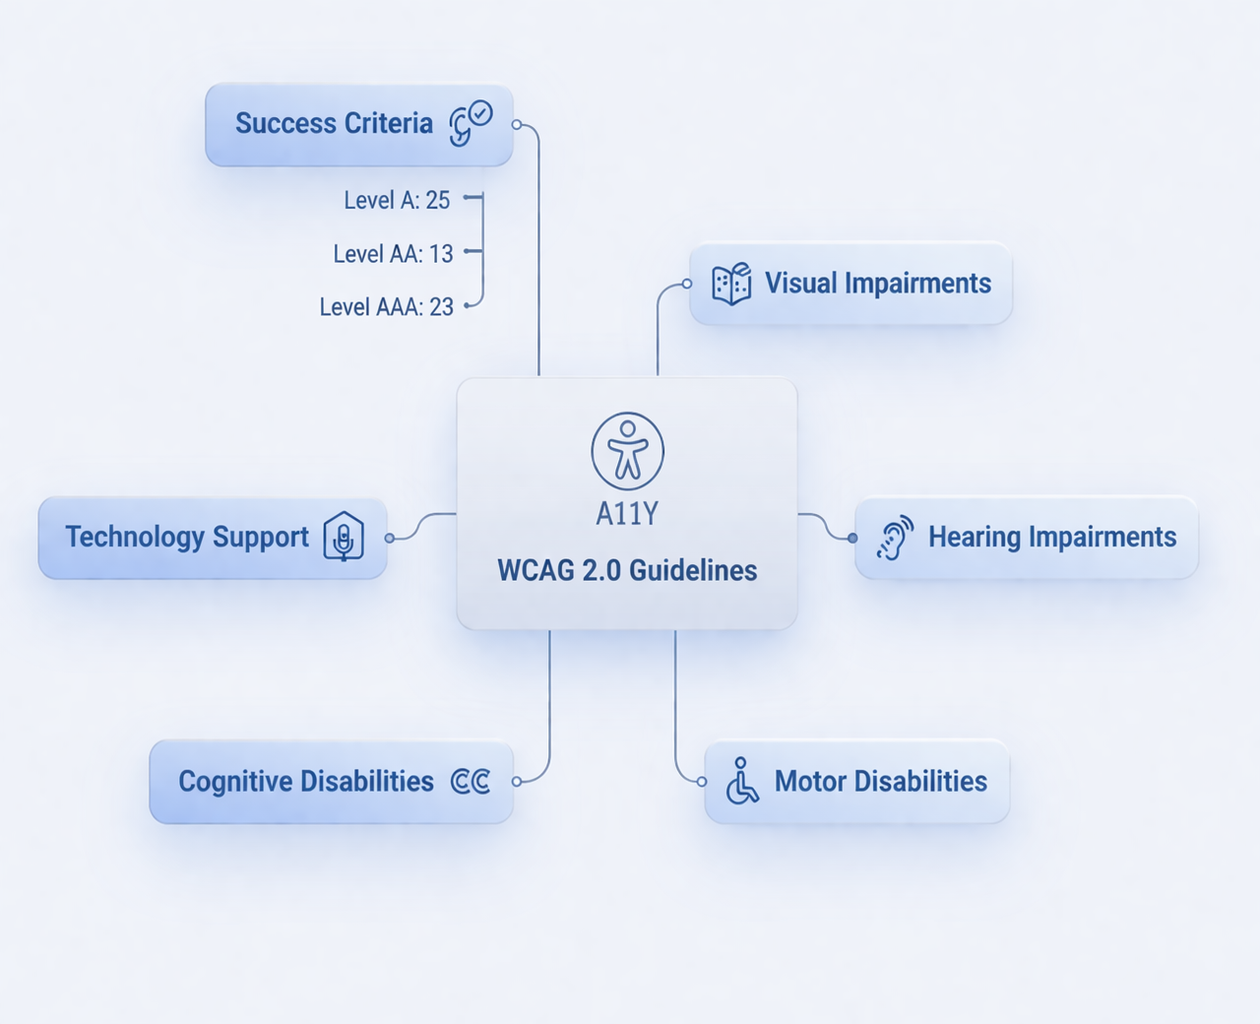
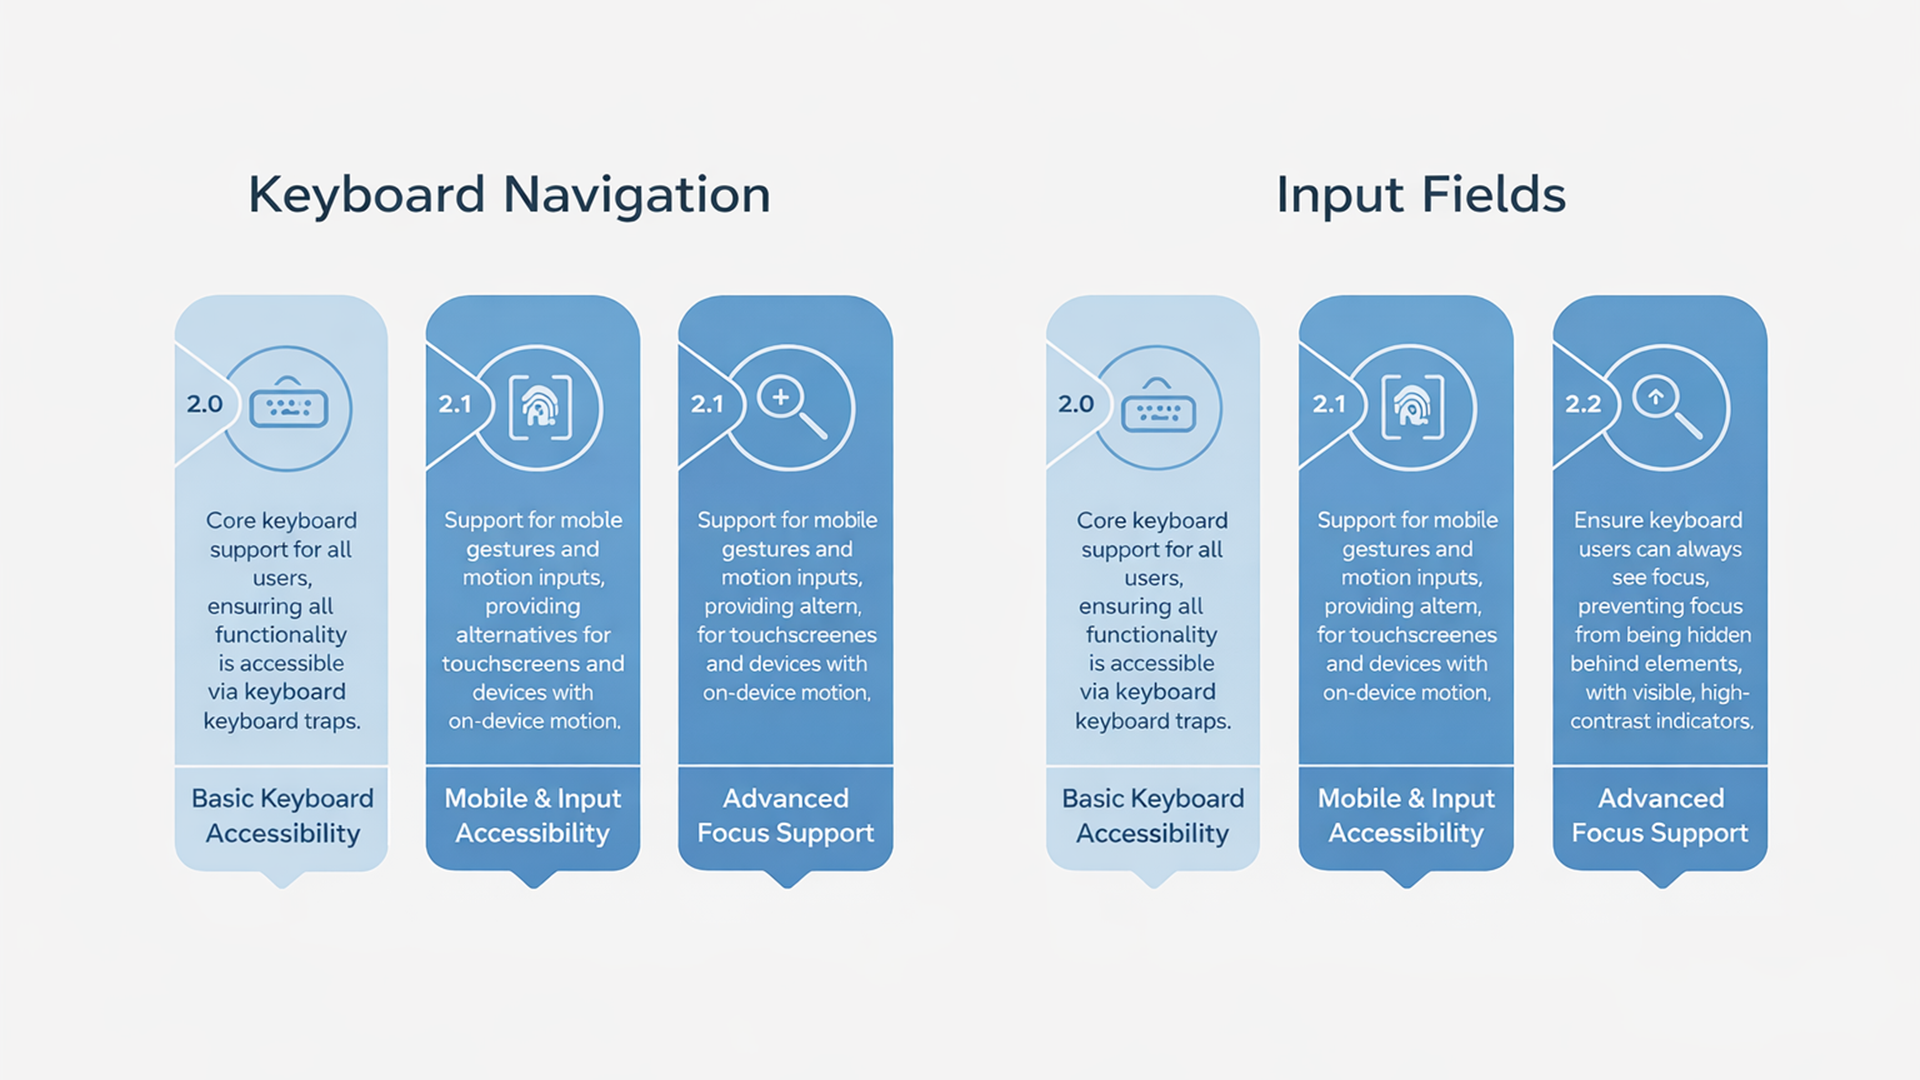
WCAG 2.0 acts as the base with 61 success criteria covering technology support, cognitive, motor skill, hearing, and visual disabilities. It ensures the content is accessible in various ways, navigation is possible with different input devices, the information is understandable, and the website works with different browsers.
WCAG 2.1: accessibility for mobile and low vision (2018)
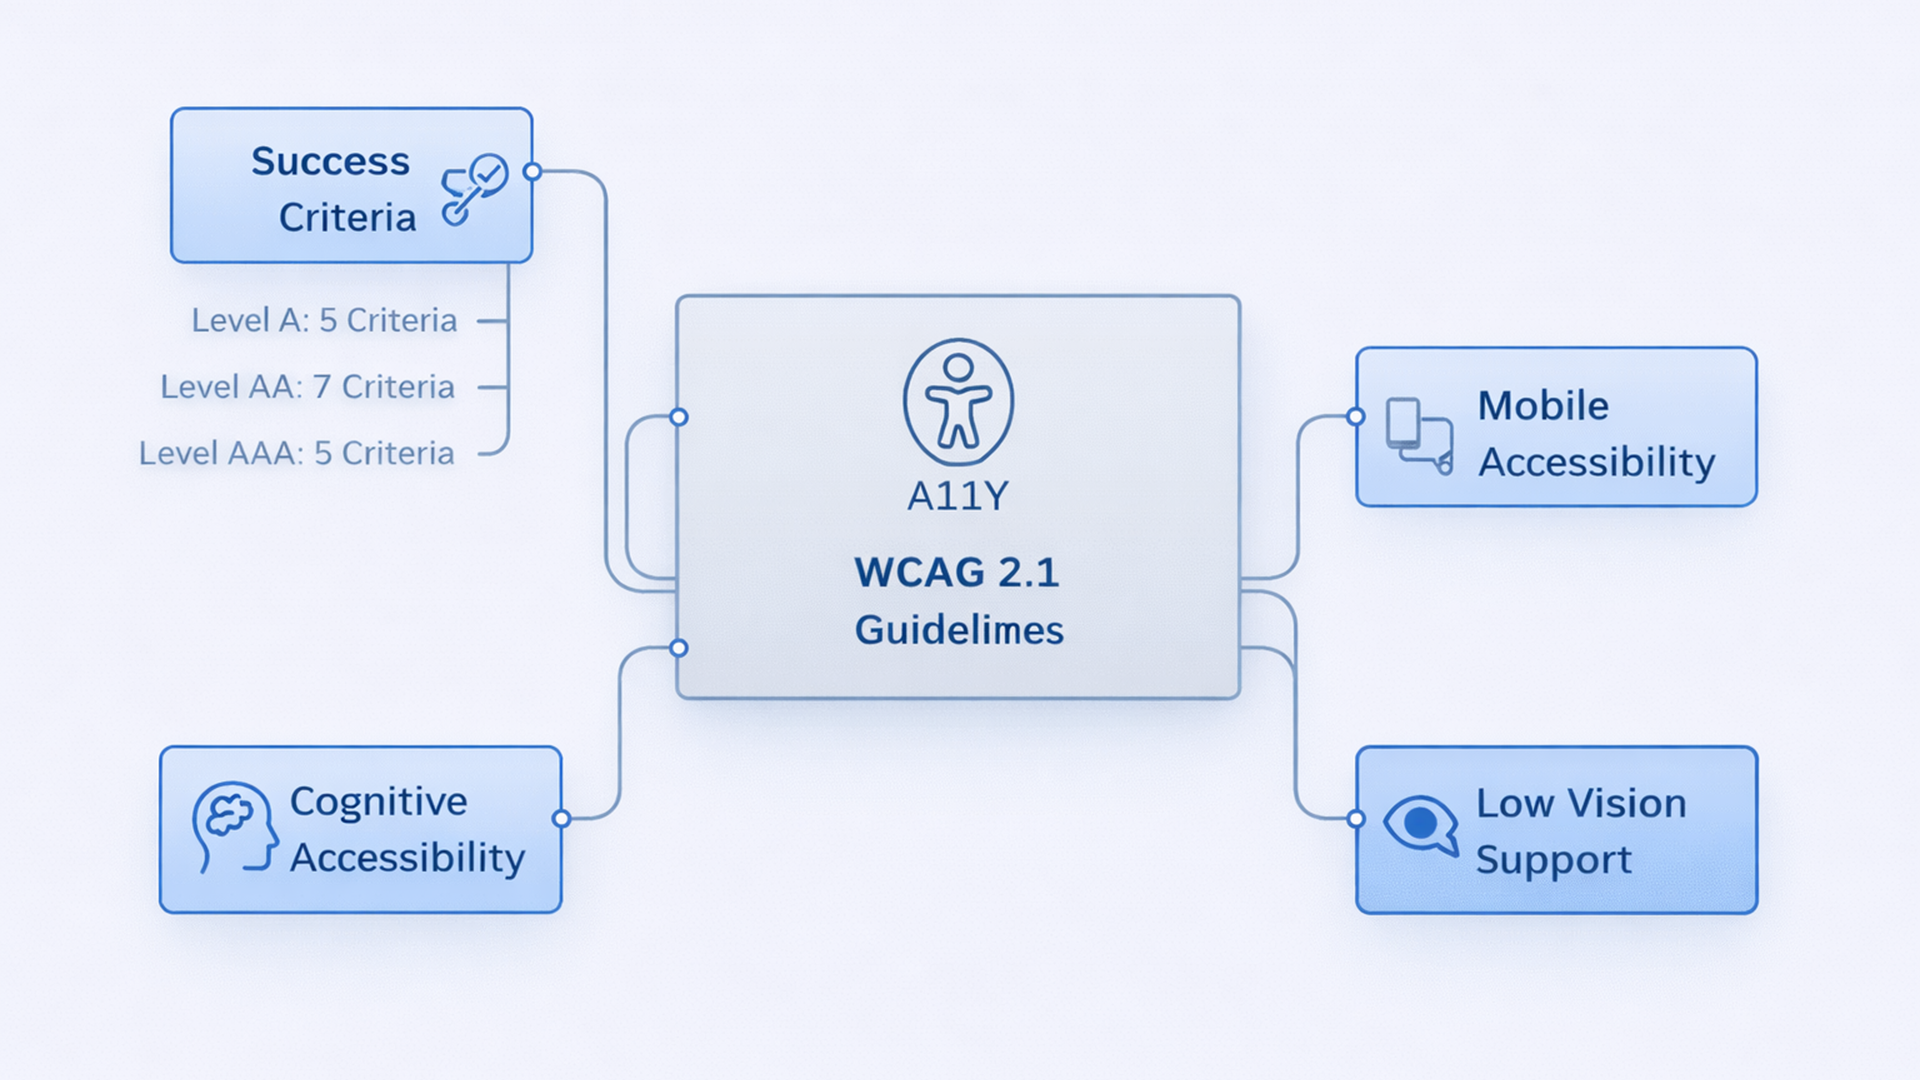
Smartphones and tablets have transformed the way users interact with the internet, especially with the introduction of WCAG 2.1, which is an extension of WCAG 2.0, with 17 new success criteria that focus on mobile devices, low vision, and cognition. It ensures that using a website is touch-friendly, content is legible even if it is zoomed, and it is simple to use.
WCAG 2.2: latest update (2023)
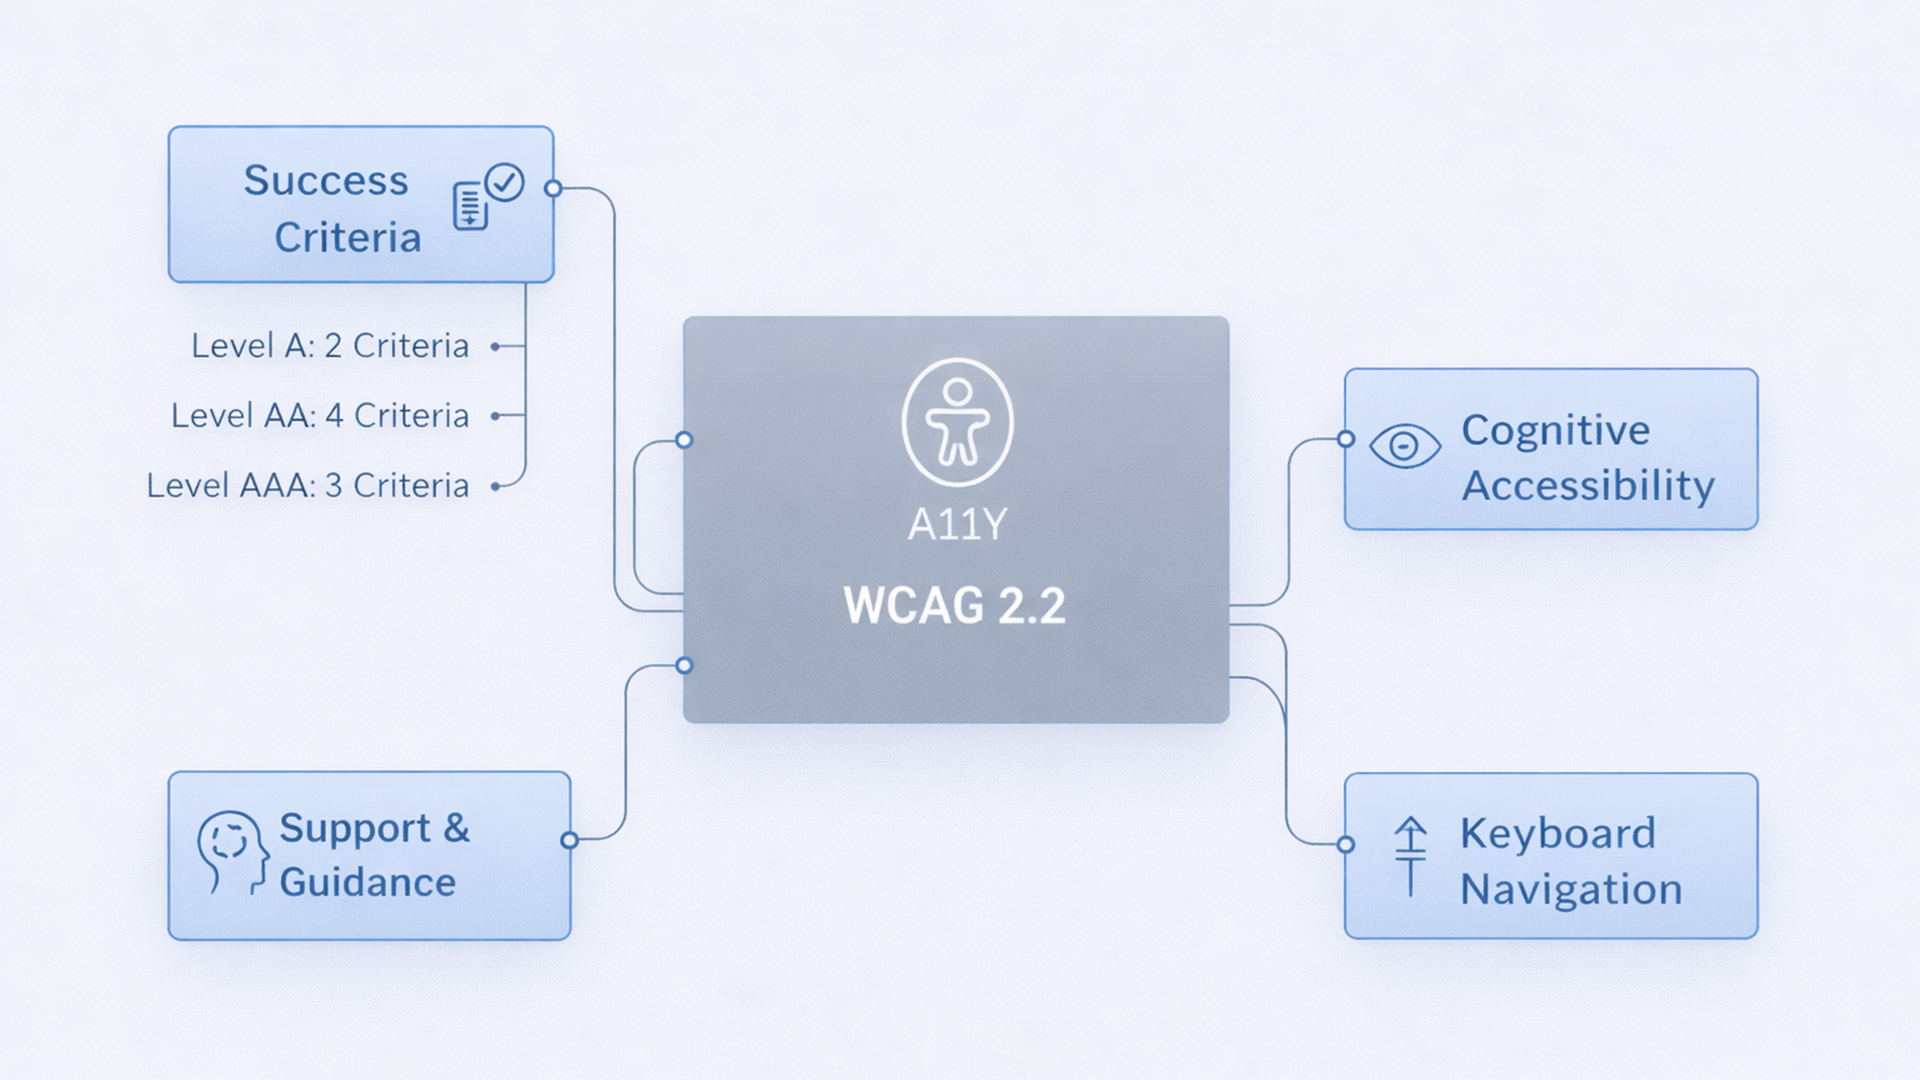
WCAG 2.2, published in October 2023, introduces 9 new success criteria for enhanced cognitive accessibility, keyboard operation, and user support. It has been improved for easier task completion, with all functionality being easily accessible with the keyboard and help functionality being easy to find.
Comparison between WCAG 2.0, 2.1, and 2.2 (examples)
Legal compliances
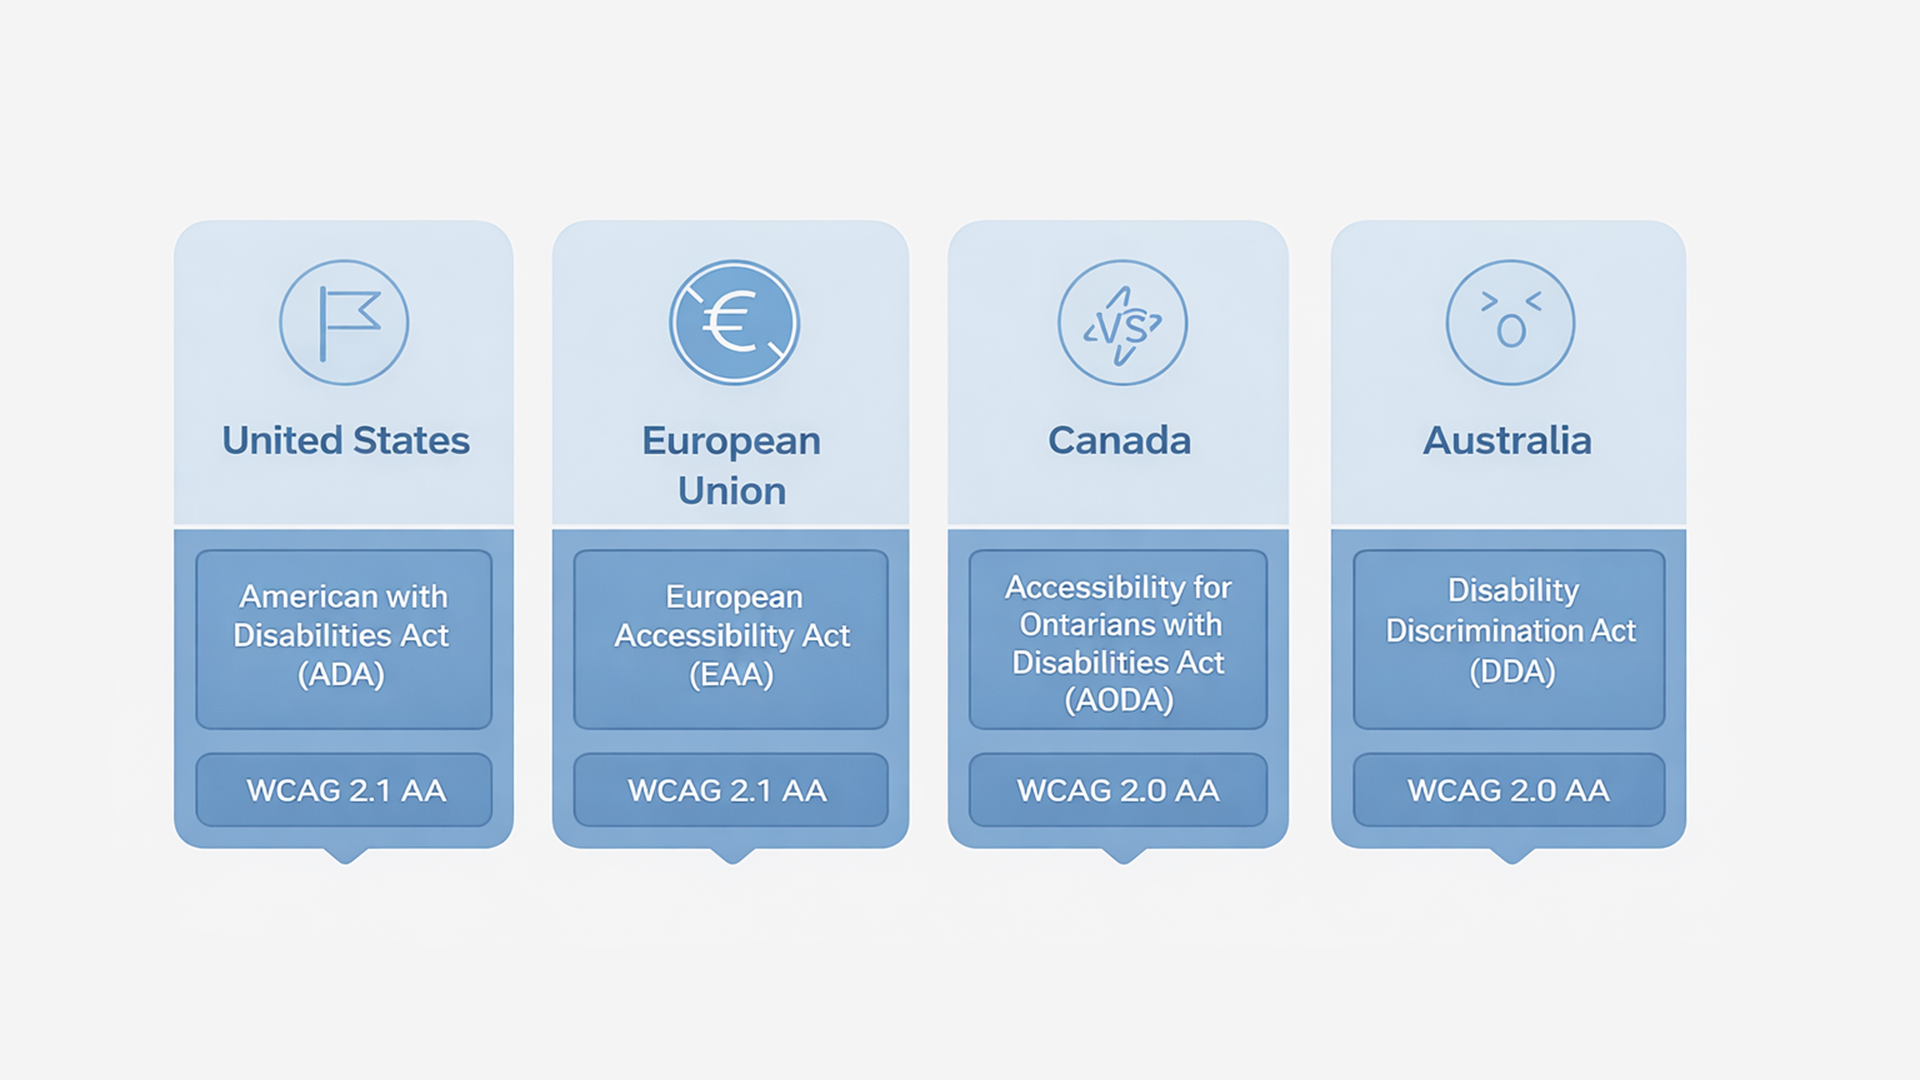
Accessibility compliance ensures that digital content is compliant with existing laws and regulations that protect the rights of people living with disabilities, which are mostly aligned with WCAG guidelines at varying levels. Most compliance is aligned with WCAG 2.1 AA, but now many organizations are moving towards WCAG 2.2 AA as a best practice.
Why upgrade? the benefits are clear
Making your website more accessible is a good idea for many reasons. It means your website will be accessible to more people, it will help you comply with the law, it will improve the overall usability of your website, and it will help create a more inclusive design.
How much effort does it take to upgrade from WCAG 2.0 to 2.1 or 2.2?
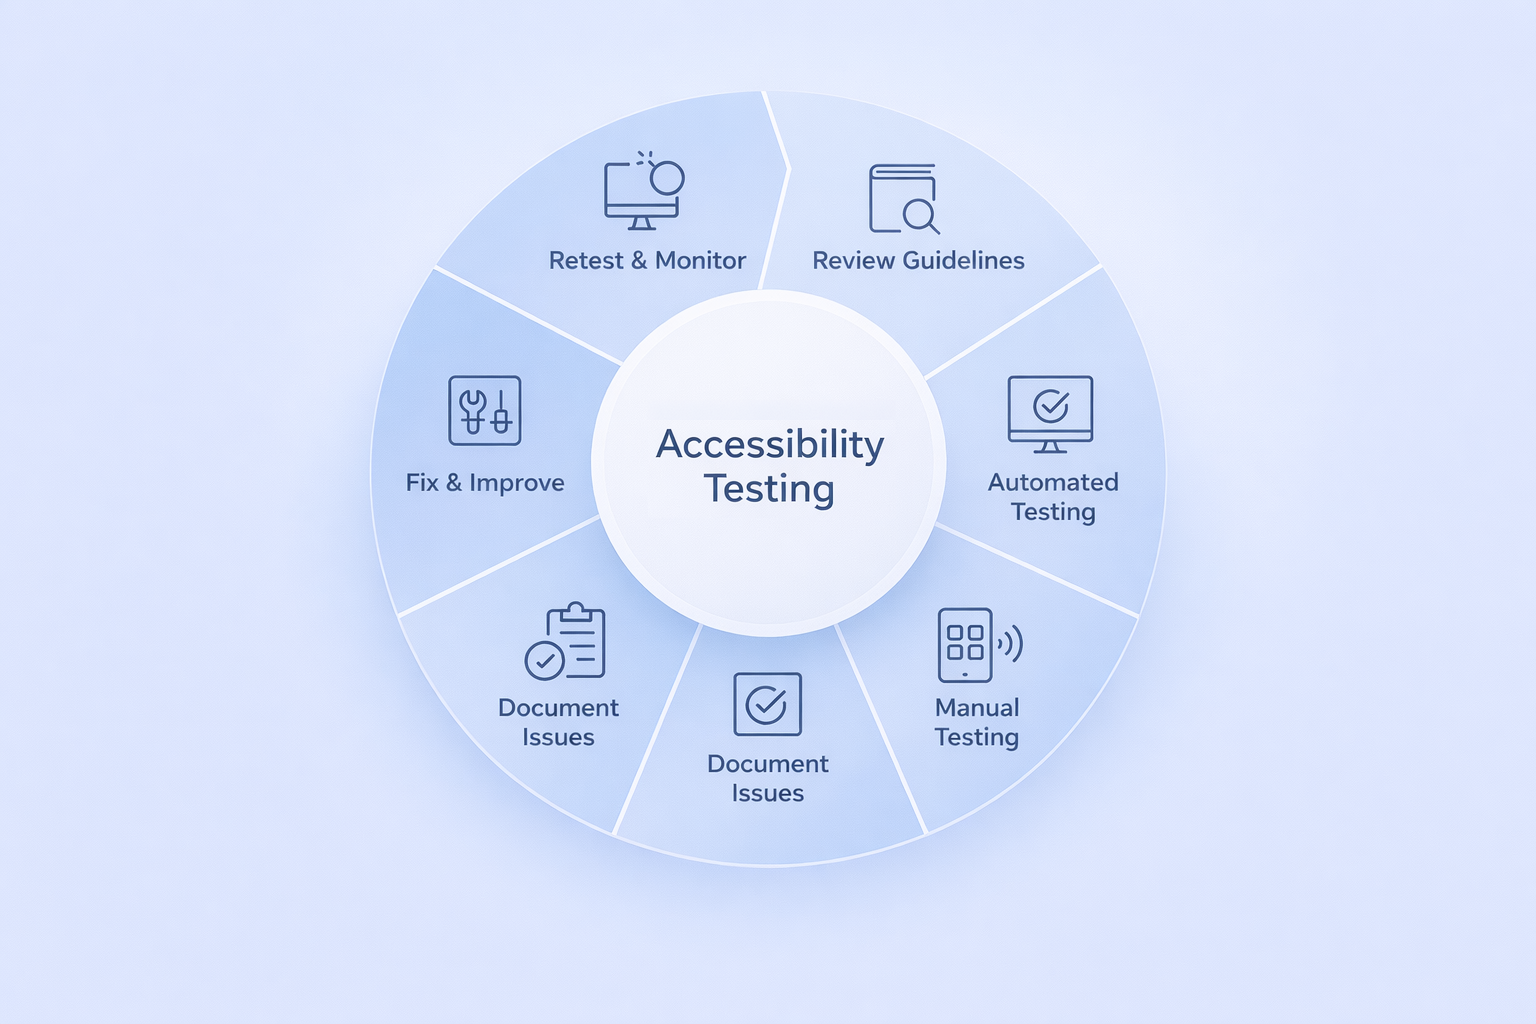
If your site meets WCAG 2.0 Level AA, upgrading to 2.1 or 2.2 is easier than starting over, but it still takes planning and time. Here’s what to expect:
Step 1: Understand the new guidelines
Start by reviewing the detailed new guidelines in WCAG 2.1 and 2.2 to understand how they apply to your site.
Step 2: Run automated accessibility tests (medium effort)
Use tools like Pa11y, Axe, or Lighthouse (set to WCAG 2.1/2.2) to spot common issues, but remember they catch only 30–50% of actual problems.
Step 3: Start manual testing (this is where the main effort begins)
- Mobile-friendly design: Ensure buttons and links are large enough, and gestures work easily with one finger.
- Cognitive-friendly interfaces: Ensure forms, instructions, and time limits are clear, avoiding complex language or confusing layouts.
- Zoom and visibility: Zoom to 400% to ensure content stays accessible, and check contrast on icons, buttons, and inputs for visibility.
- Keyboard use: Navigate the site with just a keyboard, ensuring all elements are accessible and focus moves logically.
- Assistive Technology: Ensure your website is compatible with assistive devices such as screen readers, voice control, etc. This is to ensure that all users can use your website effectively.
Step 4: Document what’s missing
Group issues by the WCAG 2.1 or 2.2 guideline that they violate to prioritise and fix them efficiently
Step 5: Fix and improve (this part varies a lot)
- Development fixes: Some fixes, like tweaking the CSS for button sizes, may be easy and take a short time. However, other fixes, like implementing custom gestures and handling complex forms, may take a while.
- Design updates: Design teams may need to adjust components, colours, and layouts to enhance mobile usability and visual accessibility.
- QA & retesting: Once the fixes have been implemented, thorough testing should be carried out, including the use of automated tools and manual testing, to ensure that the fixes have worked and there are no new issues created in the process.
- Tooling: Accessibility tools should be integrated or updated within the development process, as well as within the QA process, including integration with CI/CD pipelines.
Factors that influence your upgrade effort
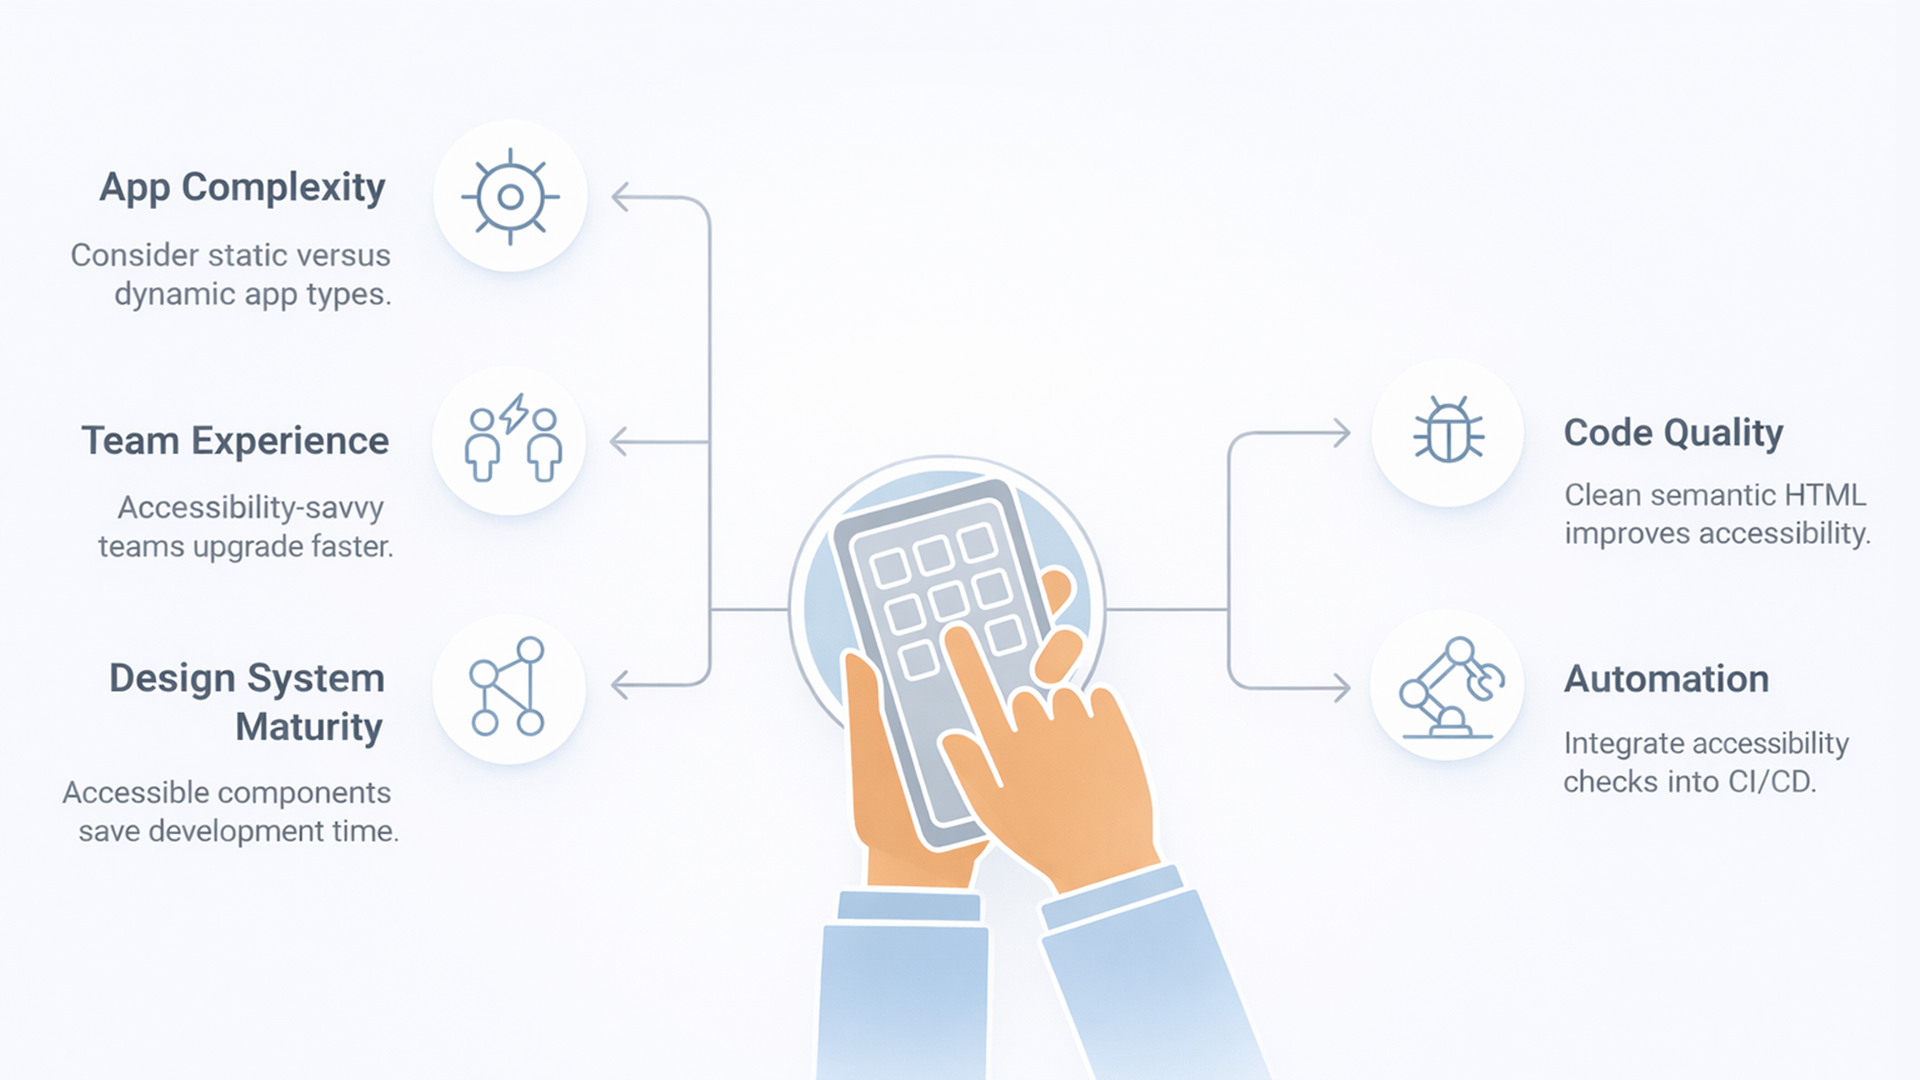
The effort needed to upgrade to WCAG 2.1 or 2.2 isn’t just about the guidelines. It also depends on how your application is built and how your team works. Here are some factors that can greatly affect the workload:
- App complexity: Upgrading a dynamic website is more complex than a static one. This is because of the complex interactions in a dynamic website.
- Code quality: Good, clean HTML and CSS semantics help with upgrades. Bad code may need fundamental changes before new guidelines can be applied.
- Team experience: Teams familiar with accessibility, ARIA, keyboard navigation, and contrast can upgrade faster, while inexperienced teams need more time to learn and implement.
- Testing automation: Adding automated accessibility tests to your CI/CD catches issues early and prevents regressions, speeding up the process.
- Design system maturity: Applications with more mature and accessible design systems can upgrade the entire application by updating a few key components.
A strong foundation makes upgrades easier, while disorganised code, little accessibility knowledge, or no testing framework will require more time to fix.
Conclusion: accessibility as an ongoing journey
The shift from WCAG 2.0 to 2.1 and now 2.2 shows that accessibility is not a one-time task. It’s an ongoing effort. This effort changes as technology advances and as we learn more about how people use digital content.
The best approach is to combine smart tools with human judgment. Use automated checkers to catch common issues. And support them with thorough manual testing. Most importantly, create a culture where accessibility is part of your team’s mindset and daily work.
Ultimately, accessibility is more than just meeting compliance rules. It’s about building digital experiences that are inclusive, easy to use, and empowering for everyone.
Compliance testing: safeguarding your software against legal and industry risks
Have you ever wondered how companies make sure their products or systems don’t shatter the rules? That’s where Compliance testing is like the last check of the rulebook.
Compliance testing acts as the final safeguard, ensuring your product not only works but also meets the legal, security, and accessibility standards that protect businesses from costly risk. This procedure is all about making sure that everything follows the correct rules or industry standards, whether it's making sure that an app keeps your data safe under laws like GDPR or making sure that new software satisfies safety standards.
Keeping things safe, equitable, and reliable is more important than just checking boxes. Here are some reasons why creating safe and reliable digital products requires compliance testing.
Let's explore what compliance testing is, the requirements you must be aware of, how QA teams approach it, and how it could prevent some quite serious circumstances.
What is Compliance testing in web applications?
Compliance testing is the process of verifying that a web application complies with industry rules, external laws, internal security guidelines, and accessibility standards
It verifies that your application:
- Protects personal data under regulations like GDPR/CCPA.
- Validates accessibility for users with disabilities (WCAG).
- Prevents security risks by addressing known vulnerabilities.
- Aligns with regional laws (e.g., EU Cookie Law)..
QA teams do this important testing to ensure functional, security, and performance testing to make sure nothing is overlooked before a product launches.
Types of Compliance standards you should know
Every industry and location has different requirements for compliance. These are a few of the more popular ones:
- GDPR (General Data Protection Regulation): EU law governs the processing of personal information for EU citizens.Avoids heavy fines in the EU (up to 4% of global turnover) for mishandling personal data. Read More
- CCPA (California Consumer Privacy Act): California law giving consumers rights over personal data collection and usage. Read More
- PCI-DSS (Payment Card Industry Data Security Standard): Safeguards credit card data, preventing breach costs and customer churn.. Read More
- HIPAA (Health Insurance Portability and Accountability Act): Regulates healthcare data in the United States. Read More
- WCAG (Web Content Accessibility Guidelines): Ensures digital content is accessible to individuals with disabilities. Read More
- SOX (Sarbanes-Oxley Act): Enforces financial data transparency, protecting against fraud and legal penalties.
- ISO 27001: Globally recognised information security framework that enhances credibility and client confidence. Read More
Key areas QA teams cover in Compliance testing
QA teams should mainly focus on applications that don't expose the business to legal or compliance risks.
Key focus areas include:
- Data privacy: Verifying sensitive user data is encrypted and never exposed.
- Consent management: Making sure user consent is properly obtained and recorded (e.g., cookie banners).
- Access controls: Verifying that only authorised users can access restricted features or data.
- Audit trails: Checking that system logs record all relevant actions for traceability.
- Accessibility: Confirming the application is usable for disabled users.
- Localisation compliance: Ensures adherence to regional laws (e.g., EU, U.S., APAC).
By integrating these tests at an early stage of development, QA prevents major issues from making it into production.
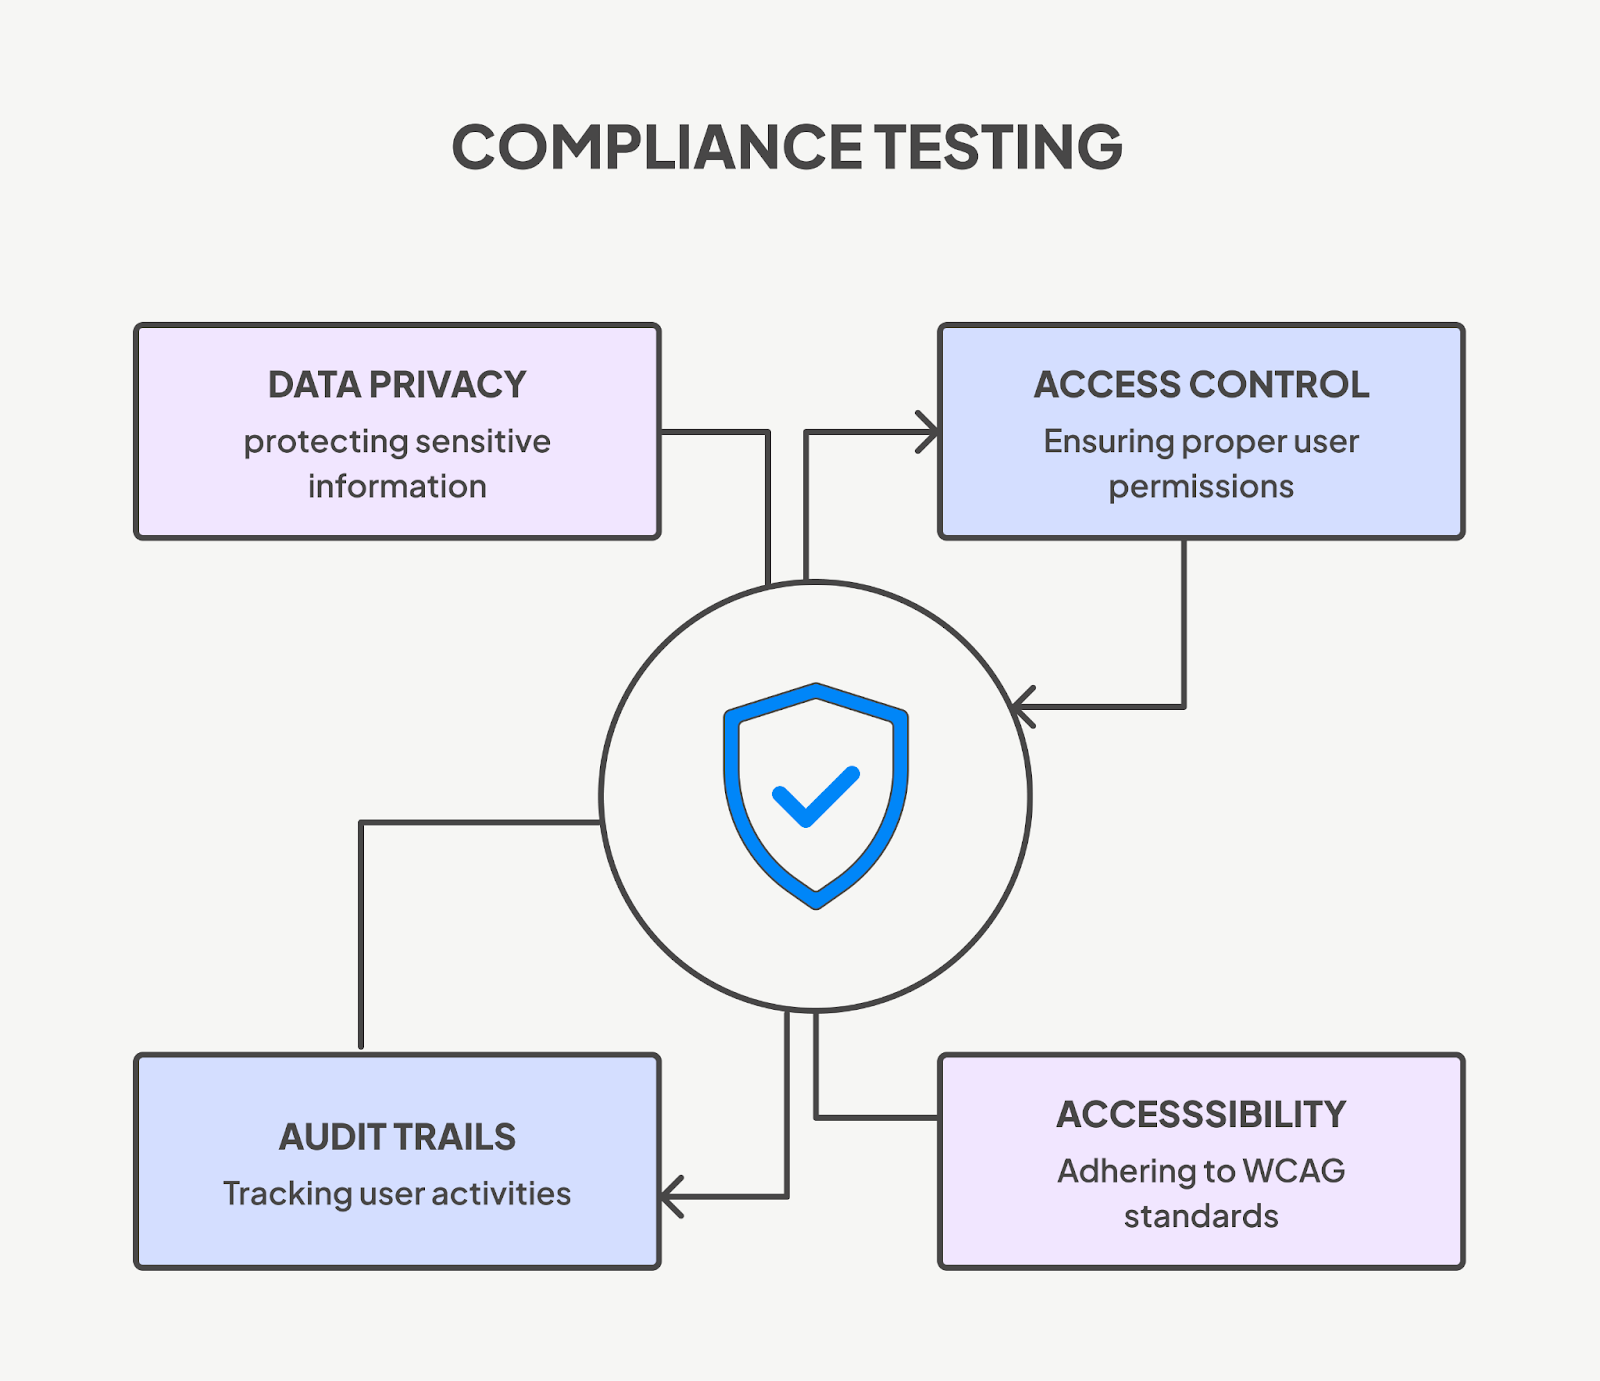
Tools for Compliance testing
In the market, there are many tools available that can be used for compliance Testing.
Some popular tools used by QA teams include:
- Accessibility: Axe DevTools, WAVE, Screen Readers, Keyboard Navigation.
- Security & privacy: OWASP ZAP (security), Postman (API security headers), Cookiebot (consent).
- Performance & SEO: Google Lighthouse (accessibility, performance, SEO compliance).
QA workflow
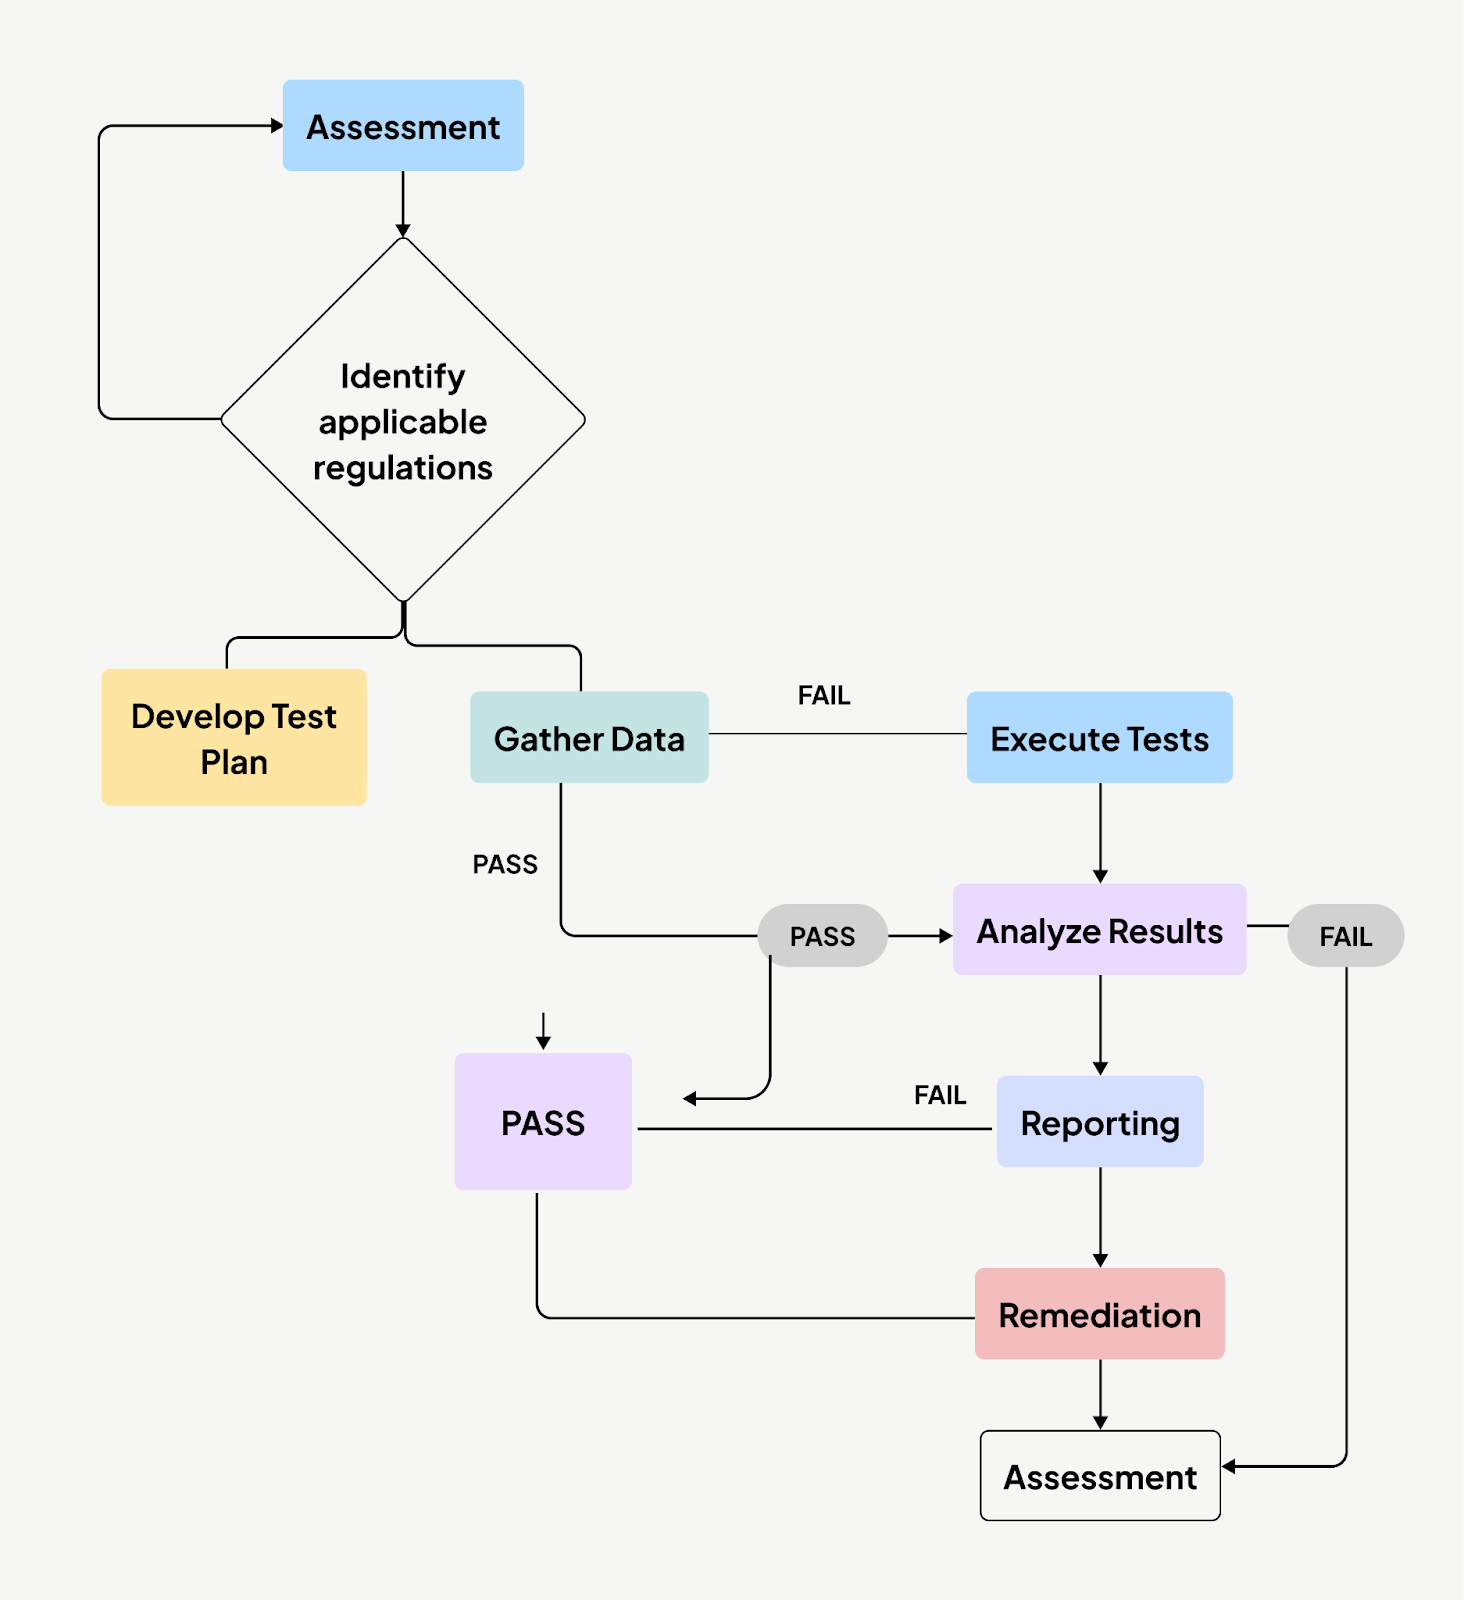
Real-world examples of Compliance testing in action
Here are a few examples of how compliance-focused testing can be done and has saved companies from major trouble:
1. Accessibility Compliance (WCAG 2.1)
Test case:
- Test: Verify that images on the homepage have alternative text (alt attribute).
- Steps:
- Use a tool like Axe DevTools, WAVE, or Lighthouse.
Observation: Images have alt text.
Risk: Missing alt text can lead to non-compliance, accessibility lawsuits, and the exclusion of users
2. GDPR and Cookie Consent Compliance
Test case:
- Test: Verify that the site presents a cookie consent banner on the first visit.
- Steps:
- Open the website in incognito mode.
- Observe whether any tracking cookies (e.g., Google Analytics) are set before the user accepts consent.
Observation:
- A cookie banner appears at the bottom of the screen.
- Use the browser DevTools > Application tab > Cookies to check if third-party cookies are dropped before consent is given.
Bug:
- If Google Analytics cookies (like _ga) are placed on a user’s device before they click “Accept,” it goes against GDPR rules.
Risk: GDPR violation with potential fines up to €20M.
Screenshot:

3. Privacy Policy & Form Data Handling
Test case:
- Test: Verify if the forms (e.g., newsletter signup or contact form) link to the Privacy Policy and collect only necessary data.
- Steps:
- Go to Get Involved.
- Fill and submit a form.
Observation:
- Check if there’s a visible privacy notice or checkbox indicating user consent.
- Use browser DevTools > Network to confirm that submitted data is encrypted (HTTPS) and goes to the right domain.
Bug:
- Form lacks an explicit consent checkbox.
- No immediate privacy policy link near the form.
Risk: The absence of a consent checkbox and policy link can lead to data misuse, potential lawsuits, and loss of user trust.
4. Keyboard Navigation and Screen Reader Support
Test case:
- Test: Verify that users can navigate menus and buttons using just the keyboard.
- Steps:
- Use Tab/Shift+Tab to move through menus and buttons.
- Observe if focus states are visible.
Observation:
- Tab navigation works with elements like buttons and links.
Risk: Ineffective navigation may result in accessibility violations and exclude users with disabilities.
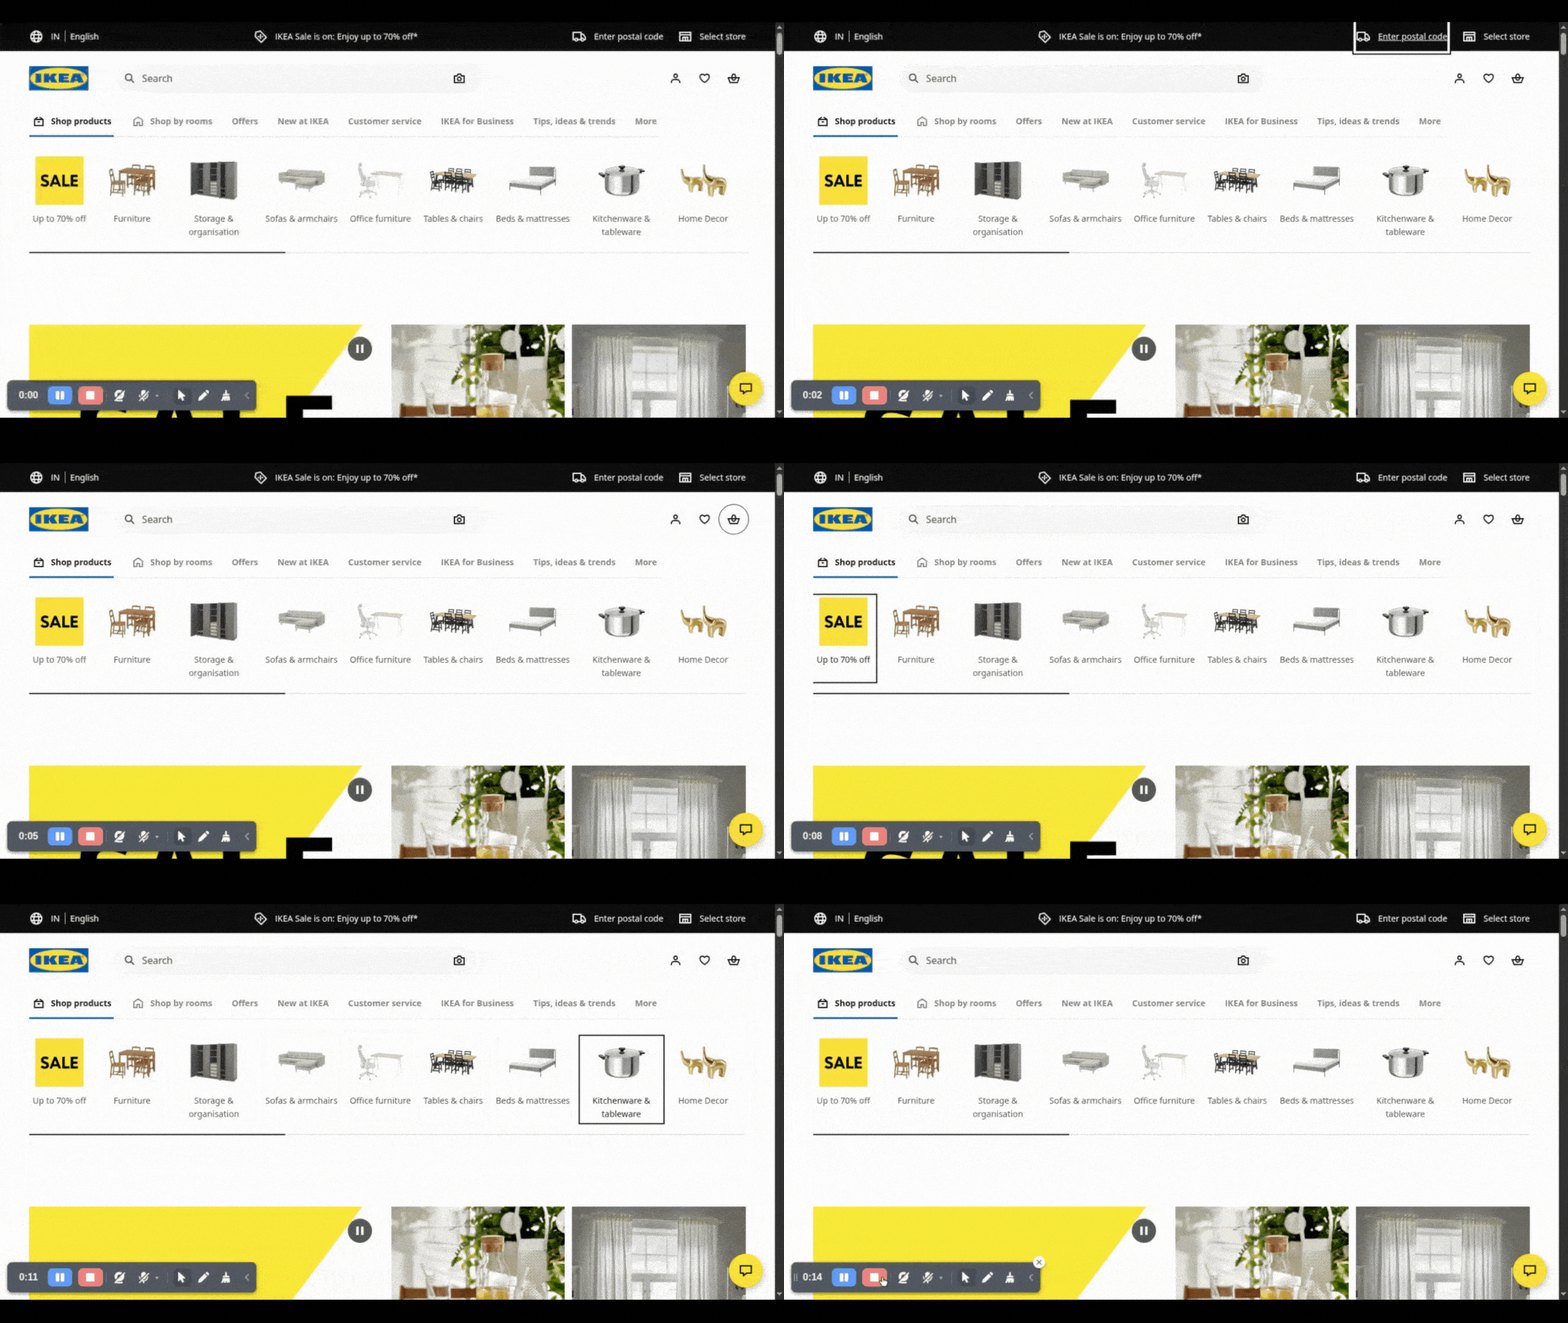
5. Security Headers & HTTPS
Test case:
- Test: Verify that the website uses HTTPS and includes security headers.
- Steps:
- Use tools like SecurityHeaders.com or SSL Labs.
Observation:
- Site uses HTTPS.
Risk: The absence of security headers may expose the application to vulnerabilities, including XSS and man-in-the-middle attacks
Screenshot:

6. Language Declaration & HTML Validation
Test case:
- Test: Verify that the correct language is declared in the HTML tag.
- Steps:
- View page source and check for <html lang="en">.
Observation:
- Language is properly declared — good for screen readers and SEO.
Risk: Missing Language attributes can lead to poor SEO and screen reader misinterpretation
Screenshot:
Best practices for Compliance testing
These are best practices if you want to make compliance testing an efficient part of the QA process.
- Start testing for compliance at the very beginning of the development cycle.
- Use tools to quickly catch high-risk issues.
- Use checklists (GDPR, WCAG, PCI-DSS, HIPAA) to guide testing.
- QA should collaborate closely with legal teams, product owners, and developers.
- Stay Updated: Compliance rules are always changing, so stay up to date or participate in pertinent forums.
- Maintain Records: Keep Documents Up to date. For upcoming audits, preserve thorough logs, reports, and screenshots of test results.
Conclusion
In today’s digital economy, compliance is not optional — it’s a competitive advantage.
Products that prioritise compliance:
- Win user trust.
- Reduce legal and financial risks.
- Stay resilient and future-proof.
Compliance is ultimately about trust. User data is extremely valuable in today's world, and people are concerned about how their personal information is handled.
Compliance testing is crucial for this reason: it protects your platform from potential legal problems and ensures that users can trust it.
Make compliance testing an integral part of your QA strategy, and you’re not just following rules; you’re building trust and protecting your business.

Metamorphic testing for smarter AI quality checks
AI systems are changing at lightning speed, constantly learning and evolving. Testing them with our traditional software testing methods is no longer enough. These AI models produce different outputs every time, never the same and verifying them each time is nearly impossible.
Yet testing AI systems for reliability, accuracy, and consistency is critical, especially as they are increasingly embedded into decision-making processes.
It’s a challenging task since it generates non-deterministic outputs (unclear), and manual verification and test case maintenance every time isn’t possible. To overcome this, metamorphic testing has come into the picture as a powerful strategy in AI testing
What is Metamorphic testing?
Metamorphic testing is used when the output of a system is not consistent over time. MT maps relationships between input and output, and these relationships are referred to as Metamorphic Relations (MRs).
Metamorphic Relations define how output should change (or stay the same) when the input is transformed in a specific, meaningful way. Instead of verifying the same answers, it validates output differences logically.
So instead of saying “ Input A should give Output X ”, we say “ If I change input A in a specific way, the output should increase/decrease/stay the same.”
To illustrate this behaviour, let me give an example :
We have an LLM bot, and let's check the output consistency for the same question answer but with differently phrased input prompts :
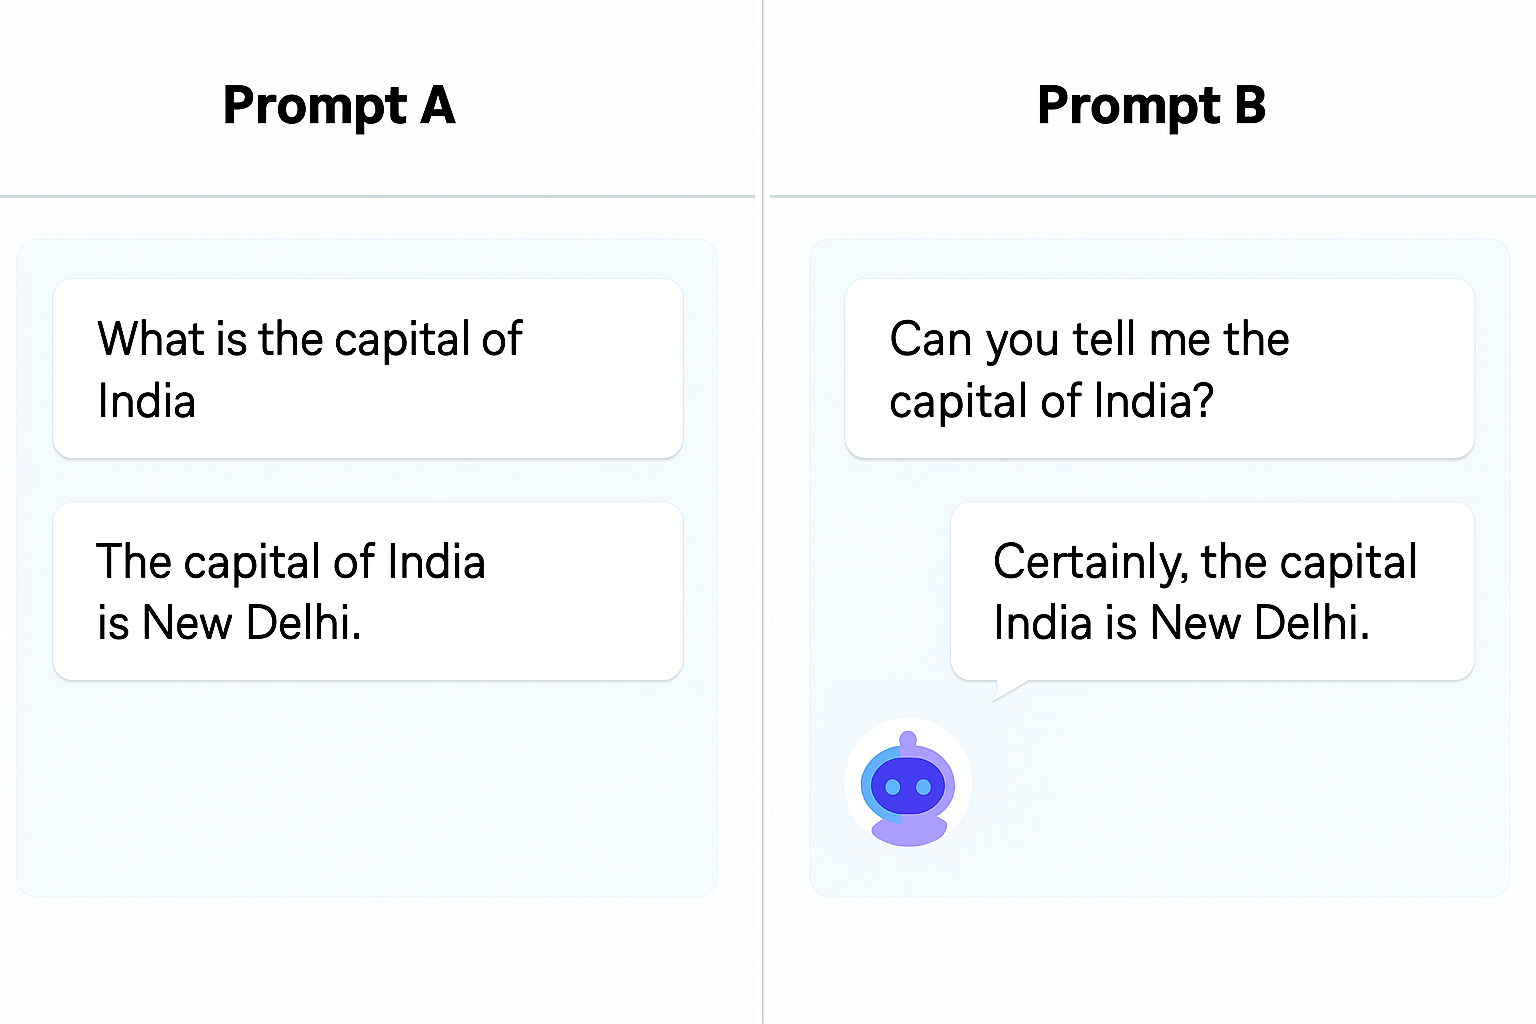
All of these essentially ask the same question, just worded differently. The model must have Delhi in its answers. The goal isn’t to get the same sentence back, but to see whether the core answer remains logically consistent.
So if I use different synonyms or just change my sentence, but the meaning remains the same, the AI model must understand this and change the outputs relatively
Let's check with another example :
Imagine you are making lemonade for 2 people, you know exactly how to make it, but now if you have to make lemonade for 4 people, you will simply double the ingredients. We may not know exactly how many glasses will be produced, but we expect more lemonade because the input has increased predictably. That’s how metamorphic relations work; it’s not about the exact output, but about how the output should change with the input.
Understanding metamorphic relations
1. Increase
When you increase or add something important to the input, the output should also increase.
This is similar to the above lemonade example
Consider an example of Loan return Risk analysis AI of a Bank, the model must predict the risk
Person A has a Salary of 80000 with no debts
Person B, with a Salary of 80000, has 3 loans.
Expected output: Adding loans should make the person riskier, so the score should increase.
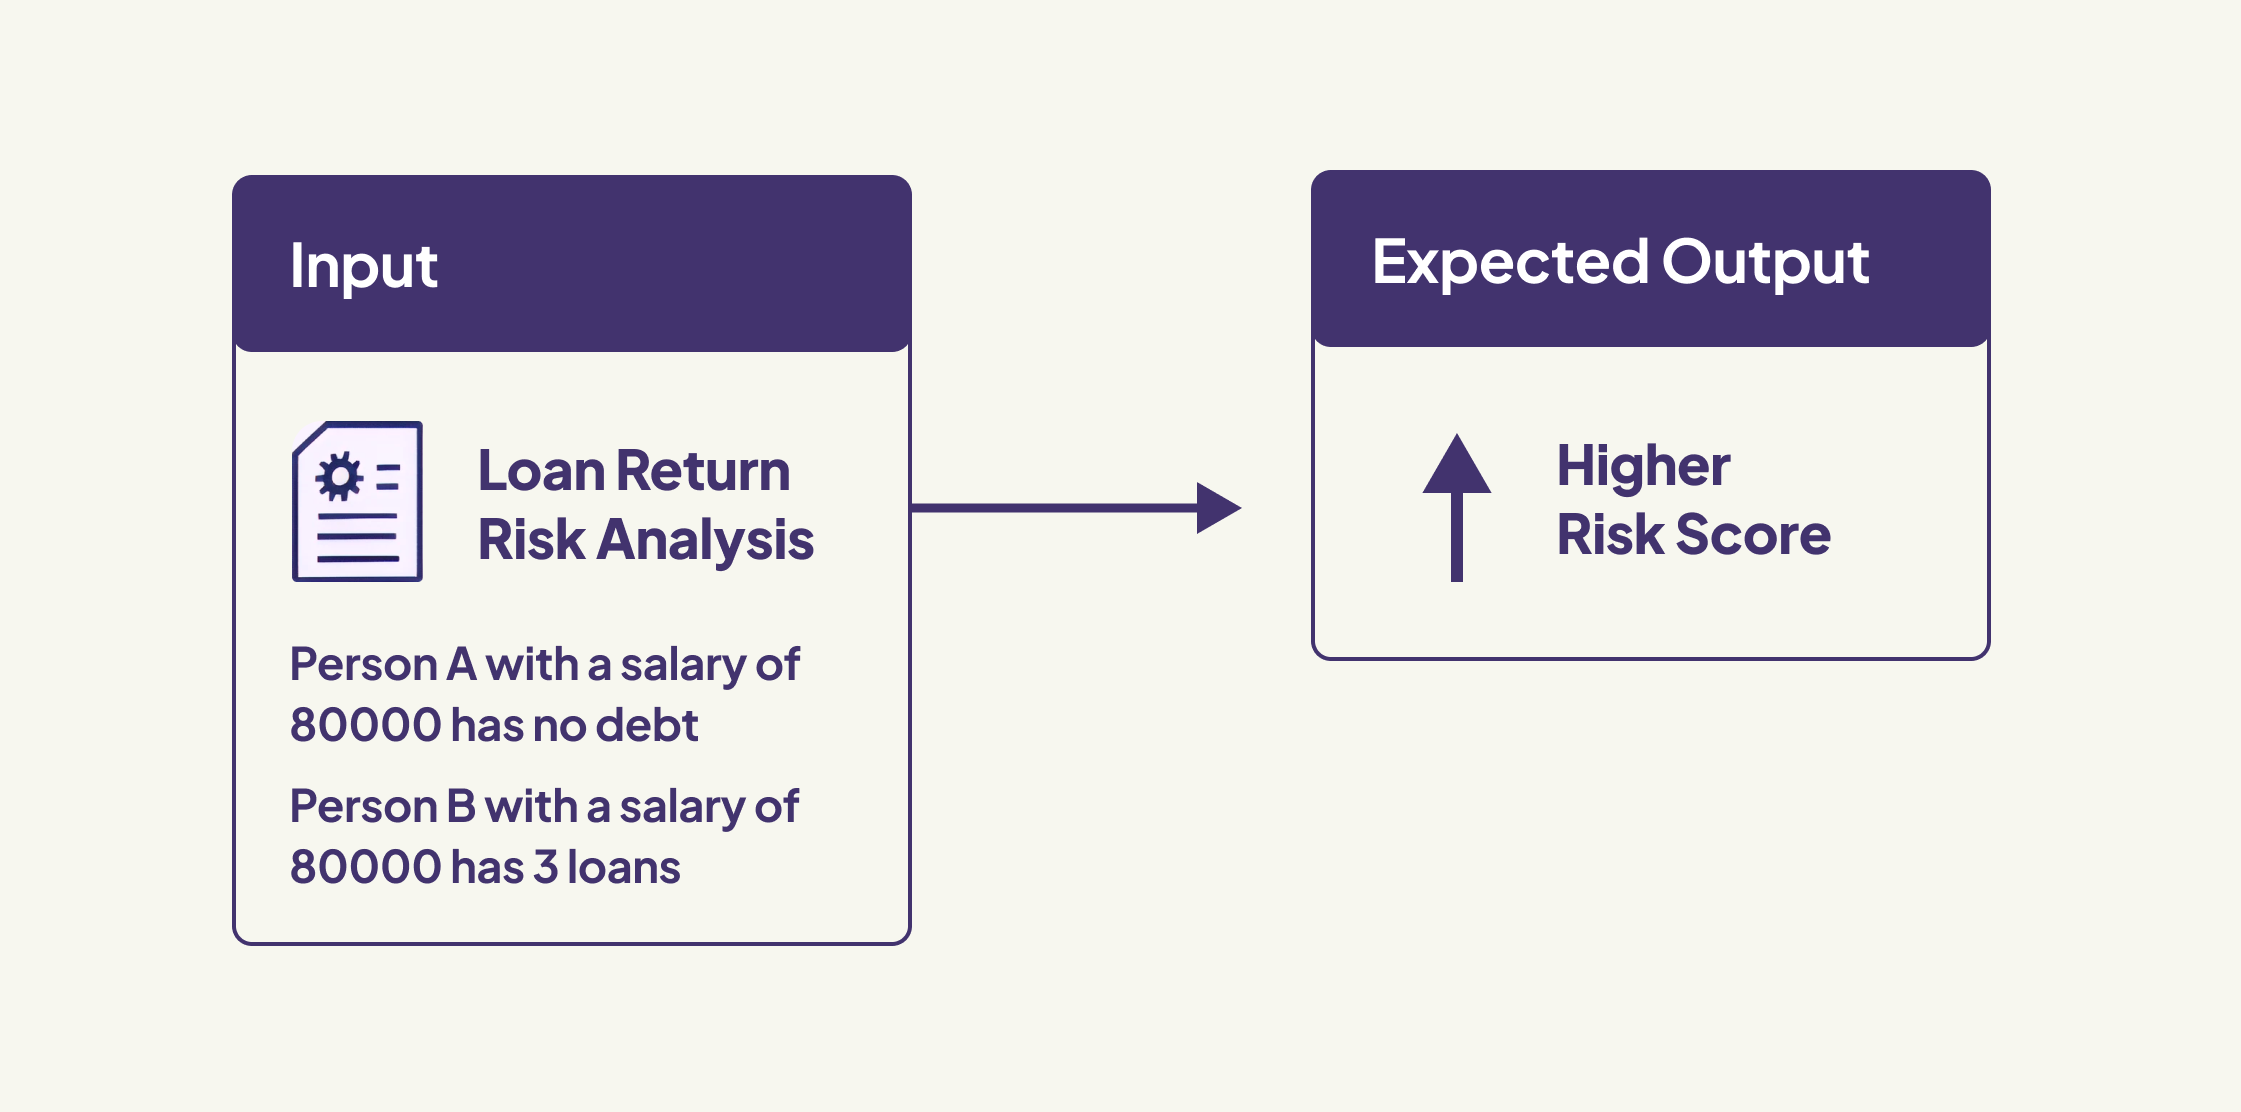
If the model does not give appropriate risk scores, then it is behaving incorrectly.
2. Decrease
When you reduce something important or add a positive signal, the output should go down.
Consider a healthcare AI model that predicts the risk of developing diabetes.
So the risk factor can be based on Healthier habits being Lower risk, and Unhealthy habits being Higher risk.
Person X is eating Healthy food with regular exercise.
The risk score must decrease
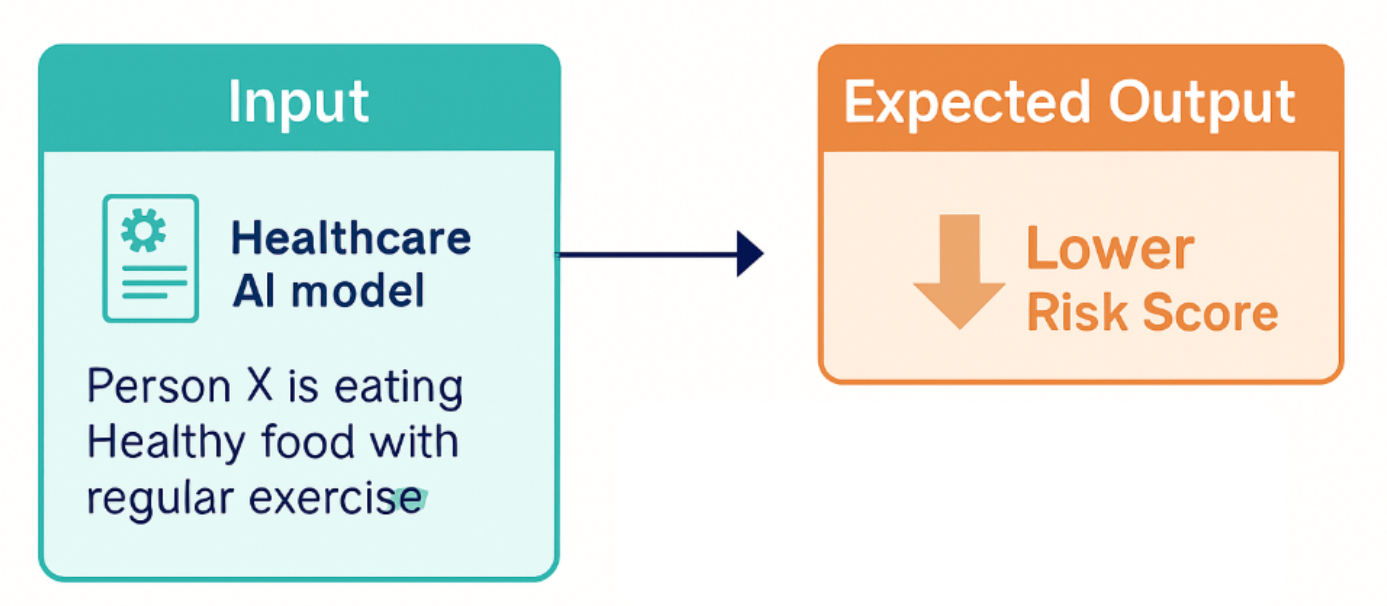
We don’t need to know what the exact risk score should be; we just know that eating healthy and exercising should lower it.
That’s the beauty of metamorphic testing: it checks whether your AI behaves logically, even when the “correct” answer is unknown.
3. Invariance
When you change the input in a way that does not affect its meaning, the output should stay the same.
Examples of Search engines
If you search :
"Give me Chemist shops near me"
Or
"Give me nearby pharmacies"
Expected Output :
Both must give the same search result.
How Metamorphic testing works
Here’s how the testing process works in practice. We can consider a Movie Review AI model to understand each step clearly.
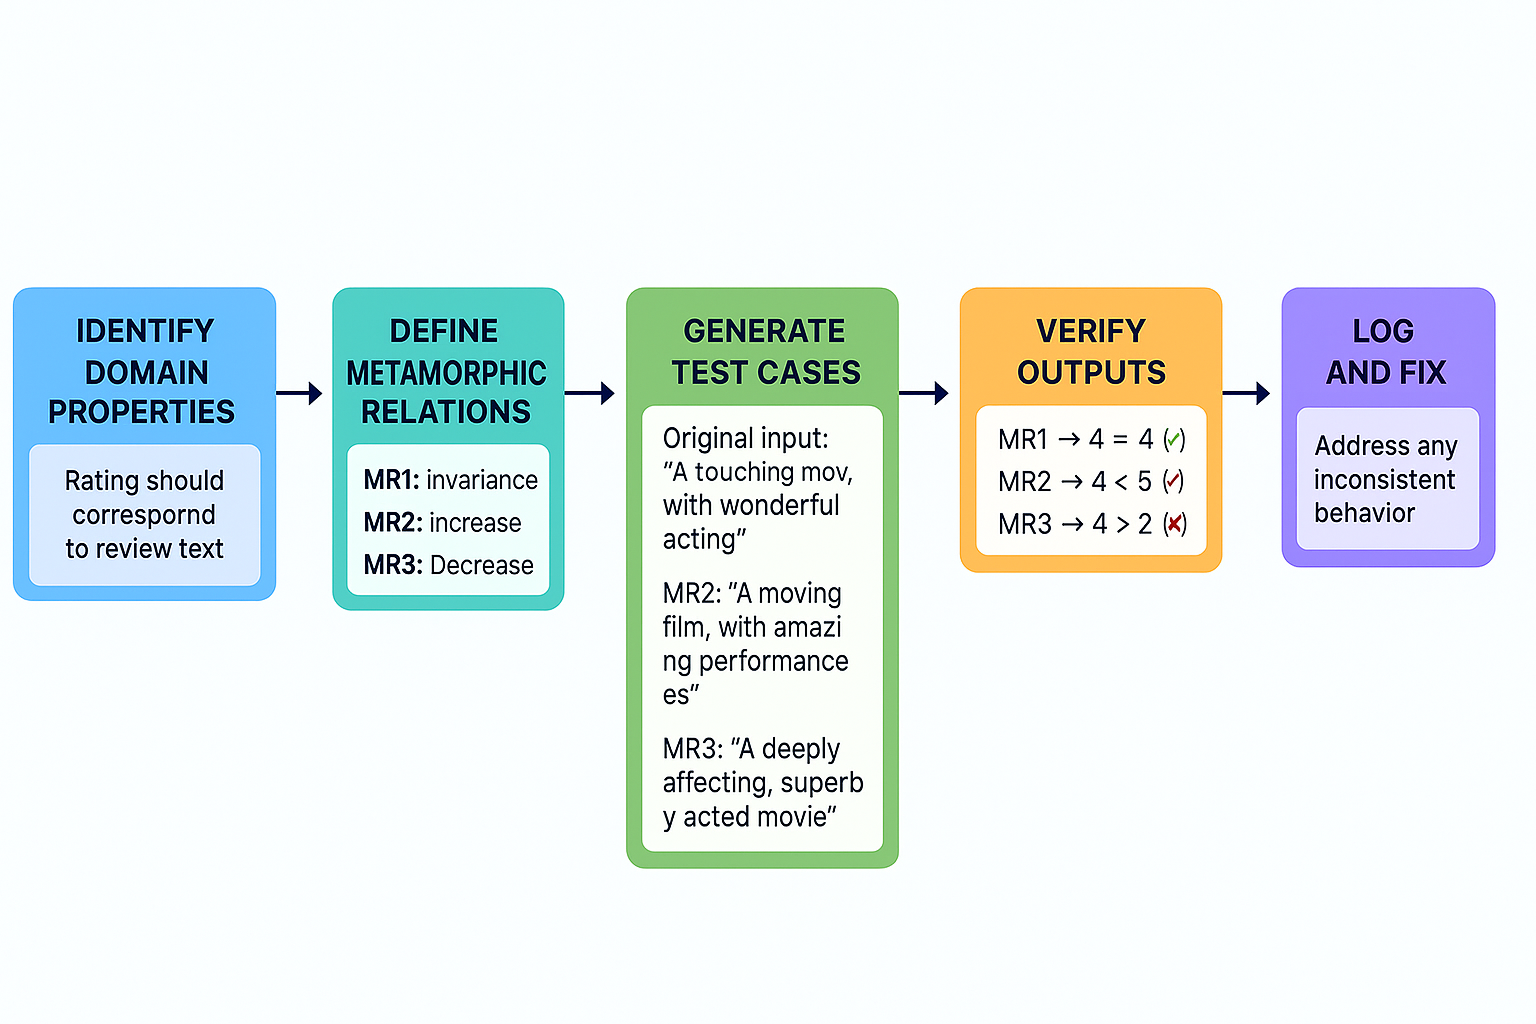
1. Identify critical properties of your model
This phase is for understanding what key behaviours of your model are.
Our Movie Review AI model will have the following behaviours :
- More positive reviews (with more praise) should get a higher rating
- A review with added negative words should get a lower rating
- Reviews with rephrased language should get the same rating
2. Define your Metamorphic relations (MRs)
State how input-output should behave under changes.
Example :
| MR Type | Input Transformation Example | Expected Output Behaviour |
|---|---|---|
| Invariance |
Original: "The movie was funny and well-acted." New input: "The film was humorous and had great performances." |
4 Stars to 4 Stars |
| Increase |
Original: "The movie was nice and fun." New input: "The movie was outstanding, thrilling, and unforgettable." |
3 Stars to 4 Stars or 5 Stars |
| Decrease |
Original: "The movie was okay." New input: "The movie was slow, boring, and had terrible acting." |
3 Stars to 2 Stars or 1 Star |
3. Generate input transformations
Use NLP tools or manual editing to:
- Paraphrase reviews
- Add adjectives/adverbs to intensify emotion
- Add or reduce praise/criticism
4. Compare output & validate MRs
Now run your model with both the original and transformed inputs.
- If output changes when it shouldn’t results in an Invariance violation
- If the output doesn’t change when it should results in an Increase/Decrease violation
| Review Type | Review Text | Expected Rating | Model Rating | MR Status |
|---|---|---|---|---|
| Original | "The movie was funny and well-acted." | 4 Stars | 4 Stars | Pass |
| Invariance | "The film was full of comedy and had great performances." | 4 Stars | 3 Stars | Fail |
| Increase | "The movie was outstanding, thrilling, and unforgettable. Really Awesome to watch" | 5 Stars | 3 Stars | Fail |
| Decrease | "The movie was slow, boring, and had terrible acting." | 2 Stars | 3 Stars | Fail |
This helps catch hidden bugs, brittle behaviour, or poor generalisation.
5. Log, Analyse, and Fix
Log the input pair and the outputs. Mark whether the MR was satisfied or violated. Analyse the pattern of failure to determine which parameter is failing. Then fix the model.
Challenges of Metamorphic testing
Metamorphic testing has many advantages, but it is not as simple as it seems. It has its own set of challenges, especially when scaling across complex systems. Here’s a deeper look at what makes MT both powerful and difficult:
1. Defining useful Metamorphic relations requires domain expertise
The biggest hurdle in MT is deciding what to test and how to transform inputs validly.
- MRs must be logically sound and relevant to the domain.
- Poorly chosen MRs may give false positives or miss actual issues.
- It often requires domain expertise + testing mindset.
Example: In finance, what input transformation meaningfully increases risk? In healthcare, what’s a “healthier” lifestyle?
2. Generating input transformations can be time-consuming
Even though MT can be automated, creating meaningful input variants is still effort-intensive. Tasks like synonym replacement or sentence rephrasing might require NLP tools or manual QA. It can become time-consuming to prepare large-scale test sets across multiple MRs.
3. Some relations are hard to automate or measure
Automating MT workflows requires combining:
- Input transformers (e.g., NLP scripts)
- Model interfaces (e.g., API calls)
- Output comparison logic
This can get technically complex and needs custom pipelines or test harnesses, especially for models deployed in production environments.
Unlike traditional test automation (which has Selenium, Postman, etc.), MT lacks standardised tools or frameworks specially tailored for AI testing.
4. Requires strong analysis to differentiate bugs vs. model limitations
Even with strong MRs, validating the output may be hard. If the MR is too strict, it may give false positives even when the model is behaving reasonably. If it’s too lenient, it may miss serious flaws.
When an MR fails, it's not always clear why. Understanding failure root causes requires a mix of testing, data science, and ML debugging skills.
Conclusion
Metamorphic testing might sound very complicated or technical, but basically it's just asking a question to the AI module, evaluating output correctness by changing our inputs. This is a really helpful method, especially for AI systems where there is often no clear right answer.
Whether you’re testing a chatbot, a search engine, or a review rating model, MT helps you check if your AI is thinking logically and consistently. MT complements, but doesn’t replace other QA methods; it is best used alongside traditional testing in AI workflows.
In a world where AI is making more decisions than ever, Metamorphic Testing helps make sure those decisions make sense, and that’s something we all care about.
Check out our other AI testing blog, A Complete Guide to Testing AI and ML Applications
Happy AI Testing!
Choosing the right WCAG level: A, AA, or AAA
In our earlier blog on global accessibility laws, we explored how different countries align with the Web Content Accessibility Guidelines (WCAG) and how WCAG has become the global standard for digital accessibility.
But one question still comes up:
“Should my website meet WCAG Level A, AA, or AAA?”
If you are building a website, making it accessible isn’t just a nice thing to do; in many locations, it’s the law. So, what level of WCAG should you try to achieve?
This guide will help you understand what each level does, how it helps, and how to pick the right one for your website.
WCAG levels (A, AA, AAA) - a quick recap
There are three levels to WCAG, and each one has extra requirements over the previous.
We’ll explain how to upgrade from WCAG 2.0 to 2.2 in a future blog, but for now, let’s quickly go over what each level means.
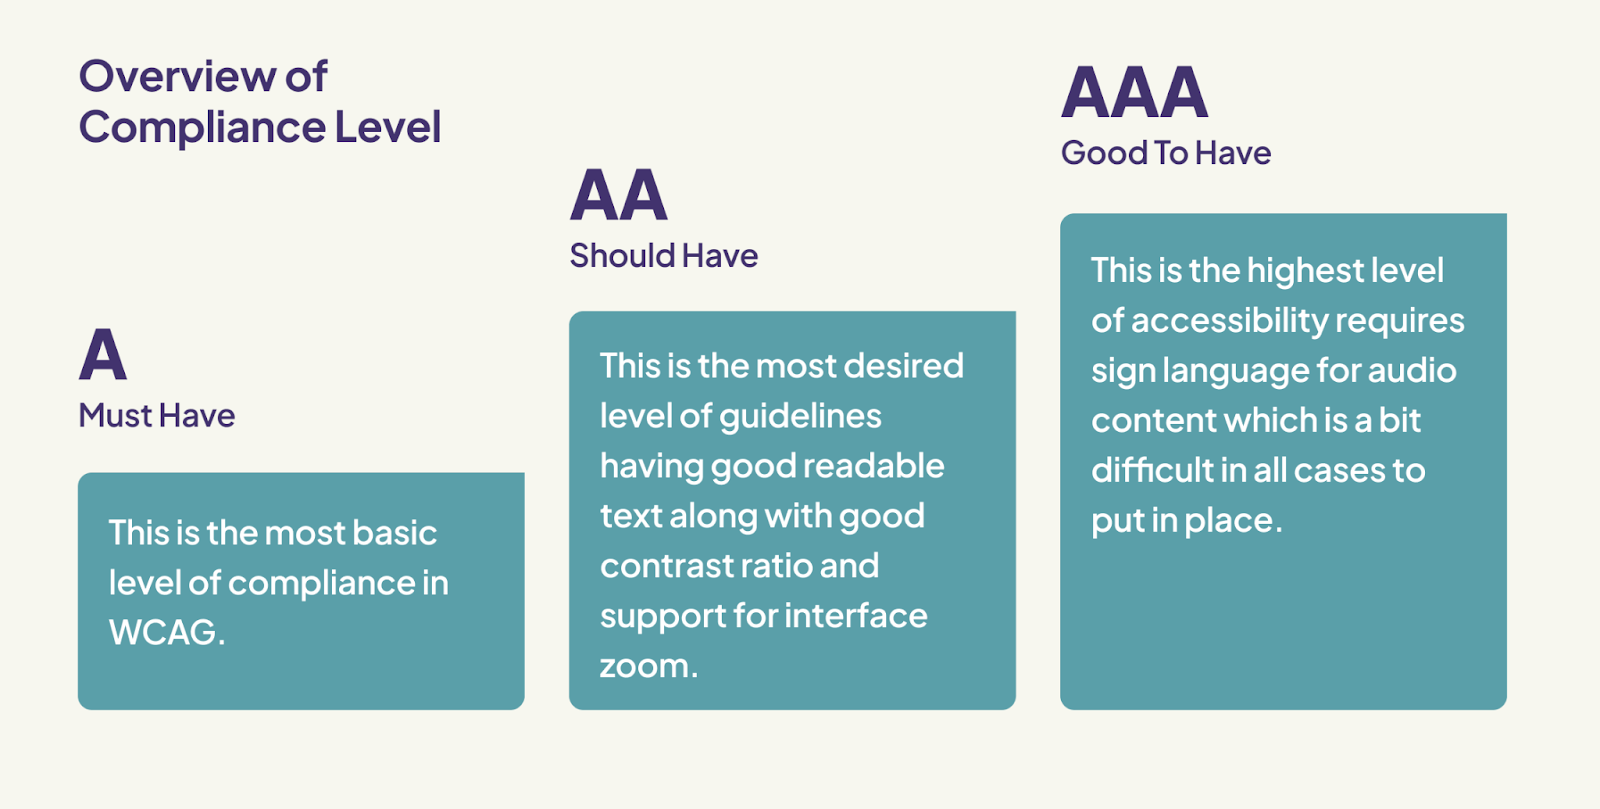
Level A - minimum
Level A accessibility is the most basic, yet essential level for making a website usable for people with disabilities. Without it, many users simply can’t access or interact with our content at all.
Here’s what that looks like in action:
- Adding alt text to images: This allows people using screen readers to understand what an image is showing or communicating.
- Making everything work with just a keyboard: Some users can't use a mouse, so it's important that all buttons, forms, and interactions can be done with keyboard shortcuts alone.
- Clear and descriptive links: Instead of vague text like “click here,” we use meaningful link text that tells users where the link will take them, like “Download the annual report (PDF).”
- Captions for videos: This helps users who are deaf or hard of hearing follow along with video content using pre-recorded captions.
- Organised page structure: A clear heading structure (think: headings and subheadings in a logical order) helps screen reader users navigate the page more easily and find what they need.
By putting these basics in place, we open the door for more people to use and enjoy our website, and that’s a win for everyone.
Level AA - mid-level (recommended)
- It makes websites usable and understandable for most people, including those with moderate disabilities.
- This improves accessibility while still giving you flexibility in design. Most laws and accessibility rules around the world require at least Level AA.
- Example:
- Ensure text and background colours have enough contrast so users with low vision or colour blindness can read easily.
- Ensure users can zoom or resize text up to 200% without losing functionality or readability.
- When someone uses a keyboard to move around, show clearly which part of the page they’re on (like with a highlight or outline).
- Every form field should have a clear label and instructions so people know what to type.
- Provide real-time captions for live videos or webinars so deaf or hard-of-hearing users can follow along
Level AAA - highest
- This is the highest level of accessibility, designed to help as many people as possible, including those with very specific or severe disabilities.
- It’s not always practical or possible for every type of content.
- Example:
- Add sign language to all videos so that deaf users who use sign language can fully understand the content.
- Include audio descriptions in videos to explain important visual details for people who are blind or have low vision.
- Make sure nothing on the page flashes more than three times per second, and avoid even mild flashing to help prevent seizures.
- Providing alternatives to complex tasks, such as simplified versions of forms or processes.
- Let users adjust text spacing (like line height, letter spacing, and word spacing) without messing up the page, so it’s easier for people with visual or learning difficulties.
How to decide which level you need
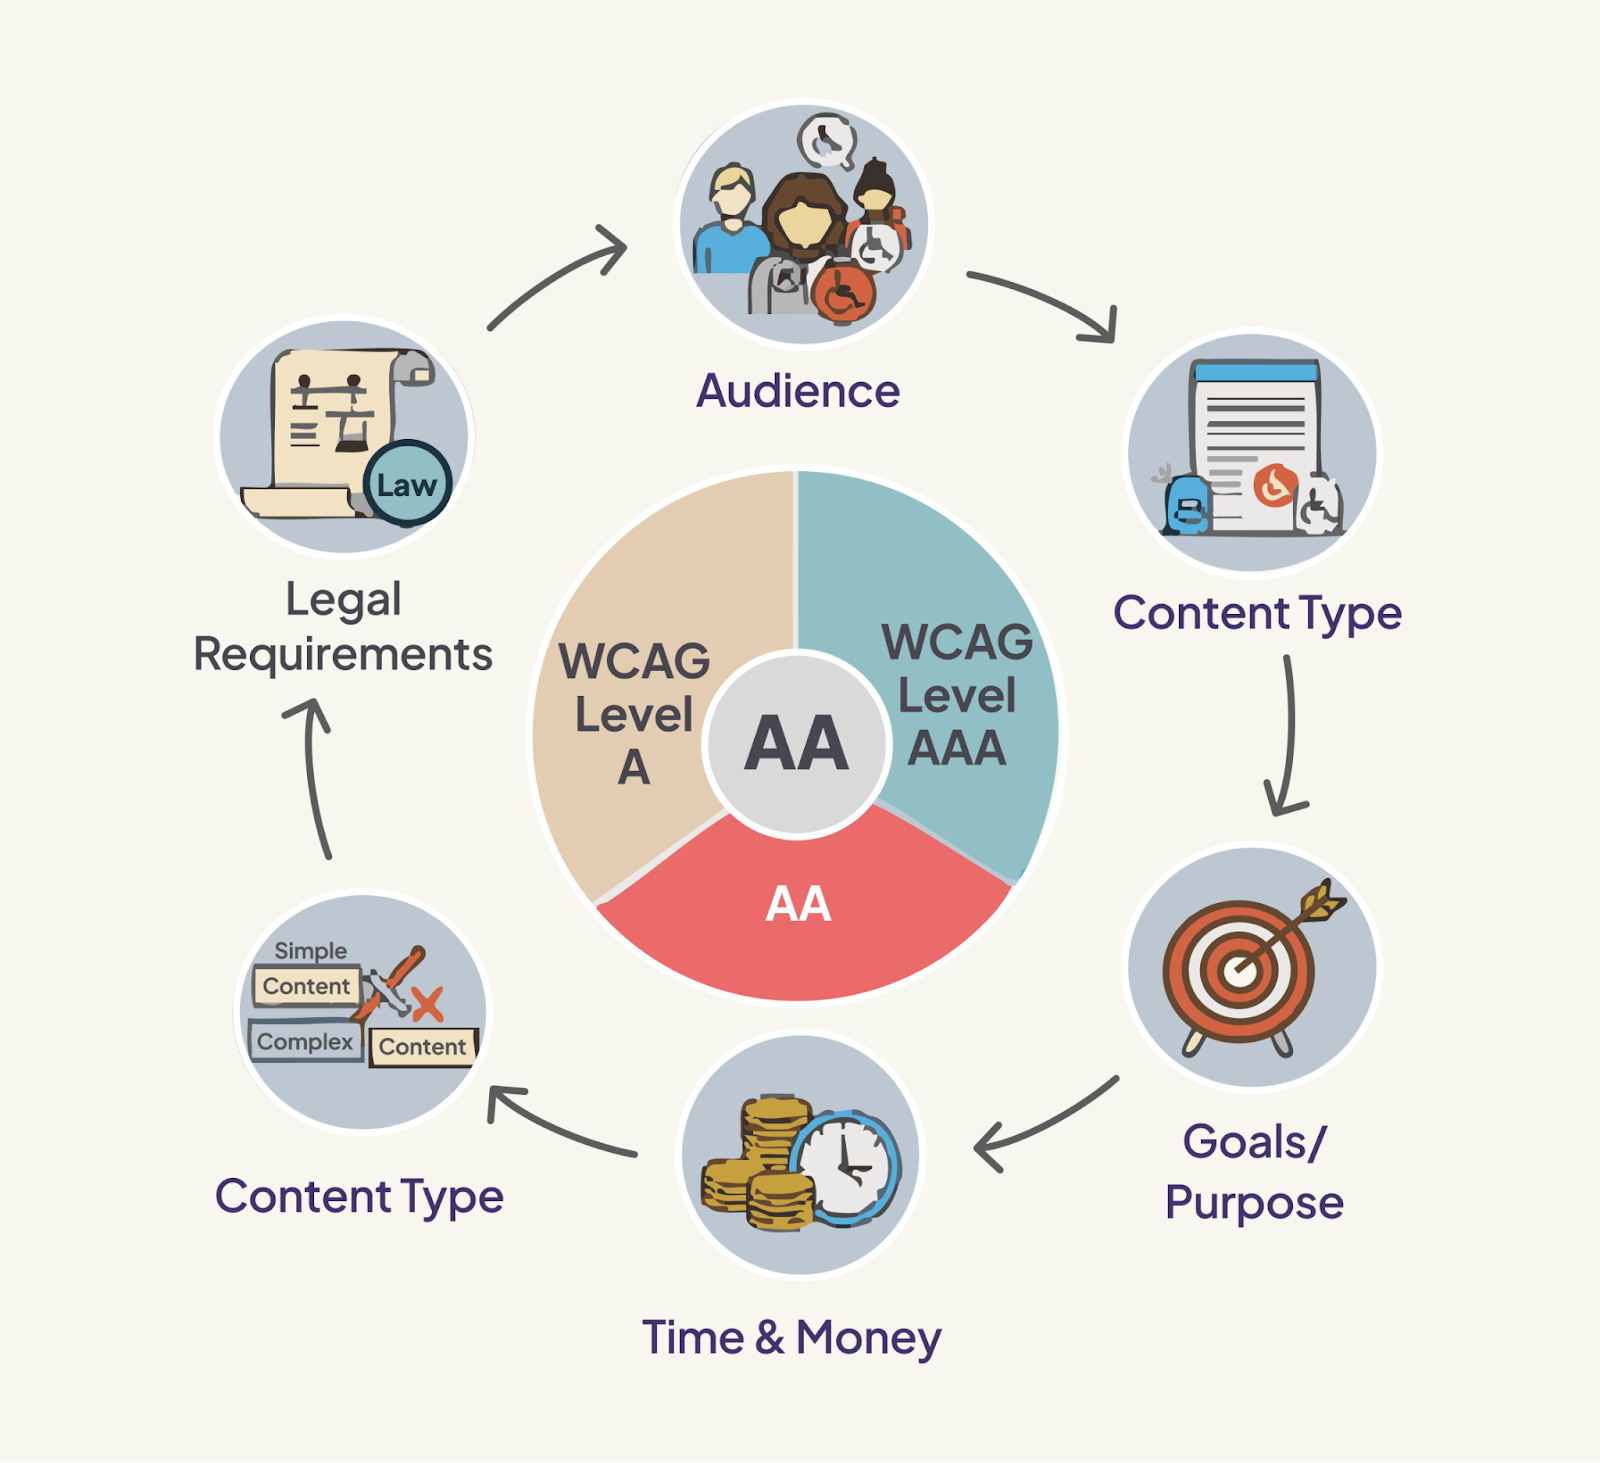
Picking a WCAG level (A, AA, or AAA) is like choosing the difficulty level in a game.
You want it to be good enough to help people use your website, but not so hard that it’s impossible to reach.
Here’s an easy way to understand it:
What does the law say?
As we explained in our blog about global accessibility laws, most countries have their own rules for website accessibility, where they clearly define the required level of accessibility along with the WCAG standard.
When it comes to the most common standards, most laws require you to meet at least WCAG 2.0 or 2.1 at Level AA.
So, if the law in your country or industry specifies which WCAG level and version to follow, make sure to follow that.
Who's going to use it?
Think about who will use your website.
- If your website is for everyone, like an online shop, Level AA is usually the best choice. It meets most common accessibility needs without being too hard to achieve.
- If you’re building something for people with severe disabilities, like a special communication tool, aim for Level AAA. This makes it as easy to use as possible for them.
- If you're just beginning your accessibility journey, aiming for Level A is a crucial first step, as it addresses fundamental barriers for many users.
What kind of content is it?
What kind of content or features does your website or product have? Some things are easier to make accessible than others.
- If your site is mostly text and simple images, reaching Level AA is usually easy.
- If your site has lots of complex videos, interactive games, or live chat tools, getting to Level AAA for everything can be very hard or even impossible without redesigning your product.
In those cases, it’s better to aim for Level AA and do your best to include some AAA features where you can.
How much effort can you put in?
How much time, budget, and resources do you have to make your website accessible?
- If you have a small team and a tight budget, aiming for Level A or AA is more realistic. It’s better to do a good job at a lower level than to aim for AAA and not succeed.
- Bigger companies with more budget and resources can aim for AAA accessibility on their entire site or specific sections.
What's your goal?
Why do you want your website to be accessible? What do you want to achieve?
- If your organisation is new to accessibility or wants to implement it step by step, you can start with Level A and then gradually move to Level AA, and eventually Level AAA. This is a practical way to improve your website’s accessibility over time.
- If your main goal is to follow the law and make your site inclusive for most people, Level AA is usually the best choice.
- If you want to lead in accessibility and give the best experience to all users, including those with the most severe disabilities, aim for Level AAA, even if you can’t follow every guideline perfectly
Our recommendation
If you’re not sure which level to aim for or if the laws in your area don’t specify which guidelines to follow, it’s safest to go for at least WCAG Level AA of the latest version (currently WCAG 2.2).
Here’s why Level AA is a good choice:
- It meets most legal requirements around the world.
- It covers the needs of most people, including those with common disabilities.
- It strikes a good balance between accessibility and keeping your design practical and attractive.
Level AAA is a great goal if your website provides critical services or has high-risk content, for example, if it’s a healthcare or emergency service site. But in most situations, AAA is optional and not required by law.
In our next blog, we will also guide you through how to upgrade your website from WCAG 2.0 to 2.2. We explain what’s changed in the new version, what new requirements have been added, and how you can meet them step by step. This will help you keep your website up-to-date and accessible to more people.
Conclusion
Choosing the right WCAG level depends on your country’s laws, your audience, and the resources you have. Level AA is the best choice for most websites, as it helps make your site inclusive and easy for everyone to use.
It’s important to understand that accessibility isn’t just about following the rules; it’s about making the web better and more equal for everyone.
If you haven’t already, we encourage you to read our blogs on global accessibility laws. We will also be sharing more practical guidance on how to upgrade your website from WCAG 2.0 to 2.1 or 2.2 in our upcoming articles.
Together, we can build a more inclusive web, one step at a time.
Stay tuned for more accessibility blogs!

Global accessibility laws and WCAG alignment
As more of our daily lives take place online, websites and digital platforms have become essential tools for communication, learning, shopping, working, and accessing services. To ensure these experiences are inclusive for everyone, digital accessibility has become a growing global priority.
At the core of this movement are the Web Content Accessibility Guidelines (WCAG), created by the World Wide Web Consortium (W3C). These guidelines offer clear, actionable standards to help make digital content accessible to people with a wide range of abilities. WCAG is built around four key principles: content should be perceivable, operable, understandable, and robust. These principles help create experiences that work well for all users.
Many countries have adopted WCAG into their legal and policy frameworks. For example:
- In the United States, the Americans with Disabilities Act (ADA) has been used to guide web accessibility practices across industries.
- The European Union’s Web Accessibility Directive requires public sector websites and mobile apps to meet WCAG standards.
- Canada’s Accessible Canada Act sets digital accessibility requirements for federally regulated organisations.
- Australia’s Disability Discrimination Act supports the use of WCAG through policy and legal precedent.
This blog explores how different countries apply WCAG through their laws and regulations, and what this means for organisations, developers, and users around the world.
Web Content Accessibility Guidelines (WCAG)
The Web Content Accessibility Guidelines were developed by the World Wide Web Consortium(W3C) as part of the Web Accessibility Initiative. They are the most widely used standards for making websites and digital content accessible to everyone.
The different versions of WCAG include:
- WCAG 2.0 (2008) – The first global standard widely used.
- WCAG 2.1 (2018) – It introduced criteria for mobile accessibility, cognitive disabilities, and low-vision users.
- WCAG 2.2 (2023) – It focused on making things easier to use, improving the focus indicators, simplifying the login process, and offering better support for individuals with motor disabilities.

WCAG compliance is categorised into three levels:
- A – Basic accessibility requirements.
- AA – The industry standard, legally required in most regions.
- AAA – The highest level, often considered a best practice.
These guidelines are built around four key principles: Perceivable, Operable, Understandable, and Robust.

Accessibility compliance in different countries

United States
- Americans with Disabilities Act (ADA)
- It is a law that protects people with disabilities from inequality
- As per courts and regulators, it is often used WCAG 2.1 AA as the standard for compliance.
- It applies to businesses, government agencies, and public services.
- Section 508 of the Rehabilitation Act
- This requires federal agencies to make electronic and IT resources accessible.
- It was updated in 2017 to follow WCAG 2.0 AA accessibility standards.
- It applies to the government websites, contractors, and federally funded projects.
- Section 504 of the Rehabilitation Act
- This guarantees equal access to education and public programs that receive federal funding.
- It refers to WCAG 2.1 AA for digital accessibility standards
- It applies to education, healthcare, and social services.
- Twenty-First Century Communications and Video Accessibility Act (CVAA)
- It refers to WCAG 2.0 AA for digital accessibility standards.
- It requires telecommunications and video services to be accessible
- Air Carrier Access Act (ACAA)
- It refers to WCAG 2.0 AA for digital accessibility standards
- It requires that Airlines operating in the U.S. (including foreign carriers) should be accessible.
European Union (EU)
- European Accessibility Act (EAA)
- It aligns with EN 301 549, which follows WCAG 2.1 AA Standard
- It is effective from 2025, which requires Information and Communication Technology(ICT) products, e-commerce, and digital banking to be accessible.
- EU Web Accessibility Directive (2016)
- It refers to WCAG 2.1 AA for digital accessibility standards.
- It includes regular monitoring, reporting, and enforcement.
- It requires public sector websites and mobile apps to be accessible.
Canada
- Accessibility for Ontarians with Disabilities Act (AODA)
- It refers to WCAG 2.0 AA for the digital accessibility standards.
- It requires both public and private sector organisations to be accessible.
- Provincial Accessibility Laws
- Accessible Canada Act (ACA)
- Federal law requires organisations to eliminate accessibility barriers in digital spaces.
- It refers to the WCAG 2.0 AA for digital accessibility standards.
- British Columbia – Accessible BC Act
- It requires that Public sector organisations (including municipal governments, libraries, and schools) should be accessible.
- No specific WCAG requirement, but organisations must develop accessibility action plans.
- Manitoba – Accessibility for Manitobans Act (AMA)
- It is required for the Public sector & private organisations with 50+ employees.
- It refers to WCAG 2.1 AA for the digital accessibility standard.
- Nova Scotia – Accessibility Act
- It is required for the Public sector organisations & large businesses.
- It refers to WCAG 2.1 AA for the digital accessibility standard.
- Accessible Canada Act (ACA)
United Kingdom
- Public Sector Bodies Accessibility Regulations (2018)
- It requires all public sector websites and mobile apps to meet the accessibility standard.
- It refers to WCAG 2.1 AA digital accessibility standards.
- Organisations must share accessibility statements and complete compliance audits.
- Equality Act 2010 – Covers All Organisations
- It requires all organisations, including private businesses, charities, and public sector bodies, must comply with the accessibility standard
- It refers to WCAG 2.1 AA for the digital accessibility standards.
Australia
- Disability Discrimination Act (DDA)
- It is enforced by the Australian Human Rights Commission.
- It recommends WCAG 2.0 AA for the digital accessibility standard
- It applies to the government and private entities.
- Web Accessibility National Transition Strategy (NTS) – Government Digital Services
- It requires that all Australian Government websites (federal, state, and local) must follow the accessibility standard.
- It complies with WCAG 2.1 AA accessibility standard (previously WCAG 2.0).
India
- Rights of Persons with Disabilities (RPWD) Act, 2016
- It requires that information and communication technology, such as websites, mobile apps, and online services, be accessible to everyone.
- It refers to WCAG 2.1 AA for the digital accessibility standard.
- It applies to the government and private sector organisations providing public services.
- Guidelines for Indian Government Websites (GIGW)
- It was developed by the NIC (National Informatics Centre) for government websites.
- It refers to the WCAG 2.0 AA for the digital accessibility standard.
- It requires websites to be accessible to people with disabilities, including screen reader support and keyboard navigation.
China
- Voluntary Web Accessibility Standard
- This standard is mainly for government websites and public service platforms in China.
- It refers to the WCAG 2.0 AA for the digital accessibility standard.
- Law on the Protection of Disabled Persons (LPDP) – Legal Mandate
- Government websites & apps, Public service providers and Large private sector platforms must comply with China’s Web Accessibility Guidelines (WAH 2.0).
- Government websites & apps, Public service providers and Large private sector platforms must comply with China’s Web Accessibility Guidelines (WAH 2.0).
Brazil
- Lei Brasileira de Inclusão (LBI)
- Government websites & apps, Private sector businesses that provide Public services and Companies with government contracts must comply with the WCAG 2.0 AA
- Government websites & apps, Private sector businesses that provide Public services and Companies with government contracts must comply with the WCAG 2.0 AA
- eMAG (Modelo de Acessibilidade em Governo Eletrônico) – Government Accessibility Standard
- Government agencies and digital services must follow WCAG 2.1 AA
- Government agencies and digital services must follow WCAG 2.1 AA
South Africa
- Promotion of Equality and Prevention of Unfair Discrimination Act, 2000 – Legal Mandate
- Government websites, Private sector organisations and Telecommunications and digital service providers must follow WCAG 2.1 AA
- Government websites, Private sector organisations and Telecommunications and digital service providers must follow WCAG 2.1 AA
- Electronic Communications and Transactions Act (ECTA)
- Telecommunications companies, E-commerce platforms, and Online service providers should be aligned with WCAG 2.1 AA
Other Countries/Regions
Apart from the above-listed countries, there are other countries as well where accessibility-related compliance is also applicable. To check the compliance, go to https://www.w3.org/WAI/policies/
Conclusion
Countries around the world are adopting the Web Content Accessibility Guidelines (WCAG) to help make digital spaces easier for everyone to use. But accessibility is more than just following rules. It's about creating content and experiences that are inclusive, thoughtful, and welcoming to all.
When we consider accessibility from the start, it becomes a natural part of the design process. It's not something extra, but something that improves the experience for everyone.
So let's move away from thinking of accessibility as something we have to do, and start seeing it as something we want to do. You can begin today by checking your website or app against WCAG standards. By taking small steps together, we can help build an internet where everyone can participate and feel included.

Basic guide: visual testing with Percy and Cypress
After more than a decade in QA architecture, I’ve seen firsthand how critical visual testing is to delivering high-quality web applications. In this blog, I’ll walk you through how to integrate Percy with Cypress, covering everything from the initial setup to advanced configuration
Why Percy with Cypress?
Visual testing ensures your UI remains pixel-perfect across different environments. Percy with Cypress offers:
- Automated visual regression detection
- Cross-browser compatibility checks
- Responsive design validation
- CI/CD integration
- Version control for UI changes
Getting started
Step 1: Project setup
Create and navigate to the project directory
Commands
mkdir visual-testing-project

cd visual-testing-project
Initialise npm project
Commands
npm init -y
Install required dependencies
Commands
npm install cypress --save-dev

npm install @percy/cli @percy/cypress --save-dev

npm install cypress-mochawesome-reporter --save-dev cypress-xpath --save-dev
Step 2: Project structure
Create this folder structure:
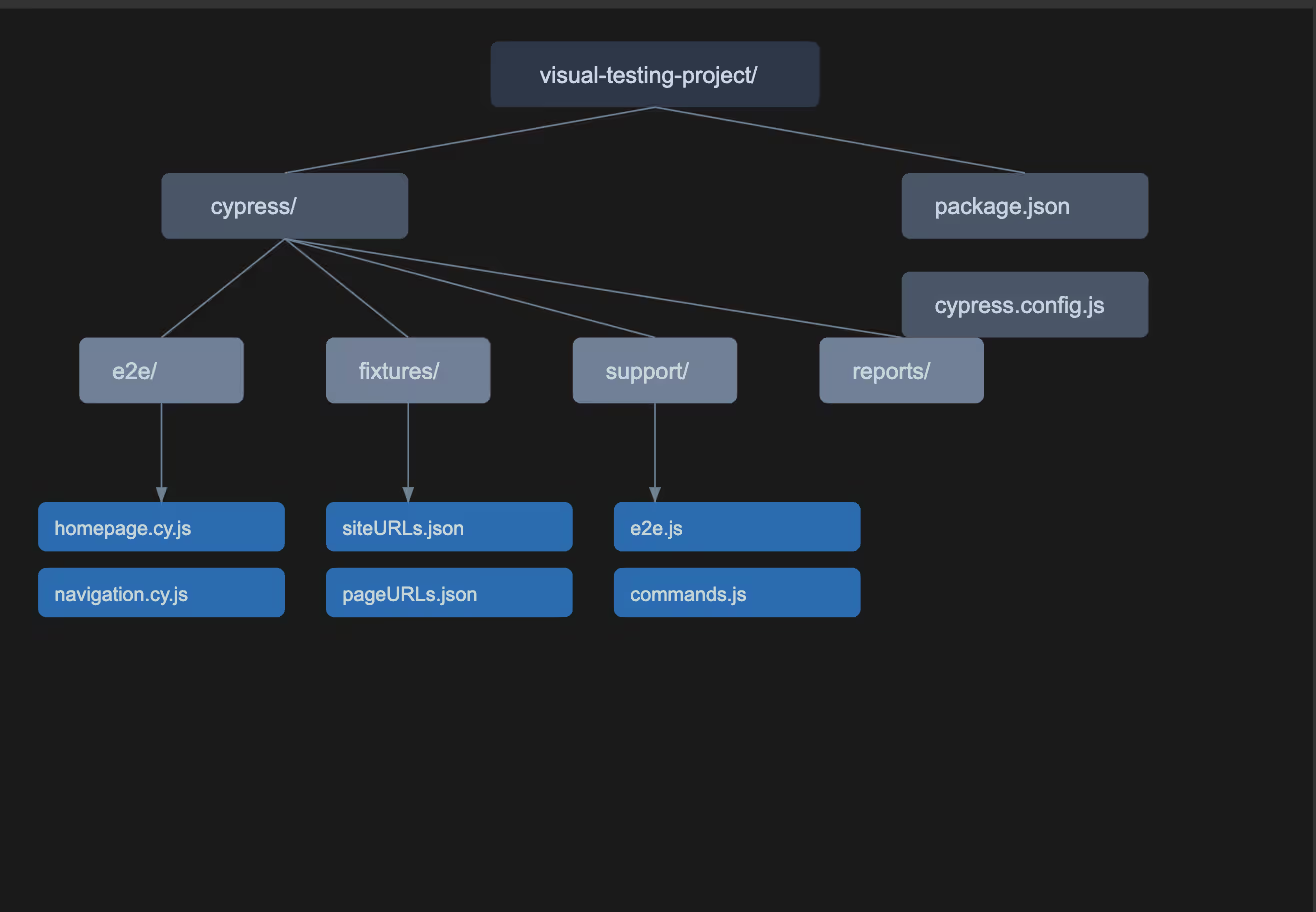
Step 3: Configuration Files
Syntax:
package.json
{

  "name": "visual-testing-project",

  "version": "1.0.0",

  "description": "Visual Testing with Percy and Cypress",

  "scripts": {

    "cypress:open": "cypress open",

    "percy:uat": "npx percy exec -- cypress run --config specPattern='cypress/e2e/percy/**.cy.js' --spec cypress/e2e/percy/*.cy.js --env testenv=uat",

    "percy:prod": "npx percy exec -- cypress run --config specPattern='cypress/e2e/percy/**.cy.js' --spec cypress/e2e/percy/*.cy.js --env testenv=prod",

    "test:e2e": "npx cypress run --spec cypress/e2e/*.cy.{js,jsx,ts,tsx}"

  },

  "devDependencies": {

    "@percy/cli": "^1.29.3",

    "@percy/cypress": "^3.1.3-beta.0",

    "cypress": "^13.8.0",

    "cypress-mochawesome-reporter": "^3.8.2",

    "cypress-xpath": "^1.6.2",

    "mochawesome": "^7.1.3",

    "mochawesome-merge": "^4.3.0",

    "mochawesome-report-generator": "^6.2.0"

  }

}
File : Cypress.cofig.js
cypress.config.js
const { defineConfig } = require('cypress')

module.exports = defineConfig({

  e2e: {

    baseUrl: 'https://your-website.com',

    reporter: 'cypress-mochawesome-reporter',

    reporterOptions: {

      charts: true,

      reportDir: 'cypress/reports/mochawesome',

      overwrite: false,

      html: true,

      json: true

    },

    env: {

      testenv: 'uat'

    }

  }

})
Writing Your first test
Basic test structure
Here's a concise explanation of the test structure:
The visual test for the homepage is structured in a clear, hierarchical manner. Starting with a `describe` block that defines our test suite, we first ensure a clean testing environment using `beforeEach` to clear browser data. Within the test case (`it` block), we follow a logical sequence: first navigating to the page, then waiting for content to load, and finally capturing visual snapshots at different viewport sizes. This approach ensures consistent and reliable visual testing by addressing common challenges like page load timing and responsive design verification.
For example, when we write:
```javascript
cy.percySnapshot('Homepage', {
  widths: [375, 768, 1280]
});
```
This single command captures the page's appearance across mobile, tablet, and desktop views, enabling us to verify our responsive design with one test. By using meaningful snapshot names and strategic viewport sizes, we create maintainable tests that provide valuable visual regression coverage.
Create file: cypress/e2e/percy/homepage.cy.js
Syntax:
describe('Homepage Visual Test', () => {

  beforeEach(() => {

    cy.clearLocalStorage();

    cy.clearCookies();

  });

  it('should match homepage design', () => {

    // Visit page

    cy.visit('/');


    // Wait for content

    cy.get('main').should('be.visible');


    // Take screenshot

    cy.percySnapshot('Homepage', {

      widths: [375, 768, 1280]

    });

  });

});
Multi-environment testing
Environment configuration
Create file: cypress/fixtures/siteURLs.json
{

  "uat": {

    "en": "https://uat.example.com",

    "es": "https://uat.example.com/es"

  },

  "prod": {

    "en": "https://example.com",

    "es": "https://example.com/es"

  }

}
Page Configuration
Create file: cypress/fixtures/pageURLs.json

[

  {

    "en": [

      {

        "page": "Home",

        "path": "/"

      },

      {

        "page": "Products",

        "path": "/products"

      }

    ]

  }

]
Multi-Environment Test
const siteURLs = require('../../fixtures/siteURLs.json');

const pageURLs = require('../../fixtures/pageURLs.json');

describe('Multi-Environment Visual Tests', () => {

  const siteNames = Object.keys(siteURLs[Cypress.env('testenv')]);

  beforeEach(() => {

    cy.clearLocalStorage();

    cy.clearCookies();

  });

  siteNames.forEach(siteName => {

    describe(`Testing ${siteName}`, () => {

      const baseUrl = siteURLs[Cypress.env('testenv')][siteName];

      const site = pageURLs.find(site => site.hasOwnProperty(siteName));

      const paths = site ? site[siteName].map(page => page.path) : [];

      paths.forEach(path => {

        it(`Validates ${path}`, () => {

          const url = baseUrl + path;

          // Handle authentication if needed

          cy.visit(url, {

            auth: {

              username: Cypress.env('AUTH_USER'),

              password: Cypress.env('AUTH_PASS')

            },

            failOnStatusCode: false

          });

          // Handle lazy loading

          cy.scrollTo('bottom', { duration: 1000 });

          cy.wait(500);

          // Take snapshot

          cy.percySnapshot(`${siteName}-${path}`, {

            widths: [320, 768, 1440]

          });

        });

      });

    });

  });

});
Advanced configuration
Custom commands
Create file: cypress/support/commands.js
Syntax:
Cypress.Commands.add('waitForContent', () => {

  cy.get('.loading-spinner').should('not.exist');

  cy.wait(1000);

});

Cypress.Commands.add('handleDynamicContent', () => {

  cy.intercept('GET', '/api/dynamic-data', {

    fixture: 'stable-data.json'

  });

});
Percy configuration options
cy.percySnapshot('Custom Name', {

  widths: [375, 768, 1280],    // Device sizes

  minHeight: 1000,             // Minimum height

  percyCSS: '.dynamic-content { display: none }',  // Hide dynamic elements

  scope: '.main-content',      // Specific element

  enableJavaScript: true       // Handle dynamic content

});
Reports and screenshots
Percy screenshots
- Stored in Percy cloud (percy.io)
- Accessible via the Percy dashboard
- Organised by builds and snapshots
Local reports
- Location: cypress/reports/mochawesome/
- Contains:
- HTML reports
- JSON reports
- Screenshots of failures
- Test execution logs
Best practices
1. Environment variables
// Use Cypress.env() for dynamic configuration

const environment = Cypress.env('testenv');

const baseUrl = Cypress.env('baseUrl');
2. Authentication
// Handle basic auth

cy.visit(url, {

  auth: {

    username: Cypress.env('AUTH_USER'),

    password: Cypress.env('AUTH_PASS')

  }

});
3. Lazy loading
// Ensure content is loaded

cy.scrollTo('bottom', { duration: 1000 });

cy.wait(500);

cy.percySnapshot('Full Page View');
4. Dynamic content
// Hide dynamic elements

cy.percySnapshot('Dynamic Page', {

  percyCSS: `

    .timestamp { display: none }

    .user-specific { opacity: 0 }
  `
});
Troubleshooting guide
Common issues
1. Missing screenshots
// Add explicit waits

cy.get('main').should('be.visible');

cy.waitForContent();

cy.percySnapshot();
2. Authentication failed
// Add retry mechanism

Cypress.Commands.add('loginWithRetry', () => {

  cy.session('login', () => {

    cy.visit('/login');

    cy.get('#username').type(Cypress.env('AUTH_USER'));

    cy.get('#password').type(Cypress.env('AUTH_PASS'));

    cy.get('form').submit();

  });

});
3. Dynamic content issues
// Stabilize dynamic content

cy.intercept('GET', '/api/dynamic-data', {

  fixture: 'stable-data.json'

}).as('getData');

cy.wait('@getData');
Remember:
- Start with critical user paths
- Use meaningful snapshot names
- Test across multiple viewports
- Handle dynamic content appropriately
- Maintain clean, reusable test code
Percy-Cypress component guide
1. Percy configuration options explained
Syntax:
cy.percySnapshot('Custom Name', {

  widths: [375, 768, 1280],    // Capture at specific device widths

  minHeight: 1000,             // Set minimum page height for snapshot

  percyCSS: '.dynamic-content { display: none }',  // Hide dynamic elements

  scope: '.main-content',      // Only capture specific element

  enableJavaScript: true       // Enable JavaScript execution during capture

})
Key options:
- widths: Array of viewport widths to test (mobile, tablet, desktop)
- minHeight: Forces minimum page height, useful for infinite scroll pages
- percyCSS: Inject CSS to modify page appearance during capture
- scope: Limit screenshot to specific element (useful for component testing)
- enableJavaScript: Allow JavaScript execution during snapshot
2. Custom commands explained
Syntax:
// Wait for page stabilization

Cypress.Commands.add('waitForContent', () => {

  // Wait for loading spinner to disappear

  cy.get('.loading-spinner').should('not.exist');

  // Additional delay for stability

  cy.wait(1000);

});

// Handle dynamic data

Cypress.Commands.add('handleDynamicContent', () => {

  // Intercept API calls and return stable fixture data

  cy.intercept('GET', '/api/dynamic-data', {

    fixture: 'stable-data.json'

  });

});
Use cases:
- waitForContent: Essential for single-page applications
- handleDynamicContent: Stabilizes tests by providing consistent data
3. Multi-environment testing breakdown
Syntax:
const siteURLs = require('../../fixtures/siteURLs.json');

const pageURLs = require('../../fixtures/pageURLs.json');

describe('Multi-Environment Visual Tests', () => {

  // Get site names for current environment (uat/prod)

  const siteNames = Object.keys(siteURLs[Cypress.env('testenv')]);

  beforeEach(() => {

    cy.clearLocalStorage();

    cy.clearCookies();

  });

  // Loop through each site (en, es, etc.)

  siteNames.forEach(siteName => {

    describe(`Testing ${siteName}`, () => {

      // Get base URL for current environment and site

      const baseUrl = siteURLs[Cypress.env('testenv')][siteName];

      // Find corresponding page paths

      const site = pageURLs.find(site => site.hasOwnProperty(siteName));

      const paths = site ? site[siteName].map(page => page.path) : [];

      // Test each page path

      paths.forEach(path => {

        it(`Validates ${path}`, () => {

          const url = baseUrl + path;


          // Visit with authentication

          cy.visit(url, {

            auth: {

              username: Cypress.env('AUTH_USER'),

              password: Cypress.env('AUTH_PASS')

            },

            failOnStatusCode: false

          });

          // Handle lazy loading content

          cy.scrollTo('bottom', { duration: 1000 });

          cy.wait(500);

          // Take snapshot with responsive widths

          cy.percySnapshot(`${siteName}-${path}`, {

            widths: [320, 768, 1440]

          });

        });

      });

    });

  });

});
4. Package.json script commands explained
Syntax:
{

  "scripts": {

    "cypress:open": "cypress open",  // Open Cypress Test Runner

    "percy:uat": "npx percy exec -- cypress run --config specPattern='cypress/e2e/percy/**.cy.js' --spec cypress/e2e/percy/*.cy.js --env testenv=uat",  // Run Percy tests in UAT

    "percy:prod": "npx percy exec -- cypress run --config specPattern='cypress/e2e/percy/**.cy.js' --spec cypress/e2e/percy/*.cy.js --env testenv=prod",  // Run Percy tests in Production

    "test:e2e": "npx cypress run --spec cypress/e2e/*.cy.{js,jsx,ts,tsx}"  // Run all e2e tests

  }

}
5. CI/CD integration
Syntax:
name: Visual Testing

on: [push]

jobs:

  visual-test:

    runs-on: ubuntu-latest

    steps:

      - uses: actions/checkout@v2

      - name: Install Dependencies

        run: npm ci

      - name: Percy Test

        run: npm run percy:uat

        env:

          PERCY_TOKEN: ${{ secrets.PERCY_TOKEN }}

          AUTH_USER: ${{ secrets.AUTH_USER }}

          AUTH_PASS: ${{ secrets.AUTH_PASS }}
6. Dynamic data management
Syntax:
// 1. Using Fixtures

beforeEach(() => {

  cy.fixture('stable-data.json').as('testData');

  cy.intercept('GET', '/api/data', { fixture: 'stable-data.json' });

});
// 2. Using Percy CSS

cy.percySnapshot('Dynamic Content', {

  percyCSS: `

    .timestamp { display: none }

    .user-data { opacity: 0 }

    .random-content { visibility: hidden } })


// 3. Using Custom Commands

Cypress.Commands.add('stabilizeData', () => {

  cy.intercept('GET', '/api/**', (req) => {

    req.reply((res) => {

      res.body = require('../fixtures/stable-response.json');

    });

  });

});
7. Test maintenance tips
When selecting elements in Cypress tests, using dynamic selectors is crucial for test maintenance and reliability. Consider this approach:
// Bad practice
cy.get('#specific-id-123').click();  // Hard-coded IDs can change during development

// Good practice
cy.get('[data-testid="login-button"]').click();  // Data attributes stay consistent
This pattern creates resilient tests because data-testid attributes are specifically designed for testing and are less likely to change during UI updates or refactoring. Think of it like having a dedicated handle for testing purposes, rather than relying on IDs that might change for styling or JavaScript functionality.
1. Use dynamic selectors
When selecting elements in Cypress tests, using dynamic selectors is crucial for test maintenance and reliability. Consider this approach:
// Bad Practice
cy.get('#specific-id-123').click();  // Hard-coded IDs can change during development

// Good practice
cy.get('[data-testid="login-button"]').click();  // Data attributes stay consistent
This pattern creates resilient tests because data-testid attributes are specifically designed for testing and are less likely to change during UI updates or refactoring. Think of it like having a dedicated handle for testing purposes, rather than relying on IDs that might change for styling or JavaScript functionality.
2. Handle environment variables
Environment variables allow for flexible configuration across different testing environments.
const config = {

  apiUrl: Cypress.env('API_URL'),

  timeout: Cypress.env('TIMEOUT', 5000)

};
This setup lets you run the same tests against different environments (development, staging, production) without changing the test code. The config object acts as a central place for environment-specific values, making test maintenance and environment switching straightforward.
3. Create reusable test data
Having a structured approach to test data improves test readability and maintenance:
const testData = {

  validUser: {

    username: 'testuser',

    password: 'testpass'

  },

  invalidUser: {

    username: 'invalid',

    password: 'wrong'

  }

};
Conclusion
Using Percy with Cypress is a practical and efficient way to automate visual testing and catch UI issues early. It reduces manual effort, helps detect visual bugs before they reach production, and keeps the interface consistent across browsers, devices, and languages. Since it integrates smoothly with most CI/CD pipelines, it supports faster and more reliable releases.
To get the most out of this setup, it's important to follow a few best practices:
- Start with your most critical user flows
- Roll out the implementation gradually
- Use reusable commands and flexible selectors
- Keep test data stable
- Be deliberate about where and when you take snapshots
As applications grow, maintaining visual consistency becomes increasingly complex. This integration offers a clear advantage by surfacing visual changes directly in pull requests, making it easier for teams to catch regressions and collaborate more effectively.
In my view, Percy and Cypress together offer a dependable, scalable solution for teams that care about delivering a high-quality, visually consistent user experience.

The complete QA engineer's guide to Cypress with GitHub actions and test automation
Welcome to this comprehensive guide to automated testing with GitHub Actions. Whether you're a QA Engineer moving into automation, a team setting up CI/CD pipelines, or a manual tester exploring GitHub Actions, this guide is designed for you. Even if you're just curious about automated testing, there's plenty here to learn.
You'll discover how to create and manage GitHub Actions workflows, set up test automation via package.json, run tests automatically, generate and manage reports, handle errors, debug with clarity, and optimise performance.
Before you begin, make sure you’re familiar with basic testing concepts, have a GitHub account, and know your way around the command line. With that in place, you're all set to strengthen your automation skills and streamline your testing workflow.
Getting started with GitHub actions
GitHub Actions is a continuous integration and continuous delivery (CI/CD) platform that allows you to automate your build, test, and deployment pipeline. Let's create our first workflow.
We will use the Cypress automation framework to understand github workflow.
1. Understanding GitHub actions basics
GitHub Actions workflows are defined using YAML files located in your repository. Let’s start by breaking down the key components:
Workflow file location
All workflows are stored in the .github/workflows/ directory in your repository. Each workflow is a .yml file.
Basic workflow structure
A workflow comprises the following elements:
- Name: Provides a human-readable identifier for the workflow.
- Triggers (on): Specifies when the workflow should run.
- Jobs: Define the tasks to execute.
- Steps: Detail the specific commands or actions to perform within a job.
2. Key workflow triggers
Triggers define when your workflow runs. GitHub Actions supports multiple types of triggers:
Trigger syntax example
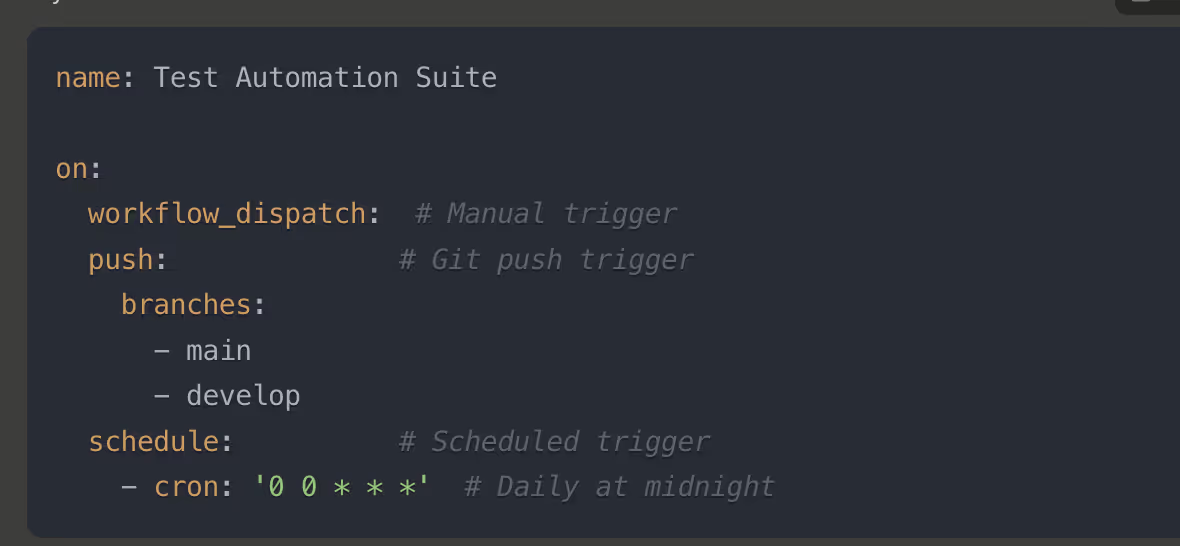
How triggers work
- workflow_dispatch: Adds a manual trigger button in the GitHub Actions UI.
- push: Executes workflows when changes are pushed to specified branches.
- schedule: Uses cron syntax to run workflows at regular intervals.
3. Writing your first workflow
Here’s a simple workflow to get started:
Full example Syntax
name: My First Test Workflow

on:
  workflow_dispatch:  # Manual trigger
  push:               # Trigger on code changes
    branches:
      - main
      - develop

jobs:
  test:
    runs-on: ubuntu-latest

    steps:
      - name: Checkout code
        uses: actions/checkout@v2

      - name: Run a simple test
        run: echo "Hello, GitHub Actions!"
Explanation
- Name: "My First Test Workflow" is the workflow's identifier.
- Triggers (on): The workflow runs on manual triggers or pushes to the main or develop branches.
- Jobs:
- test: Specifies a job running on ubuntu-latest.
- Steps:
- Check out the repository code using a predefined GitHub action.
- Print "Hello, GitHub Actions!" to demonstrate a simple test.
4. Configuring Jobs
Jobs define the tasks to run as part of your workflow.
Example Syntax
jobs:
  test-execution:
    runs-on: ubuntu-latest
    environment: production
    concurrency:
      group: ${{ github.workflow }}-${{ github.ref }}
Key features
- runs-on: Specifies the operating system (e.g., ubuntu-latest, windows-latest).
- environment: Sets the target environment, such as production or staging.
- Concurrency: Prevents duplicate runs for the same workflow and branch combination.
5. Extending your workflow
Once you’ve created your first workflow, you can expand it with additional jobs, steps, or triggers, such as:
- Adding test automation tools like Jest or Cypress.
- Integrating deployment pipelines.
- Generating reports for test results.
Package.json management
Dependencies structure
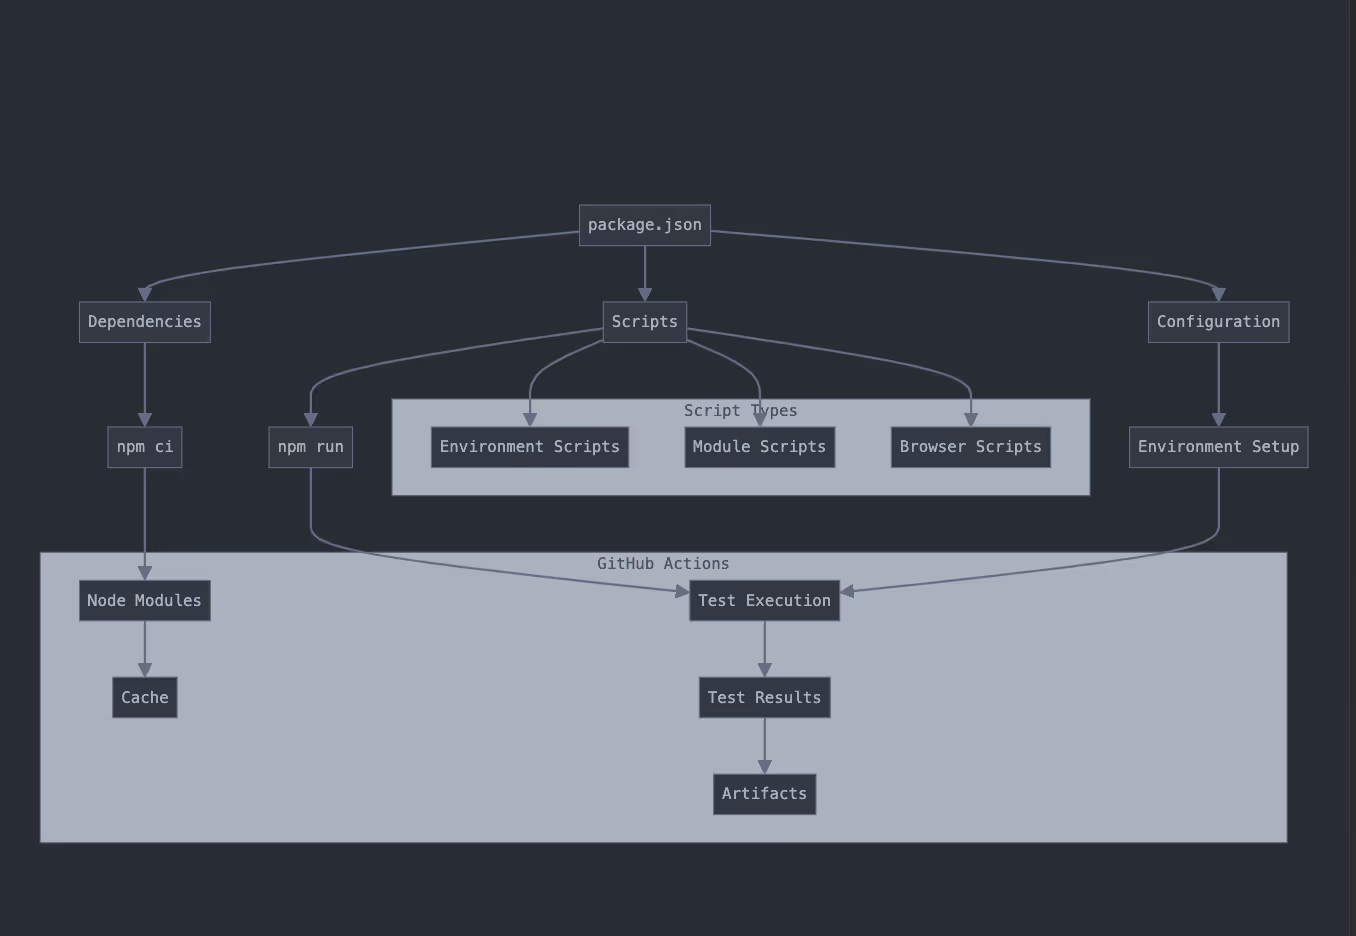
How it works in GitHub Actions
- Cypress: Main testing framework
- ^12.7.0 means it will accept patches and minor updates (12.7.1, 12.8.0, etc.)
- Used by GitHub Actions during npm install
- cypress-mochawesome-reporter: For test reporting
- Generates HTML reports that can be uploaded as artefacts
- Automatically integrated when tests run
Usage in CI/CD
- These are required at runtime
- GitHub Actions installs these using npm install
- Available during test execution
Scripts configuration
Environment-based scripts
Syntax:
"scripts": {

  "test:dev": "cypress run --env environment=dev",

  "test:stage": "cypress run --env environment=stage",

  "test:prod": "cypress run --env environment=prod",

  "test:mobile": "cypress run --config viewportWidth=375,viewportHeight=667",

  "test:ci": "cypress run --headless --record"

}
Environment configuration scripts
Syntax:
{
  "scripts": {


 "cypress:open:dev":
           "cypress open --config-file cypress/config/development.json",


"cypress:open:stage":
               "cypress open --config-file cypress/config/staging.json",


"cypress:open:prod":
         "cypress open --config-file cypress/config/production.json"


  }
}
Usage with environment variables
Add to your GitHub Actions workflow file (.github/workflows/cypress.yml):
Syntax:
steps:
  - name: Set Environment
    run: |
      ENV=${{ github.event.inputs.environment }}
      npm run cypress:open:$ENV

Module-specific test scripts
This should be structured in your package.json:
Syntax:
{
  "scripts": {
    "run:e2e:categoryFilters": "cypress run --spec cypress/e2e/default/e2e/category/categoryTests/**/*.cy.js",


    "run:e2e:salesforce": "cypress run --spec project/tests/cypress/e2e/default/e2e/salesforce/salesforceTests/*.cy.js"
  }
}
Test automation setup
Before running automated tests, you need to configure the testing environment. This involves setting environment variables required for your tests to execute successfully.
steps:
  - name: Setup Environment
    run: |
      echo "NODE_ENV=production" >> $GITHUB_ENV
      echo "CYPRESS_BASE_URL=${{ secrets.BASE_URL }}" >> $GITHUB_ENV
Explanation
- NODE_ENV: Specifies the environment (e.g., production, staging, or development).
- CYPRESS_BASE_URL: Fetches a secure base URL from GitHub secrets to use during test execution.
This ensures your tests run in the correct environment and against the appropriate endpoint.
Dependency management
Efficiently managing dependencies helps streamline test execution and reduce unnecessary downloads during workflows.
- name: Cache dependencies
  uses: actions/cache@v3
  with:
    path: |
      ~/.npm
      ~/.cache/Cypress
    key: ${{ runner.os }}-node-${{ hashFiles('**/package-lock.json') }}
Explanation
- actions/cache@v3: A GitHub-provided action to cache dependencies.
- path: Directories to cache, such as ~/.npm for Node modules and ~/.cache/Cypress for Cypress files.
- key: Identifies the cache based on the OS, Node.js version, and a hash of the package-lock.json file to ensure consistency.
By caching dependencies, workflows can skip redundant installations, significantly reducing build times.
Test optimisation and state management
Efficient tests save time and reduce flakiness. Below are strategies to optimise test execution and manage state effectively.
Reducing test execution time
Replace arbitrary delays (cy.wait) with dynamic and condition-based waits:
Bad practice
cy.wait(5000) // Arbitrary wait time
Good practices
Wait for specific conditions:
cy.get('button').should('be.enabled');
Use API intercepts:
cy.intercept('GET', '/api/data').as('getData');
cy.wait('@getData');  // Wait for specific XHR request
Create custom commands for reusable logic:
Cypress.Commands.add('waitForLoader', () => {
  cy.get('.loader', { timeout: 10000 }).should('not.exist');
});
Language and localisation Testing
For applications supporting multiple languages, ensure tests adapt to the preferred locale.
Example Syntax
Set default language:
beforeEach(() => {
  cy.setCookie('preferredLanguage', 'en');
  cy.request('POST', '/api/settings', { language: 'en' });
});
Handle multi-language content:
const translations = {
  en: {
    welcomeText: 'Welcome',
    loginButton: 'Login',
  },
};
cy.get('button').should('contain', translations.en.loginButton);
By dynamically adapting to localisation requirements, you ensure comprehensive testing across all supported languages.
Real-world example: complete E2E test suite
Below is a detailed workflow for running Cypress E2E tests in a real-world scenario. This setup covers:
- Dynamic environment and module selection.
- Pre-test system checks.
- Test execution and reporting.
Workflow Syntax example
name: Cypress E2E Test Suite

on:
  workflow_dispatch:
    inputs:
      environment:
        description: 'Test environment'
        required: true
        default: 'staging'
      module:
        description: 'Test module'
        required: true
        type: choice
        options:
          - login
          - orders
          - statement

jobs:
  system-check:
    runs-on: ubuntu-latest
    steps:
      - name: Check System Status
        uses: actions/checkout@v2

      - name: Verify System State
        run: ./scripts/check-system-status.sh

  test:
    needs: system-check
    runs-on: ubuntu-latest
    steps:
      - uses: actions/checkout@v2

      - name: Setup Node.js
        uses: actions/setup-node@v4
        with:
          node-version: '20'
          cache: 'npm'

      - name: Install Dependencies
        run: npm ci

      - name: Run Tests
        run: |
          npm run test:${{ github.event.inputs.module }}
        env:
          TEST_ENV: ${{ github.event.inputs.environment }}

      - name: Upload Reports
        if: always()
        uses: actions/upload-artifact@v3
        with:
          name: test-reports
          path: cypress/reports
Conclusion
A reliable testing pipeline is built on consistency, clarity, and control. Verifying system state ensures stable test conditions. Dependency management keeps environments predictable. Smart retry strategies reduce noise from intermittent issues, while resource monitoring helps maintain performance and prevent slowdowns. With robust error handling in place, the entire process becomes smoother and more dependable. These practices work together to create a testing pipeline that supports faster development, meaningful insights, and confident releases.
.avif "The evolution of QA: from manual testing to AI-powered automation tools")
The evolution of QA: from manual testing to AI-powered automation tools
Quality Assurance (QA) has evolved dramatically over the years.
From the early days of manual testing, where human ingenuity and attention to detail drove the process, to the current era of AI-powered automation tools, the journey of QA reflects the broader advancements in software development practices.
In this blog, The Evolution of QA: From Manual Testing to AI-Powered Automation Tools, we explore the fascinating journey of Quality Assurance, highlighting the transformative shift from traditional manual testing to the cutting-edge adoption of AI-driven automation tools.
Readers will gain valuable insights into the key milestones of QA evolution, learn best practices for integrating modern tools into their workflows, and discover actionable strategies for QA professionals to stay ahead in this dynamic field. Whether you're new to QA or a seasoned expert, this blog will provide you with the knowledge and inspiration to embrace the future of testing..
.avif)
The early days: manual testing as the backbone of QA
Manual testing laid the foundation for modern QA practices. It involves testers manually executing test cases without the aid of automation tools, ensuring the software behaves as expected.
The key strengths of manual testing include:
- Human insight: Manual testers excel at understanding user behaviour and identifying edge cases.
- Flexibility: Testers can adapt to changes in requirements and focus on usability and user experience.
- Exploratory testing: Testers can investigate unforeseen scenarios, uncovering issues that automated scripts might miss.
However, as software complexity grew, the limitations of manual testing, such as scalability, time consumption, and susceptibility to human error, became apparent.
The advent of automation: a game changer
To address these challenges, automation tools like Selenium and QTP emerged. These tools enabled QA teams to execute repetitive test cases more efficiently and with greater accuracy. Key benefits included:
- Speed: Automation dramatically reduced the time required for regression testing.
- Consistency: Automated scripts ensure consistent execution of test cases, reducing human error.
- Scalability: Large-scale testing became feasible with automation.
Despite these advantages, traditional automation has its own challenges. Test script maintenance, the need for programming expertise, and limited adaptability to dynamic UI changes often hindered its effectiveness.
The AI revolution in QA: Ushering in a new era
AI has propelled QA into a new era of innovation. AI-powered tools leverage machine learning and predictive analytics to enhance testing processes. Here's how AI is transforming QA:
- Predictive analytics: AI analyses historical test data to identify high-risk areas, enabling testers to focus their efforts effectively.
- Automated test generation: Tools like Test.ai generate test cases by analysing user behaviour, ensuring better coverage.
- Visual testing: AI tools such as Applitools use advanced algorithms to detect visual discrepancies across different platforms and resolutions.
- Anomaly detection: AI-powered platforms like Mabl identify anomalies and suggest fixes in real time, improving defect detection.
- Self-healing tests: AI tools like Testim and Functioning can detect and adapt to changes in the application, minimising the need for manual script updates.
Leading AI-Powered QA Tools
Here are some AI-powered tools that are reshaping QA practices, with details on their features, benefits, and accessibility:
UI and functional Testing
- Testim
- Features: Self-healing tests, AI-driven insights for test creation, and maintenance optimisation.
- Impact: Accelerates test execution and reduces maintenance efforts.
- Website: Testim.io
- Type of testing: UI and functional testing.
- Functionize
- Features: Natural language scripting, AI-driven execution, and self-healing capabilities.
- Impact: Reduces reliance on coding expertise for automation.
- Website: Functionize.com
- Type of testing: Functional and performance testing.
- SmartBear
- Features: Tools like TestComplete and AI-driven script creation, API testing, and performance monitoring.
- Impact: Provides an all-in-one solution for testing various application types.
- Website: SmartBear
- Type of testing: functional testing, API testing, load testing, UI testing.
- Applitools
- Features: Visual AI for automated UI testing across multiple platforms, ensuring consistent user experiences.
- Impact: Enhances visual testing accuracy, outperforming manual inspections.
- Website: Applitools.com
- Type of testing: Visual and cross-browser testing.
- Mabl
- Features: Low-code automation, AI-driven anomaly detection, and advanced reporting.
- Impact: Simplifies adoption for non-technical testers and improves test reliability.
- Website: Mabl.com
- Type of testing: Functional and regression testing.
- Katalon Studio
- Features: Unified testing platform for web, API, mobile, and desktop applications with AI-powered analytics.
- Impact: Seamlessly integrates manual and automated testing workflows.
- Website: Katalon.com
- Type of testing: web, API, mobile, and desktop testing.
- Ranorex
- Features: AI-enhanced GUI testing with drag-and-drop test creation and robust reporting.
- Impact: Lowers the barrier for non-programmers to adopt automation.
- Website: Ranorex
- Type of testing: Functional Testing, Regression Testing, Cross-Browser Testing, UI Testing
Visual and Cross-Browser Testing
- Applitools
- Features: Visual AI for automated UI testing across multiple platforms, ensuring consistent user experiences.
- Impact: Enhances visual testing accuracy, outperforming manual inspections.
- Website: Applitools.com
- Type of testing: Visual and cross-browser testing.
- Sauce Labs
- Features: AI-powered debugging and testing across multiple environments in the cloud.
- Impact: Ensures comprehensive testing coverage for diverse platforms.
- Website: SauceLabs.com
- Type of testing: Cross-browser and performance testing.
- Perfecto
- Features: AI-powered, cloud-based mobile and web testing with insights and real-time debugging.
- Impact: Enhances mobile app testing with comprehensive device coverage.
- Website: Perfecto
- Type of testing: Mobile Testing, Web Testing, Cross-Browser Testing, Cloud Testing.
- Percy (Cypress using BrowserStack AI features)
- Features: Visual testing integrated with Cypress and BrowserStack.
- Impact: Detects visual changes across multiple environments.
- Website: Percy
- Type of testing: Visual regression testing.
Accessibility testing
- Axe devtools
- Features: Accessibility testing powered by AI.
- Impact: Ensures compliance with accessibility standards like WCAG.
- Website: Axe devtools
- Type of testing: Accessibility testing.
Regression and risk-based testing
- Mabl
- Features: Low-code automation, AI-driven anomaly detection, and advanced reporting.
- Impact: Simplifies adoption for non-technical testers and improves test reliability.
- Website: Mabl.com
- Type of testing: Functional and regression testing.
- Appsurify
- Features: AI-driven testing prioritisation based on code changes and risk analysis.
- Impact: Focuses manual QA efforts on high-risk areas to improve efficiency.
- Website: Appsurify
- Type of testing: Risk-Based Testing, Regression Testing, Test Optimisation.
- TestCraft
- Features: Codeless Selenium-based testing with AI-driven optimisation.
- Impact: Speeds up test creation and maintenance.
- Website: TestCraft.io
- Type of testing: Web application testing.
- TestRigor
- Features: AI-powered functional testing using plain English instructions.
- Impact: Reduces reliance on coding skills for automation.
- Website: TestRigor.com
- Type of testing: End-to-end functional testing.
Mobile App Testing
- Test.ai
- Features: AI-driven app testing that mimics user interactions and validates user-centric scenarios.
- Impact: Expands exploratory testing capabilities through automation.
- Website: Test.ai
- Type of testing: Mobile app and user behaviour testing.
- Perfecto
- Features: AI-powered, cloud-based mobile and web testing with insights and real-time debugging.
- Impact: Enhances mobile app testing with comprehensive device coverage.
- Website: Perfecto
- Type of testing: Mobile Testing, Web Testing, Cross-Browser Testing, Cloud Testing.
API and data-driven testing
- Mockaroo
- Features: Generates mock data for testing purposes.
- Impact: Provides realistic test data to simulate real-world scenarios.
- Website: Mockaroo.com
- Type of testing: Data-driven testing.
- SmartBear
- Features: Tools like TestComplete and AI-driven script creation, API testing, and performance monitoring.
- Impact: Provides an all-in-one solution for testing various application types.
- Website: SmartBear
- Type of testing: functional testing, API testing, load testing, UI testing.
- Kusho AI
- Features: AI-enhanced exploratory testing and defect prediction.
- Impact: Helps identify high-risk areas and enhance test coverage.
- Website: Kusho.ai
- Type of testing: Exploratory, API testing and predictive testing.
Exploratory Testing
- Kusho AI
- Features: AI-enhanced exploratory testing and defect prediction.
- Impact: Helps identify high-risk areas and enhance test coverage.
- Website: Kusho.ai
- Type of testing: Exploratory, API testing and predictive testing.
Test Case Documentation and Generation
- Gen AI (e.g., Chatgpt/Gemini/Prompting)
- Features: Assists in generating test cases, reviewing scripts, and creating documentation through conversational AI.
- Impact: Enhances productivity by providing quick, intelligent suggestions.
- Website: OpenAI.com https://gemini.google.com/app
- Type of testing: Test case generation and documentation.
- Test case studio
- Features: Simplifies manual test case documentation and export.
- Impact: Saves time for testers by automating case generation.
- Website: Test Case Studio
- Type of Testing: Manual test case management.
- Scribe (AI Documentation)
- Features: Automatically documents workflows and test procedures.
- Impact: Simplifies process documentation and onboarding.
- Website: ScribeHow.com
- Type of testing: Process documentation and training.
Comparing Manual Testing with AI-Powered Automation

The quality engineer’s role in agile development
Software development moves fast. Teams release updates weekly—sometimes even daily—while adapting to shifting requirements. In this environment, quality isn’t a separate step at the end. It’s something built into every part of development.
A Quality engineer plays a crucial role in making this happen. Instead of waiting for a finished product to test, they work alongside developers, product owners, and other stakeholders from the start. Automated tests catch issues early, while manual testing focuses on details automation might miss—like usability and edge cases.
Imagine a team building a customer-facing app. Instead of long release cycles, they push updates every week, responding to feedback in real time. Each code change triggers automated tests, keeping everything stable. Meanwhile, manual testing fine-tunes the experience, catching the issues only a human can spot.
In an agile setup, quality isn’t an afterthought. It’s a continuous effort.
This blog explores the role of a Quality engineer in this fast-paced environment, tackling common challenges and sharing best practices to keep software reliable without slowing development down.
.avif)
The role of QE in an agile project
What a Quality engineer does in an agile team
A QE is involved throughout the development process, making sure quality is built in from the start. The job goes beyond just running tests—it’s about creating a system where quality is a shared responsibility.
Instead of acting as a gatekeeper, the role is about collaboration. That means working closely with developers to ensure testable requirements, automating checks for quick feedback, conducting exploratory testing, and keeping communication open. Testing becomes an ongoing effort rather than a final step, ensuring that every code change is approached with quality in mind.
Key responsibilities
- Getting requirements right from the start
Joining sprint planning helps ensure user stories and acceptance criteria are clear. Defining testable requirements early reduces confusion and makes validation more effective.
- Testing early and often
Instead of waiting until the end of development, testing happens alongside coding. Reviewing test-driven development (TDD) efforts, running automated checks throughout the sprint, and catching issues early prevent last-minute delays.
- Automating tests for fast feedback
Frequent releases make automation essential. Test suites run with every code change, ensuring nothing breaks. While automation handles routine checks, manual testing focuses on tricky edge cases and the user experience.
- Exploring software like a real user
Automation confirms functionality, but real-world issues often go beyond test scripts. Exploratory testing helps uncover unexpected behaviors and usability problems that might disrupt the overall experience.
- Ensuring performance and security
It’s not just about making sure everything works—it also has to perform well and stay secure. Checking how the system handles heavy loads, monitoring response times, and identifying security risks early keep applications scalable and reliable.
- Working with the team, not just testing in isolation
Quality is a team effort. Open discussions about risks, testing strategies, and real-world usage ensure that features meet both technical and business needs.
- Keeping an eye on things after release
Testing doesn’t stop once a feature is live. Tracking production performance, analyzing logs, and reviewing user feedback help spot issues early and improve future releases. - At its core, this role isn’t just about finding bugs—it’s about making sure software is reliable, user-friendly, and ready for the real world.
Challenges
Agile development moves quickly, and testing has to keep up. Tight deadlines, changing requirements, minimal documentation, and complex integrations make quality a constant focus.
Staying adaptable, combining automation with exploratory testing, and collaborating closely with the team ensure reliability without slowing things down.
Tight deadlines
Sprints move fast, leaving little time for lengthy test cycles. Prioritizing high-impact areas helps keep testing effective.
Example: While working on an event ticketing platform, a last-minute schedule change left only two days for validation. Instead of testing everything, the team focused on ticket purchasing and seat selection—the most critical functions.
Changing requirements
Mid-sprint changes can disrupt planned testing. Quick adjustments help keep everything on track.
Example: During a food delivery app project, an unexpected payment gateway update required testing on short notice. Instead of starting over, existing test cases were adapted, ensuring core functionality remained intact.
Minimal documentation
With Agile’s focus on working software over detailed specs, testing often happens with limited information.
Example: While testing a fitness tracking app, only a basic user story was available. By collaborating with developers and the product owner, the team mapped out possible scenarios, ensuring proper coverage.
Integration complexities
Frequent code changes mean testing incomplete features while maintaining overall stability.
Example: A mobile banking app had continuous integration builds with partially developed features. Automated smoke tests checked key functions like login and fund transfers, allowing manual testing to focus on finer details.
Collaboration barriers
Poor communication can lead to missed scenarios and unexpected issues.
Example: In a healthcare application project, an API update wasn’t clearly communicated, causing critical test cases to be overlooked. Regular API updates and daily stand-ups improved coordination, reducing incidents in future releases.
Best practices for QE in Agile
Be actively involved in sprint planning
Sprint planning isn’t just about building—it’s about testing too. Getting involved early helps shape clear, testable user stories and acceptance criteria.
Focus on the most critical test cases
Not everything needs the same level of testing. Prioritizing high-risk areas first helps catch major issues early.
Explore beyond scripted tests
Even with well-defined test cases, real users behave unpredictably. Exploring the application outside scripted scenarios helps uncover unexpected issues.
Use collaboration tools wisely
Keeping track of progress and communicating with the team is easier with tools like Jira, Trello, and Slack. Sharing dashboards with tested features and defects keeps everyone informed.
Keep learning and adapting
Agile means constantly evolving. Staying updated on new tools and technologies helps improve testing effectiveness.
Why continuous testing matters
A Quality engineer keeps Agile development moving by testing alongside development, not after it. Instead of waiting until the end of a sprint, testing happens in small steps as features take shape. This helps teams:
- Catch and fix defects early, avoiding last-minute surprises.
- Deliver a working product at the end of every sprint.
- Feel confident that new updates won’t break existing functionality.
Example: In a social media app project, running daily smoke tests and exploratory testing twice a week ensured new features worked as expected while keeping everything stable.
Conclusion
A strong Agile team builds quality into every sprint, making it a natural part of the development process. The best results come when testers work alongside developers and product owners from the start, refining requirements, identifying risks early, and making sure automation supports fast, reliable releases.
With exploratory testing, automation, and continuous feedback, every change is validated in real time.
From personal experience, being actively involved in development discussions and understanding the intent behind features makes a huge difference. It’s not just about finding defects—it’s about helping shape a product that works seamlessly for users.
This approach ensures software meets both technical and user expectations—staying true to Agile’s core principle of delivering high-quality software with every release.

Mastering Cypress automation: advanced solutions
Scaling test automation means building a structured framework that ensures reliability, speed, and maintainability. As applications grow, a well-planned approach keeps test execution efficient, reduces maintenance overhead, and improves confidence in results.
Organizations that invest in structured test automation often achieve 30% faster release cycles and fewer production issues, leading to smoother deployments and better user experiences.
A well-designed Cypress framework supports thousands of test executions while adapting to different environments.
For instance, an e-commerce platform validating payment gateways, user flows, and device compatibility needs a strategy that keeps test execution fast and reliable. Without clear organization, test runs can become time-consuming, delaying releases and increasing operational complexity.
This guide focuses on essential strategies for handling environment configurations, organizing test suites, managing unexpected errors, and optimizing test performance.
With the right approach, it can scale seamlessly, keeping testing efficient and aligned with development goals.
Environment management
A well-planned environment setup keeps test execution smooth across development, staging, and production. Clear environment variables ensure tests run consistently, allowing teams to switch between environments without modifying test files.
This flexibility makes automation scalable and easier to maintain as infrastructure evolves.
To avoid misconfigurations, a fallback mechanism should always be in place. Using clear, easily recognizable environment names helps prevent confusion, ensuring tests run in the right context. Logging the selected environment adds visibility, making it easier to debug issues when running tests under different conditions. A structured approach to environment management keeps testing reliable and efficient, reducing the risk of errors and unexpected failures.
Overview:
Here's how test execution flows across different environments:
- Setting up base URLs
Below is sample code of config.js that is used for Setting up Base URL’s :
Syntax :
// cypress/config/config.js

const environments = {

  dev: "https://dev.example.com",

  stage: "https://staging.example.com",

  prod: "https://www.example.com",

  local: "http://localhost:3000"

};

function setBaseUrl() {

  const env = process.env.CYPRESS_ENV || "prod";

  Cypress.config("baseUrl", environments[env] || environments.prod);


  console.log(

    `%c🌍 Environment Selected: %c${env}`,

    "color: #4CAF50; font-weight: bold",

    "color: #2196F3; font-weight: bold"

  );

}
Best practices:
- Always include fallback values
- Use descriptive environment names
- Implement clear logging
- Keep sensitive data in environment variables
Shell script automation
Automating test execution makes workflows more efficient by reducing manual steps. A simple shell script can handle environment selection before running Cypress tests, ensuring consistency across different test runs.
This approach is especially useful in CI/CD pipelines, where automation removes the need for manual input and minimizes setup errors.
To keep things reliable, the script should validate inputs and allow only predefined environments. Assigning a default environment helps prevent issues caused by missing configurations. Adding clear logs makes it easy to see which environment is selected, giving teams instant feedback and helping them troubleshoot quickly when needed.
- Script setup
First, create a shell script for test execution:
Below is sample code of setTestEnv.sh that is used to select environment :
Syntax:
// setTestEnv.sh

#!/bin/bash

print_log() {

    COLOR=$1

    MESSAGE=$2

    echo -e "\033[0;${COLOR}m${MESSAGE}\033[0m"

}

get_environment() {

    while true; do

        read -p "Enter environment (prod/dev/stage/local) [default: prod]: " ENV

        ENV=${ENV:-prod}

        case $ENV in

            prod|dev|stage|local) break ;;

            *) print_log "red" "Invalid environment. Please try again." ;;

        esac

    done

}
- Implementation steps
- Create the script file
- Add environment selection
- Implement test path configuration
- Add validation and error handling
Flowchart :

Shell script automation flowchart
Test organization and filtering
A well-structured test suite makes test execution more efficient and easier to manage. When tests are organized by priority, module, and feature, teams can run only what’s necessary instead of executing the entire suite every time. This keeps test runs faster and more relevant to current development needs.
Using test tags like ‘smoke,’ ‘regression,’ or ‘high-priority’ helps teams filter and execute specific test groups, making workflows more streamlined. Well-tagged tests are easier to maintain and adapt as the application evolves.
Clear naming conventions for test files and folders also play a key role in keeping the repository structured. When test cases follow a logical order, team members—especially new ones—can navigate the framework effortlessly without confusion. A well-organized test suite not only saves time but also makes scaling automation much more manageable.
- Test suite organization
Here's a recommended structure for organizing your tests:
- Setting up test tags
Below is sample code of Setting test tags that is used to select and execute specific test groups like smoke sanity and based on the priorities :
Syntax :
// File : TestLogin.cy.js


describe('Login Tests', () => {

  it('should handle login process', {

    tags: ['smoke', 'auth', 'high']

  }, () => {

    // Test implementation

  });

});

describe('PIM Tests', () => {

  it('should create new product', {

    tags: ['smoke', 'pim', 'high']

  }, () => {

    // Test implementation

  });

});
- Tag categories
- Priority: high, medium, low
- Type: smoke, sanity, regression
- Module: pim, marketo, orders
- Feature: login, search, checkout
Flowchart :

Test organization and filtering flowchart
Error handling
A reliable automation framework needs to handle unexpected errors effectively. Issues like network delays, dynamic UI changes, and unhandled exceptions can affect test stability. A strong error-handling approach helps keep test runs consistent and prevents false failures from slowing down development.
Cypress offers built-in hooks to catch uncaught exceptions, log useful details, and keep tests running without unnecessary terminations. Clear logging makes it easier to diagnose issues, and setting limits on exception handling ensures that frequent failures don’t mask deeper problems that need attention.
Writing tests with real-world variations in mind improves reliability. Dynamic elements, API response delays, and UI updates should be accounted for to prevent flaky tests. A well-structured error management strategy creates a stable automation framework, reducing test failures and keeping execution smooth.
- Error handling flow
Here's how different types of errors are managed:ImplementationBelow is sample code of Handle Uncaught Exceptions that is used to solve exceptions and console errors while loading the webpage : Create File : error-handler.js
Syntax :
// cypress/support/error-handler.js

const handleUncaughtExceptions = () => {

  let uncaughtExceptionCount = 0;

  Cypress.on("uncaught:exception", (err, runnable) => {

    uncaughtExceptionCount++;

    console.error(`Uncaught Exception #${uncaughtExceptionCount}:`, {

      message: err.message,

      stack: err.stack,

      testTitle: runnable.title
      });

    if (uncaughtExceptionCount > 5) {

      return true;
    }

    return false;
   });
};Flowchart :

Error handling flowchart
Feature flag management
Feature flags help test automation stay in sync with evolving application functionalities. When new features roll out gradually, tests should adjust dynamically to account for their availability. By using environment variables, cypress can check whether a feature is enabled and decide whether to test the latest version or stick with the existing implementation.
This approach keeps test runs stable, avoiding unnecessary failures when a feature is still in development. It also supports A/B testing by allowing different test scenarios without disrupting the overall suite.
Integrating feature flags into Cypress ensures tests stay relevant as the application grows, keeping automation flexible and aligned with real-world usage.
Implementation
Syntax :
describe('Login Tests', () => {

  let useLatestFeature;

  beforeEach(() => {

    const LFValue = Cypress.env('LF');

    useLatestFeature = LFValue === 'true' || LFValue === true;

  });

  it('should handle login process', {

    tags: ['smoke', 'auth']

  }, () => {

    if (useLatestFeature) {

      loginDirect();

    } else {

      loginLegacy();

    }

  });

});
Performance optimization
Efficient test execution is essential for large-scale applications. Optimizing test runs ensures faster execution without sacrificing coverage. Using precise selectors improves stability and speeds up test execution, while avoiding generic or unreliable locators reduces flakiness.
Event-based synchronization ensures that tests proceed only when the application is ready, improving consistency.
Managing resources effectively helps maintain performance. Running too many parallel tests can strain system memory, slowing down execution rather than improving it. A balanced approach—limiting parallel execution based on available resources—prevents unnecessary slowdowns.
Test data should also be structured to avoid dependencies that can cause unpredictable failures.
Data-driven testing helps reduce redundancy by covering multiple scenarios with fewer test cases. Regularly reviewing and refining test cases keeps the suite focused, eliminating outdated or overlapping tests that add unnecessary overhead.
Best practices for optimized execution
- Use precise selectors to improve stability and execution speed.
- Replace arbitrary wait times with event-based synchronization for consistency.
- Manage resources by optimizing parallel test execution to prevent performance bottlenecks.
- Implement data-driven testing to maintain coverage without redundant test cases.
- Continuously review and refine test cases to keep the suite efficient.
A well-optimized test execution strategy ensures that Cypress tests remain fast, reliable, and scalable, supporting smooth development and deployment cycles.
Ensuring viewport management
Applications today run across multiple devices, from smartphones to large desktop screens. Testing needs to account for these variations to ensure a consistent user experience.
A well-planned viewport management strategy helps validate how applications respond to different screen sizes, making sure layouts, navigation, and functionality remain intact across mobile, tablet, and desktop resolutions.
Rather than relying on default settings, defining viewport configurations for specific devices ensures accurate testing. Applying these presets consistently across test cases helps catch display issues early and prevents inconsistencies.
Responsive testing should reflect how real users interact with the application, ensuring that buttons, menus, and key features remain accessible and functional at every screen size. Proper viewport management helps prevent layout shifts, overlapping elements, or navigation problems that could otherwise surface in production.
- Viewport presets
Syntax :
const viewports = {

  mobile: { width: 375, height: 667 },

  tablet: { width: 768, height: 1024 },

  desktop: { width: 1920, height: 1080 }

};

// Usage in tests

describe('Responsive Testing', () => {

  it('works on mobile', () => {

    cy.viewport(viewports.mobile.width, viewports.mobile.height);

    // Test implementation

  });

});
Flowchart :

Virewport configuration demo
Reporting and screenshots for better debugging
Clear reporting makes it easier to track test results and troubleshoot failures efficiently.
Cypress offers various reporting tools that generate detailed execution reports, complete with charts, logs, and embedded screenshots. These reports help teams quickly analyze outcomes, spot patterns, and address issues before they impact production.
Screenshots captured during test failures provide instant visual context, making debugging faster and more precise. Video recordings add another layer of insight by showing the exact sequence of interactions leading up to an issue.
With well-structured reporting, developers, testers, and stakeholders can collaborate more effectively, ensuring test results are transparent and actionable.Setup
Syntax :
// cypress.config.js

module.exports = {

  reporter: 'cypress-mochawesome-reporter',

  video: true,

  screenshotOnRunFailure: true,

  reporterOptions: {

    charts: true,

    reportPageTitle: 'Test Execution Report',

    embeddedScreenshots: true

  }

};
Leveraging latest cypress features
Staying updated with Cypress improvements enhances test capabilities.
Features like component testing allow validation of UI elements in isolation, ensuring they function correctly before integration.
Newer Cypress versions include performance optimizations, improved debugging options, and better support for modern frameworks.
Keeping up with updates helps teams leverage improvements that enhance test reliability and execution efficiency.Component Testing// Example React component test
Syntax :
import MyComponent from './MyComponent'

describe('MyComponent.cy.js', () => {

  it('renders correctly', () => {

    cy.mount(<MyComponent />)

    cy.get('[data-testid="my-component"]').should('be.visible')

  });

});
Conclusion
"The best test suite is one that confirms quality before users even notice—and remains effortless to maintain."
A well-structured Cypress automation framework makes testing easier to scale. With a clear environment setup, organized test structures, and strong error handling, teams can build a system that is both reliable and easy to maintain. Beyond just writing tests, a well-planned approach ensures that automation keeps up with development, providing fast feedback and supporting continuous improvement.
In my experience, automation works best when it’s designed for long-term efficiency. A defined environment configuration keeps execution smooth across different stages, while automation scripts reduce manual effort and allow teams to focus on development. Well-organized test suites make it easy to run specific test sets when needed, adapting to different priorities without unnecessary overhead.
Handling errors effectively strengthens test stability and ensures consistent results. Tests that account for real-world scenarios provide meaningful insights, making automation a valuable asset rather than just a verification tool. Feature flags make testing even more adaptable, allowing new functionality to be validated without disrupting workflows.
Optimizing execution improves both speed and coverage. Small refinements—such as using precise selectors and event-driven waits—help keep tests efficient without sacrificing reliability. Responsive testing ensures applications perform well across devices, while structured reporting simplifies debugging and provides clear insights for teams.
A strong automation foundation keeps testing efficient and aligned with evolving needs. Structured configurations, automated workflows, and well-organized test cases make everything more manageable. With early error handling, feature flags, and ongoing optimizations, test automation stays scalable and adaptable over time.
Testing supports progress by providing confidence in every release.

Testing strategies for a decoupled Drupal site
Decoupled Drupal changes how websites and apps work by separating the back-end, where content is managed, from the front-end, where users interact.
This setup allows the same content to be delivered to multiple platforms in different ways. For example, a university might use Drupal to manage its course catalog, displaying it on their website, a student mobile app, and even digital kiosks across campus.
Each platform looks and feels different but pulls data from the same source.
Another case could be an e-commerce site where the back-end manages product listings, inventory, and pricing, while the front-end is tailored for web browsers, mobile apps, and in-store screens.
This separation allows for flexibility in design and functionality for each platform while keeping the core content consistent.
With this flexibility comes the need for more focused testing. For instance, QA teams need to ensure the back-end sends accurate product details to all front-end systems and that those systems display the information correctly, whether it’s a mobile app showing product availability or a website applying promotional pricing.
Decoupled Drupal creates new opportunities for better user experiences but also requires careful testing to make sure all parts work smoothly together.
The decoupled Drupal model
Before jumping into the testing approach, we need to understand what decoupled (headless) Drupal means.
In a traditional Drupal setup, the backend, which handles content management, and the frontend, which displays the content, are closely integrated and use the same URL.
In a decoupled setup, the Drupal backend handles content management (adding and managing content), while the frontend is built with JavaScript frameworks like React, and Next and content displays via APIs.
.avif)
.avif)
1. Client Request ---> User requests page
2. Server Response (HTML Shell + JS) --->
3. Front-End JavaScript Framework Activated ---> Server delivers the front-end HTML shell with the required JS framework (React/Vue/Angular)
4. Front-End Executes JavaScript Framework (JS initialization)
5. Initial HTML Rendered by the JS Framework (initial loading without full content)
6. Front-End Executes API Calls to Drupal for Dynamic Content (via REST, GraphQL, or JSON: API)
7. Drupal API Receives and Responds with Content in JSON Format
8. Front-End Updates UI with Retrieved Content
Execution steps
- User requests page from server:
- The user navigates to a URL in their browser.
- A request is sent to the server, typically through a CDN or a front-end hosting service.
- Server responds with an initial HTML shell and JavaScript:
- The server responds by sending a basic HTML shell, including links to JavaScript files that initialize the front-end framework (React, Vue, or Angular).
- JavaScript framework executes (client-side rendering):
- Once the HTML is loaded, the JavaScript framework is executed on the client side.
- The front-end framework initializes, setting up the client-side logic for rendering the page.
- Initial HTML rendering (no data yet):
- The JavaScript framework renders a skeleton page version, typically without actual content (loading states might be displayed).
- This initial render allows the front-end to handle routing and define the page structure.
- API requests for content:
- The front-end framework then issues API requests to the Drupal back-end using endpoints provided by REST, JSON, or GraphQL to fetch dynamic content.
- The request specifies what content is needed based on the page being viewed.
- API response from Drupal:
- Drupal receives the API request, processes it, and sends back the requested content in JSON format.
- This data might include structured content like articles, images, and metadata.
- Front-End receives content and renders final page:
- The front-end framework receives the JSON response and dynamically updates the HTML structure to display the content.
- The page is now fully rendered with all content in place.
Critical QA considerations for testing a decoupled Drupal site
1. API testing: the backbone of communication
In decoupled Drupal, the back-end provides data via APIs (usually RESTful or GraphQL), while the front-end consumes these APIs to render content. Testing APIs is critical to ensure:
- Correct data retrieval: APIs must return the proper data structures and formats (e.g., JSON).
- Error handling: Ensure APIs handle exceptions, such as invalid queries or network errors.
- Authentication & authorization: Verify proper access control to sensitive endpoints.
- Performance: Test the API's speed and scalability, especially under heavy loads.
Tools like Postman or SOAP UI can automate API testing, ensuring reliability across multiple scenarios.

2. Front-End testing: user experience at the forefront
The decoupled front-end introduces additional layers of complexity that QA teams must account for:
- UI/UX testing: The front-end, often built using frameworks like React or Vue, needs to be tested for usability, responsiveness, and accessibility across devices and browsers.
- Cross-browser compatibility: Ensure that the decoupled front-end works seamlessly across different browsers (Chrome, Firefox, Safari, etc.).
- End-to-end (E2E) testing: Tools like Cypress or Selenium simulate real user interactions, ensuring that front-end workflows are functional and intuitive.
3. Content consistency & synchronization
In a decoupled setup, content is often authored in Drupal but consumed by various front-end applications. Ensuring content synchronization is crucial:
- Content validation: Verify that the data entered in Drupal is displayed correctly on the front-end, without truncation or formatting errors.
- Caching issues: Ensure the front-end handles caching properly, delivering updated content to users without unnecessary delays.
- Real-time updates: If the front-end consumes real-time data (e.g., via WebSockets), test how it handles updates, especially during simultaneous data changes.
4. Performance testing: keeping both sides optimized
A decoupled architecture can introduce performance challenges due to the need for constant API requests and responses. QA teams should focus on:
- API performance: Ensure that API calls are optimized, minimizing latency and server load.
- Front-end load testing: Ensure that the front-end remains responsive even when rendering large datasets or handling concurrent users.
- Network latency: Test how the front-end performs in different network conditions (e.g., slow connections) and optimize for speed and user experience.
5. Security testing: protecting the layers
Decoupled sites are exposed to more security vulnerabilities since both the API and the front-end are open entry points. Security testing should include:
- API security: Ensure that all endpoints are secure, using proper authentication methods (OAuth, JWT, etc.).
- Cross-origin resource sharing (CORS): Validate CORS policies to prevent unauthorized access to APIs from foreign domains.
- Front-end vulnerabilities: Test for common vulnerabilities like XSS, CSRF, and other security flaws in the front-end.
6. Regression testing: continuous integration
Decoupled architectures tend to involve frequent updates to both the back-end and front-end, which can break existing functionality if not tested thoroughly. Implementing automated regression testing is crucial:
- Automated testing suites: Create test suites using tools like Jenkins, CircleCI, or GitLab CI to run tests after every code change.
- Smoke testing: After each deployment, ensure that the critical features of both the API and front-end are functioning correctly.
7. Visual regression testing
Changes in the front-end can introduce unintended design issues. Visual regression testing can be employed to ensure that the UI remains consistent after code changes:
- Tools: Use tools like Percy or BackstopJS to capture screenshots of pages before and after changes, comparing them for inconsistencies.
- CSS and layout testing: Test front-end layout across multiple screen sizes to ensure design integrity.
Best practices for QA in decoupled Drupal
Quality Assurance (QA) for a decoupled Drupal site involves unique challenges and considerations due to the separation of the frontend and backend.
Here are some best practices to ensure a thorough and effective QA process:
- Decoupled architecture understanding
- Knowledge of Frontend and Backend: QA teams should understand the Drupal backend and the chosen frontend technology (like React, and Angular).
This understanding is essential to identify integration issues and areas that require focused testing. - Knowledge of APIs: Since decoupled Drupal sites depend on APIs for communication between the frontend and backend, it is necessary to understand how these APIs work, their endpoints, and the expected data formats.
- Knowledge of Frontend and Backend: QA teams should understand the Drupal backend and the chosen frontend technology (like React, and Angular).
- QA documentation
- Test plan: Create a detailed test plan that outlines the scope, objectives, and specific areas of focus for testing, including both functional and non-functional requirements.
- Detailed test cases: When working with a decoupled Drupal site, it is essential to design detailed test cases that address both the frontend and backend components to ensure coverage and smooth integration between these layers.
- User help documentation: User help documentation is designed to assist users in understanding how to use a product, service, or software application effectively. It provides step-by-step instructions, guidelines, troubleshooting tips, and other helpful information to ensure a smooth user experience.
- Integration testing
Validate the integration between the frontend and backend. Ensure that data flows correctly through APIs and test the data flow between Drupal’s backend and the decoupled frontend to ensure that data is accurately processed, transformed, and displayed.
- Continuous Integration/Continuous Deployment (CI/CD):
Implement CI/CD pipelines to automate testing and deployment processes. This ensures that tests are run regularly and that new changes do not introduce regressions.
- Team collaboration
Maintain strong communication between frontend, backend, and QA teams to ensure alignment on requirements, testing strategies, and timelines.
Conclusion
Picture a system where content flows effortlessly from a single source to multiple platforms, each tailored for a unique audience.
Decoupled Drupal makes this possible by separating the back-end, where content is stored and managed, from the front-end, where users interact.
This separation allows organizations to deliver consistent, reliable information across websites, apps, and other digital experiences, all while customizing how it looks and functions for each platform.
But this flexibility brings complexity. With the back-end and front-end working independently, ensuring smooth communication between them becomes critical.
Every part of the system needs to perform flawlessly, from how content is fetched and displayed to how it responds to user interactions.
Testing is the glue that holds this system together, verifying that each piece works on its own and as part of a greater whole.
Through careful planning and a range of testing methods, decoupled Drupal evolves into more than a system—it becomes a platform capable of meeting diverse needs with precision.
It’s about more than delivering content; it’s about delivering experiences that work everywhere, every time.

A practical guide to web accessibility testing - basic level checklist | Part 1
Accessibility refers to the design and development of products, devices, services, or environments to be usable by people with disabilities. The goal is to provide equal access and equal opportunities to all individuals, regardless of their abilities or disabilities.
Accessibility guidelines are a set of rules and standards that help ensure that products, devices, services, or environments are accessible to individuals with disabilities. These guidelines cover a wide range of topics, such as text alternatives for non-text content, contrast ratios, resizing text, sign language interpretation, extended audio descriptions, and more.
The accessibility guidelines are divided into different levels of conformance to indicate the level of accessibility required. The most widely used set of guidelines, WCAG 2.1 (Web content accessibility guidelines 2.1), is divided into three levels of conformance: A (minimum), AA (intermediate), and AAA (advanced).
The A level provides the minimum level of accessibility, while the AAA level provides the highest level of accessibility. The AA level is considered the industry standard for accessibility. The choice of level depends on the needs of the target audience and the resources available for implementation.
In this series, we will be looking at the different common areas of a website where accessibility testing is necessary. This part covers the first basic sitewide checks that are the basis of accessibility tests.
Basic high-level checklist for accessibility
Based on the guidelines and the standard, there is a basic high-level checklist for accessibility that is followed at all accessibility levels :
1. HTML validation
HTML validator tools like the Wave tool can easily analyze the HTML validation process. This tool verifies the webpage's compliance with accessibility guidelines and detects any accessibility obstacles. As quality assurance professionals, it is crucial to ensure that the Wave tool does not detect any errors.
In the event of an error, the screen reader may not work. Upon resolution of all errors identified by the Wave tool, it can be asserted that the fundamental principles of accessibility have been satisfactorily addressed.
Eg: Alt text is missing, a nested heading is missing, a form label is missing, contrast issues etc.


Wave tool example with issues in details
Another similar tool that can be used is AxeDev tools, which can be used to validate a whole website at a time, but only limited features like full-page scans are available for free version. It gives a list of issues with details, and issue severity.

Axe Devtool example
Another tool that can be utilized is Google Lighthouse. This can be easily integrated with the dev tools in Chrome and executed on each page of your website. The reports also can be exported.
For More detailed implementations of these tools please refer to our other blog.
2. Keyboard accessibility
All links, drop-down menus, and form controls must be operable via keyboard accessibility. Failure to do so will obstruct users from accessing related functionalities and features. This requirement falls under the levels of A, AA, and AAA in terms of accessibility standards.
Verify that the tab order follows a logical sequence. DOM order should match the visual order in the front end which will help improve navigation for assistive technology.

Example of a dropdown menu accessible via screen reader additionally link interaction with screen reader , which announce we can click link using the following keyboard shortcut

3. Semantic HTML
Semantic HTML plays a crucial role in making web content more accessible and understandable for both users and automated systems. All this is required as per the WCAG A, AA and AAA standards. When testing the semantic structure of HTML, consider the following checklist:
- Usage of right HTML tags for semantic elements such as some text
- <header>, <nav>, <main>, <article>, <section>, <aside>, and <footer>.
- For media elements <img>, <audio> and <video>
- Tables must use structural elements like <thead>, <tbody>, <tfoot>, <tr>, <th>, and <td>.
- List must have <ul> and <li> tags
- Heading elements (<h1> to <h6>) are used in a logical and hierarchical order to provide a meaningful document structure
- Ensure that all links have descriptive and meaningful text.
- Use ARIA roles and attributes appropriately to enhance the accessibility of dynamic content.
- Use semantic grouping elements such as <div>, <span>, <fieldset>, and <legend> appropriately.
Example of a simple semantic HTML structure :
<!DOCTYPE html>
<html lang="en">
<head>
    <title>Semantic HTML Example</title>
</head>
<body>

    <header>
        <h1>Welcome to My Website</h1>
        <nav>
            <ul>
                <li><a href="#home">Home</a></li>
                <li><a href="#contact">Contact</a></li>
            </ul>
        </nav>
    </header>

    <main>
        <section>
            <h2>Hello</h2>
            <p>This is our Website</p>
            <img src="sample-image.jpg" alt="A descriptive image">
        </section>

        <section>
            <h2>Services</h2>
            <ul>
                <li><strong>Web Design and development</li>
                <li><strong>Quality Assurance</li>
            </ul>
        </section>
    </main>

    <footer>
        <p>2024 My Website. All rights reserved.</p>
    </footer>

</body>
</html>
Here in the above example:
- The <header> contains the main heading of the page and a navigation menu.
- The <main> element contains two <section> elements, each representing a distinct section of content.
- Inside each <section>, there are semantic elements like <h2> for subheadings and <p> for paragraphs. <img> element for an image with descriptive alt text.
- The navigation menu uses an ordered list (<ul>) with list items (<li>) and hyperlinks (<a>).
- The <footer> element at the bottom of the page includes copyright information.
4. Focus visibility
It is imperative from an accessibility standpoint that the currently focused element is consistently visible on the screen with an outline. This is crucial in order for the user to accurately identify the cursor's position. It falls under the levels of A, AA, and AAA in terms of accessibility standards.
Two main checks must be done to verify if the elements are focused in the right way


Focus with no screen reader

Focus with screen reader
5. Contrast ratio
It is crucial to follow the accessibility guidelines to ensure that users with visual impairments can easily read the text. The appropriate contrast ratio should be maintained for all text on the website, including headings, body text, and buttons. This is to prevent confusion and improve readability for users with visual impairments.
Ignoring these guidelines may result in a negative user experience and should not be overlooked. It is the responsibility of both design and development teams to make sure the website follows the accessibility standards.

The contrast ratio can be easily verified by the WAVE tool extension. This really helps in detecting the variation in any contrast ratio standards , which is a bit difficult to find manually.

Wave Tool Contrast detection
Conclusion
So these are the basic high-level criteria that are mandatory in every website which are following A, AA, AAA and help in maintaining a high level of accessibility. By prioritizing and testing these, you contribute to creating a more inclusive web experience for all users, including those with visual or motor impairments.
In the next coming series of blogs, we will look into the different common elements in websites.
Happy Testing!