All blogs

Creating a custom CKEditor 5 plugin for Svelte
Svelte is an open-source JavaScript framework that helps to create interactive web pages. The Svelte plugin enables users to embed its components seamlessly into their content.
In this blog, we will consider how to create a custom plugin to integrate Svelte components into CKEditor 5, a powerful and extensible rich text editor that allows developers to tailor it to their specific needs.
To begin with, check out the directory structure that houses the essential components of the Svelte plugin.
Directory structure

Essential components of the Svelte plugin
1. package.json
Download the necessary CKEditor5 node modules for compiling custom plugins.
2. webpack.config.js
The Webpack.config.js file is a script designed to automate the build process for CKEditor 5 plugins located in the js/ckeditor5_plugins directory. It employs the webpack module bundler to produce plugin files that are ready for production.
This configuration script is structured to bundle CKEditor 5 plugins individually, leveraging the capabilities of the getDirectories function. This function dynamically retrieves all subdirectories within the specified path (./js/ckeditor5_plugins). For each identified directory, a distinct Webpack configuration is generated and seamlessly integrated into the module.exports array.
3. index.js
This file exports an object as the default export of the ‘index.js’ file. The object possesses a property named Svelte, and its value is the imported Svelte plugin. This is how CKEditor 5 will identify and uncover the Svelte plugin during the execution of the build process. The exported object functions as a map of available plugins that CKEditor 5 can utilize.
4. svelte.js
The Svelte class serves as the glue that integrates the editing and UI components of the plugin. It extends CKEditor's Plugin class and specifies its dependencies.
The static get requires() method in this context specifies that the Svelte master plugin requires both SvelteEditing and SvelteUI. Although these components extend the Plugin class, CKEditor 5 will not consider them as individual plugins unless explicitly exported in index.js. This emphasizes the importance of explicit export to ensure that CKEditor 5 recognizes these components as plugins.
5. SvelteEditing - Handling the model
The SvelteEditing class defines the data model for the Svelte element and the converters for handling its conversion to and from DOM markup.
The init method initializes the plugin, calling two helper methods: _defineSchema and _defineConverters, to set up the schema and converters for the Svelte model. Additionally, it adds the 'insertSvelte' command to the editor, associating it with the InsertSvelteCommand class.
The _defineSchema method sets up the schema for the Svelte model, registering the model type and specifying that it behaves like a self-contained object (isObject: true). It also defines where the model is allowed (allowWhere), where its content is allowed (allowContentOf), and the allowed attributes (allowAttributes), in this case, the 'src' attribute.
The _defineConverters method sets up the converters for the Svelte model, using the CKEditor conversion object to register converters for upcasting and downcasting.
This section registers an upcast converter, determining how existing HTML is interpreted by the editor when it loads. It specifies that when encountering an HTML iframe element with the class '-svelte-embed,' it should be upcasted to a Svelte model element.
This section registers a downcast converter for data, defining how the Svelte model should be converted to DOM markup. If the model has a 'src' attribute, it uses that value; otherwise, it defaults to 'https://www.google.com'. It creates an iframe element with the specified class and source, which is then returned.
This section registers an editing downcast converter, defining how the Svelte model should be converted to editable DOM markup. It creates an iframe element similar to the data downcast converter and then uses toWidgetEditable to wrap it as a widget in the editable view.
6. SvelteUI - User interface integration
The SvelteUI class registers the toolbar button for Svelte embeds, complete with an icon and dropdown functionality. It listens for user interactions and triggers the insertion of Svelte components into the editor.
This section adds the Svelte component to the CKEditor UI, creating a dropdown view using the createDropdown function. It sets its button view with an icon and associates it with the specified locale.
Here, a collection of items is created, representing the Svelte components to be displayed in the dropdown. It iterates through the directories obtained from the editor's configuration and adds each Svelte component as a button to the collection.
This line adds the list of Svelte components to the previously created dropdown view using the addListToDropdown function.
This section sets up an event listener using 'this.listenTo' to listen for the 'execute' event on the dropdown view. When an item is selected, it extracts the src and label from the selected item, modifies the src path, and then executes the 'insertSvelte' command on the editor with the modified src.
Finally, the init method returns the configured dropdown view, completing the initialization of the SvelteUI plugin.
7. insertsveltecommand
The heart of our plugin lies in the InsertSvelteCommand class. This command executes when the toolbar button for embedding Svelte components is pressed, utilizing CKEditor's model to insert the desired content into the editor.
This line declares the InsertSvelteCommand class, extending the CKEditor 5 Command class. This class encapsulates the logic executed when the toolbar button is pressed.
The execute method is part of the Command class and contains the logic to be executed when the command is invoked. It takes a src parameter, representing the source content to be inserted.
- const { model } = this.editor;: Destructures the model property from the editor object. The editor object represents the CKEditor instance.
- model.change((writer) => { ... });: Initiates a model change, ensuring that the changes are handled as a single transaction. The writer parameter provides methods for modifying the model.
- model.insertContent(createSvelte(writer, src));: Inserts content into the model, calling the createSvelte function to generate the content to be inserted.
The createSvelte function generates a CKEditor 5 model element representing the Svelte component. It uses the writer.createElement method to create an element with the specified name ('Svelte') and attributes (in this case, the src attribute). The created element is then returned.
The final look
After enabling the module in Drupal, you should see the screen below:
.avif)
In this requirement, we are passing the folders inside a specific directory from Drupal to the CKEditor5 plugin. When you access any content-type page with full HTML, you will start seeing this:
On clicking the "View Source" option, the type casting of CKEditor5 will display the iframe tag with the src attribute set to the folder's index.html.
.avif)
Conclusion
Creating a custom CKEditor 5 plugin to embed Svelte components adds a new dimension to content creation. The Svelte plugin seamlessly integrates into the editor, providing users with a streamlined experience for incorporating dynamic Svelte content.
If you want to know how to integrate CKEditor 5 in Drupal 9, you can find all the important steps here.
Happy editing with Svelte !

Setting up Google Tag Manager and Google Analytics in Drupal
Google Tag Manager (GTM) and Google Analytics (GA) are widely used for monitoring user behavior and performance on websites. They allow us to create tracking tags and triggers without coding to follow how users interact with a site. This provides actionable data to optimize web design and functions.
Together, these tools enable website owners and marketers to gain valuable insights into user website activity. The analytics and tracking capabilities inform data-driven decisions to improve visitor experience.
Google Tag Manager (GTM)
Google Tag Manager (GTM) is a tag management system that helps to easily update tracking code fragments (known as tags) on websites and apps. It works by creating tags, triggers, and variables that help gather data and analytics on web user activity.
Learn how to use Google Tag Manager and create tags and triggers here.
Google Analytics (GA-4)
Google Analytics (GA) is an analytics service used to measure traffic and engagement on websites and apps. We can generate reports on tracked web activity using dimensions and metrics. While real-time and debug views show current data, report generation can take 24-48 hours to process.
Note: Google has announced that starting from July 2023, GA-UA (Universal Analytics) will be replaced by GA-4, and standard Universal Analytics properties will stop processing new data.
Differences between GA-UA and GA-4
Integrating GTM in Drupal
- Install the GTM module.
- Enable the module and click on the Configure button.
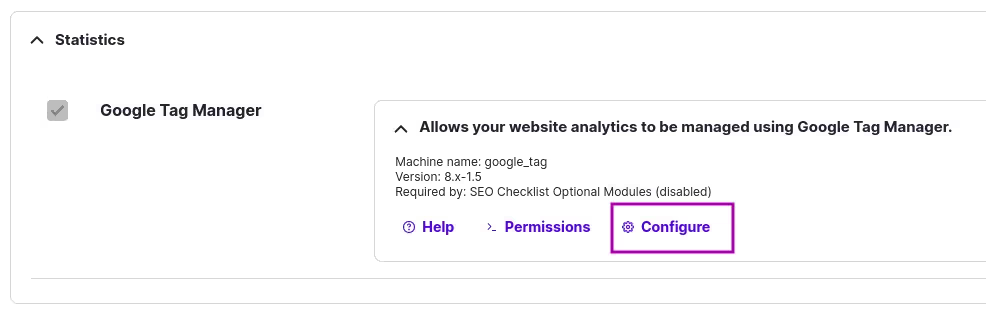
3. Click on the containers tab to add a new container.

4. Label the container and add a container ID. You can find the container ID in GTM.
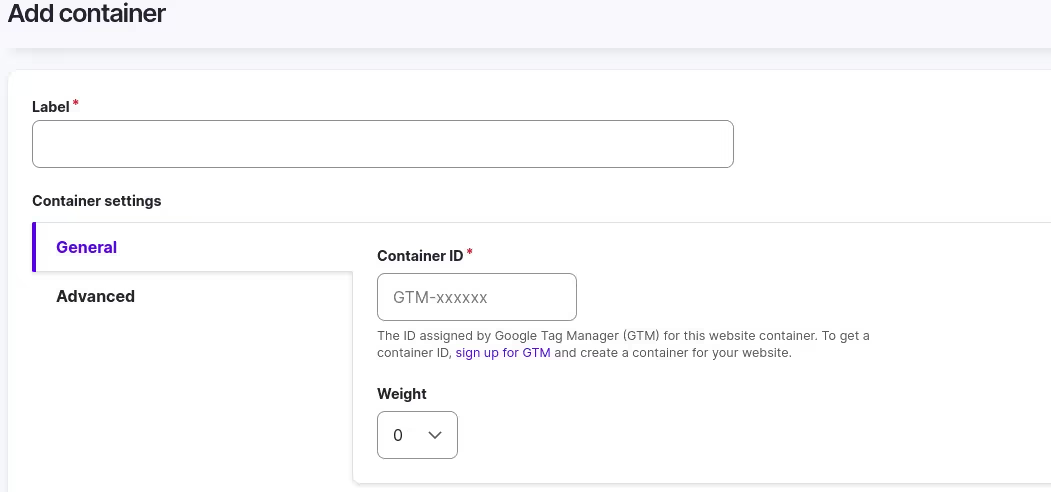
5. Find a container ID starting with GTM-XXXXX, copy the ID, paste it into the container ID input field in Drupal (step 4), and click Save to integrate the tag manager with your Drupal site.

Integrating GA4 in Drupal
- Install and enable the GA module.
- Go to the GA configuration page on Drupal by typing admin/config/services/google-analytics to add a property ID.
- To get the property ID, go to the GA account and search for measurement ID. Copy and paste it in the Web Property field and save the configuration.
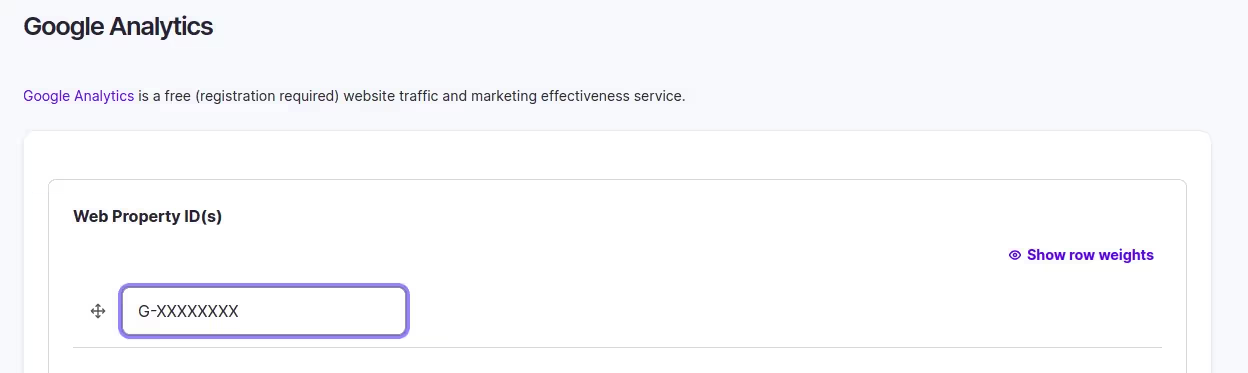
4. Connect Tag Manager with Google Analytics. Find out how to do it here.
Integrating GA reports module in Drupal
After integrating GTM with GA to enable tracking and report generation, we can display the data directly on the Drupal site using the Google Analytics Reports module.
- Install the module and enable it.
- Create a new project in Google Developers Console to access the data from Google Analytics.
- Go to Google Cloud and click on the Enabled API’s and services tab.
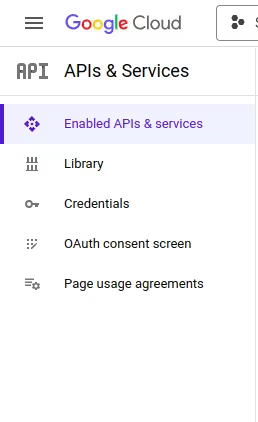
4. Enable Google Analytics Data API.
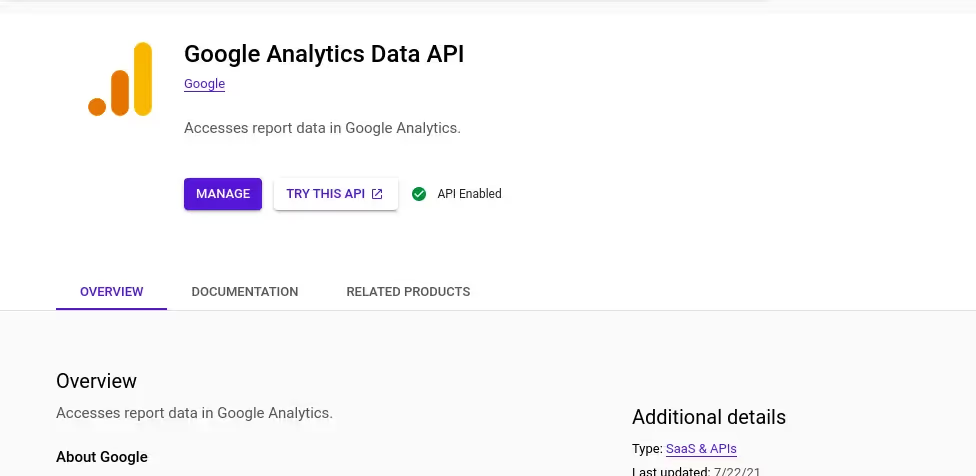
5. Go to credentials and create a Service account. Fill up all the details, like service account name, account ID, etc. Skip the optional fields and click on Save.
6. Click on the created service account, find a KEYS tab on the top, and click on it. Then click on ADD KEY → Create a new key → JSON type and → Create to download a JSON file.
7. Go to the Google Analytics reports module config page on Drupal - admin/config/services/google-analytics-reports-api, and upload the downloaded JSON file, and add a property ID. Search for the Property ID in Google Analytics and paste it into the GA reports config. Save the configurations.
8. Go to the configurations page of GA reports and click on the import field to import the fields from Google Analytics. The GA reports module is now configured in the Drupal site.
9. To display the GA data, create a new view page, select Google Analytics in views settings, and click on the Save and Edit button. Add dimensions and metrics in field sections and save the view.


Resources
Set up and install Google Tag Manager
Configure Google Analytics 4 in Google Tag Manager
Summing up
Google Tag Manager and Google Analytics offer robust website tracking and analytics. With seamless integration in Drupal and easy configuration, businesses can access meaningful data analytics and insights to optimize experiences, operations, and performance.

Introduction to Transform API
The Transform API is a recently contributed Drupal module, designed to simplify the creation of JSON content from various Drupal elements such as entities and menus. It provides a smooth way for developers familiar with Drupal's entity system, view modes, and templates to effortlessly convert them into JSON, using either configuration or code.
While Drupal traditionally served HTML content, there's a shift towards headless or decoupled architectures, where content is delivered as JSON. This is precisely where the Transform API excels. Leveraging Drupal’s responsive image module, Transform API ensures images are provided in multiple formats, contributing to improved image quality and enhanced performance for decoupled sites.
The Transform API brings together familiar elements like blocks (transform blocks), view modes (transform modes), and formatters (transformers). It also includes techniques, such as lazy_builders (lazy_transformers) and preprocess (transform_alter).
Let’s consider some key terminologies related to the Transform API.
Terminologies related to Transform API
Transform blocks
In Drupal, the Block Layout refers to the system and user interface that helps arrange and display blocks on your website. Similarly, Transform blocks allow you to manage the placement, visibility, and layout of the blocks in the JSON version of the website.
The Transform API includes a new Transform blocks tab (/admin/structure/block/transform ) within Drupal's main block layout settings page. Here, regions and blocks can be configured for the JSON output. These Transform blocks work similarly to regular blocks, except they use preconfigured regions rather than theme regions.
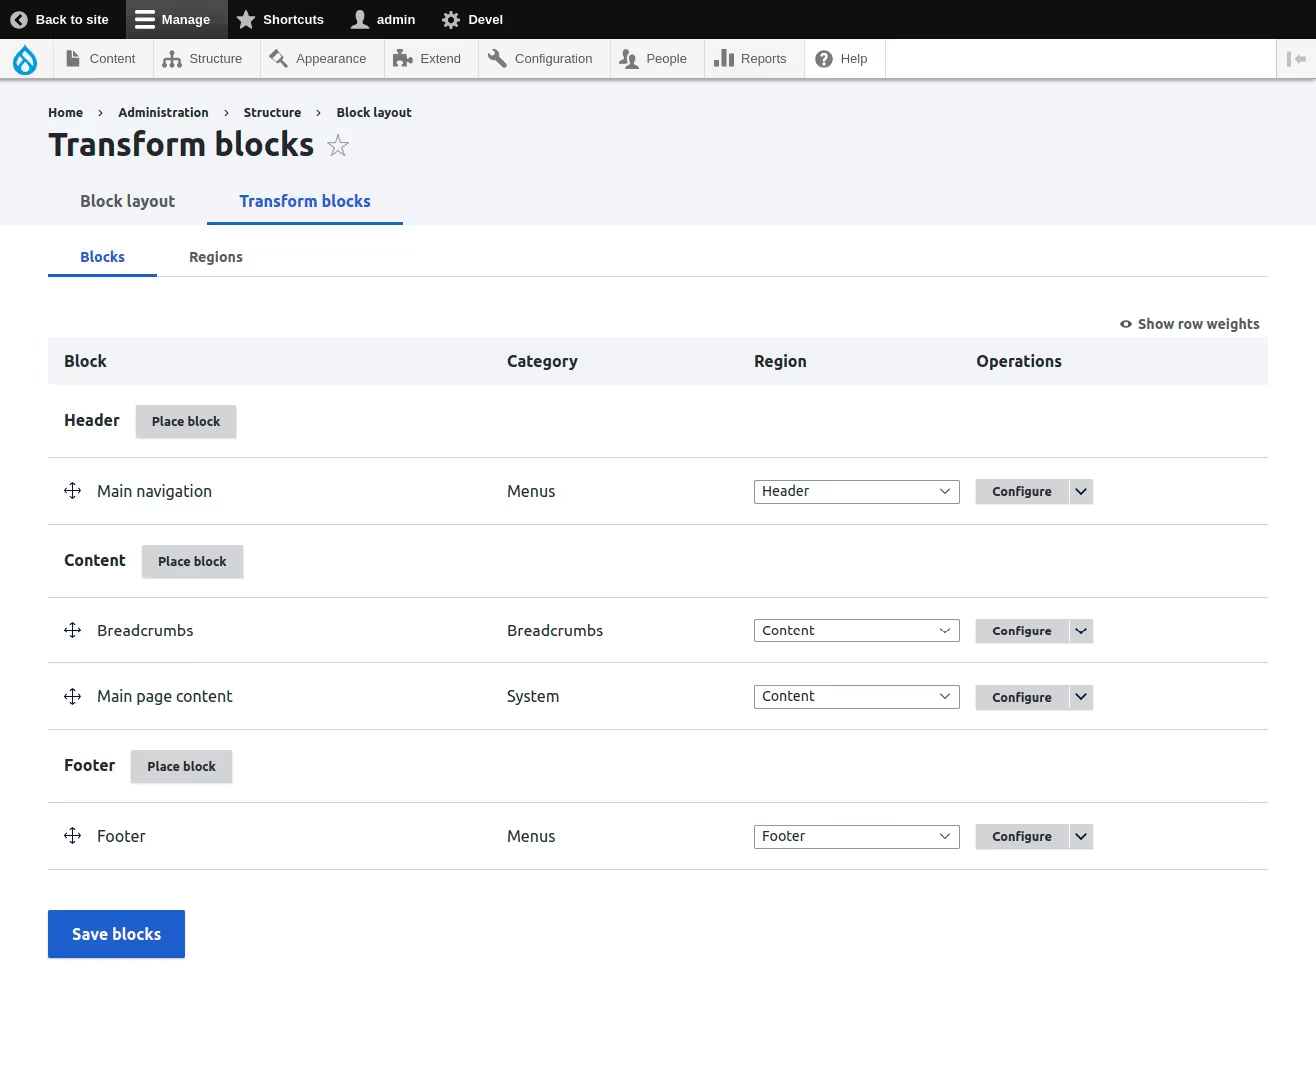

Transform modes
Drupal core has default display modes: view modes and form modes. The Transform API introduces "transform mode" - this works like the view mode but for JSON output instead of HTML.
Developers can add new transform modes in the Drupal backend under Structure → Display modes → Transform modes or use the path /admin/structure/display-modes/transform. These new transform modes can then be used for entities, similarly to view and form modes configured in the field UI.
Transform field formatter (Transformers)
The field formatter in Drupal lets you customize how field data is displayed on web pages. The Transform API has "Transform field formatter" that does the same for JSON output. These formatters control what field content gets included in headless APIs and structures.


Regular field formatters display data as HTML for web pages. Transform field formatters present data as JSON for APIs instead. Transform modes can provide different modes for representing the same entity.

Difference between JSON API and Transform API
The Transform API module takes advantage of Drupal's existing functionality. It prepares images and content so they are ready for decoupled sites. The JSON:API module mainly returns raw entity data. It requires the frontend to process images and content after receiving them.
For example, the Transform API provides images in multiple sizes for responsive sites. Its workflow matches typical Drupal development.
Check out the difference between the JSON API response and the Transform API response for article content.
Transform API response

JSON API response
1. Article entity response.

2. Image entity response.

Benefits of Transform API
- Easy to use without special coding skills.
- Converts any Drupal entities like nodes, users, or taxonomy terms into JSON.
- Generates JSON for different view modes and templates.
- Creates headless backend content for decoupled Drupal sites.
Resources
Summing up
The Transform API module simplifies creating JSON data from Drupal. It reuses existing skills for Drupal developers while meeting the needs for headless systems. If you are looking for a way to create JSON content from Drupal entities, then the Transform API Drupal module is a good option to consider.

Drupal Developer Days 2023: A Success Story
The Drupal Developer Days 2023 event brought together over 350 passionate individuals from around the world who love, learn, and discuss the open-source CMS, Drupal. Held in Vienna from 19 to 22 July, this year's gathering was a distinct success.

Organized by the Drupal community, this annual event provides a platform for developers to collaborate, contribute, share, and meet like-minded Drupal enthusiasts, uniting minds for open-source progress.
This year's event centered around developer-specific initiatives, featuring dedicated contribution events for GitLab and Mautic. Contributors hosted enlightening sessions covering a diverse array of topics.
There were sessions from renowned Drupal contributors like XJM, providing valuable tips on peer reviews, Gabor discussing the present and future of Drupal initiatives, and Lauri unveiling the exciting innovations in Drupal 10+.
One of the standout sessions was Drupal and Godot, which explored using Drupal as a backend for games with a creative workshop leveraging Legos as an interactive activity.
I had the opportunity to present my session – "An Introvert's Guide to Open Source Communities," which was very well received and opened up doors for some interesting questions from the audience.

The session also led to the opportunity to connect with fellow Drupal contributors and plan some noteworthy future collaborations.
The full session recording is available on YouTube, and it did receive an overwhelming response, making it the most-watched among all the other sessions.
In summary, DDD 2023 offered an uplifting experience for all attendees, making it a highly recommended event for open-source enthusiasts.
The key highlights included networking and collaboration opportunities with prominent figures in the Drupal community, engaging sessions and workshops on the latest Drupal developments, fostering knowledge sharing and active participation, empowering attendees to shape Drupal's future with renewed passion, and strengthening the sense of community among Drupal enthusiasts.
During the event, everyone had the chance to learn about new developments in Drupal and actively contribute to its progress while networking and sharing experiences with other developers. There is no doubt about the event's success when everyone gets to walk away not only with valuable insights and opportunities for future collaborations but also with revered memories of a lifetime.

Understanding Front-end and Back-end Validations in Drupal
Validations are used to check the accuracy, integrity, and structure of data before it is used for a company's services. If any user sends unacceptable data to any application, then the application will send validation messages either from the client side or the server side.
Understanding front-end validation
The frontend is nothing but what a user sees on the website/ application. Front-end testing validates that GUI elements are functioning as expected / as per the requirement.
Consider an example of a form where it checks whether input fields accept the right characters, or whether forms are being submitted only after the required fields are filled, or whether navigation is easy enough, or whether the page is loading fast enough.
Front-end validation scenario
Uploading a file validation (format)
Consider a form where the user has to add a file of only .gif, .png, .jpg, .jpeg formats. If the user adds any image/document other than this format, the form must throw an error message.

In this case, the client will send a validation error message. As this is a small validation, it will happen on the client side.

Uploading a file validation (size)
Consider another example of adding a file size of more than the given limit. It will show an error message that the file size should not be more than the given limit. This validation is also handled by the client side.

Filling signup form on Facebook validation
To see how the front-end validation of Facebook signup works, we need to inspect the element and switch to the network tab.
- Don’t enter any value in the fields of the signup form and verify whether it is throwing an error message.
- In the network tab, observe no request is getting hit. This means the error is coming from the client side.
- The error is getting thrown before the data is sent to the server side.

Understanding back-end validation
The backend is named because it does not run on the device (mobile/laptop) but on a remote server.
Back-end testing validates the database side of web applications or software. Consider an example of a form where it checks if an email ID input field is not accepting duplicate entries.
Suppose a user has already entered an email ID while submitting a form. When the same email ID is entered while submitting a new form, the user must get an error that the user with this email ID already exists.
Back-end validation scenarios
Credit card validation
Suppose we are on a payment gateway and we are asked to enter details of a credit/debit card. Now, when the user enters data in it and clicks on the ‘Submit’ button, we see a loading button, and after that the ‘Credit card is not valid' message. This means the system has checked from the backend if the credit card details are correct using APIs.

Existing email ID validation
Consider another example of a user details form, where the user enters the email address of an already registered user and clicks on the Continue button. An error message is displayed on the server side. The application checks if an email address is already present in the database, and if present, the user gets an error message that the email ID is already registered.

Google validation using an ID token
Let us explore another example of how we can create an account on apps like Spotify or LinkedIn by logging in with Google or Facebook.
If we open any website app and click on the Login button, we get an option to log in with Google/Facebook/Email for registering or creating a new account.

If we want to create a new account, we will click on the login button. Here we will get options to log in with Google/Facebook/Email button.
If you use Google Sign-In with an app or site that communicates with a backend server, you need to understand the below steps happening in the backend:
- The currently signed-in user on the server.
- After a user successfully signs in, the user's ID token is sent to your server using an HTTPS POST request for secure sign in. Then the user is validated.
- The integrity of the ID token is validated on the server and the user information contained in the token is used to establish a session or to create a new account.
An easy way to validate an ID token is to use the tokeninfo endpoint. This endpoint sends an additional network request that does most of the validation for you while you test proper validation. To validate an ID token using the tokeninfo endpoint, make an HTTPS POST or GET request to the endpoint, and pass your ID token in the id_token parameter.
For example, to validate the token "XYZ423", make the following GET request: https://oauth2.googleapis.com/tokeninfo?id_stoken=XYZ423.
If the token is properly signed, you will get an HTTP 200 response.
Restricted roles in Drupal
Suppose we create a role ‘Contributor’ in a CMS like Drupal and disable the permission to view the toolbar search option. We can validate it by following the steps below.
- Open the site URL and Login with Contributor role credentials.
- Verify the contributor is not able to view the admin toolbar search icon.
Understanding how they work
Let us consider online shopping websites like Myntra.
Things the user is seeing on the screen and interacting with like product lists, Added items in the cart, checkout screen, etc are part of the frontend. But, these things are not present on the user's machine(mobile/ laptop /desktop).
However, they are stored and managed on Myntra’s server side so that all the users will be able to see the same data on the applications/websites. Also, this data can be managed from the server side by adding/ deleting/ updating the details.
Also, whatever happens on the screen is controlled by the front-end code. Whatever the user sees, the frontend is responsible for showing and updating it.
Advantages of front-end validation
- Front-end validation is responsible for improving the user experience of using the application/website.
- Front-end validation determines the user can view, access, and interact with each element of the product easily.
Disadvantages of front-end validation
- Client-side validation can be bypassed easily.
- This validation does not assure that the application is protected from malicious attacks on the server and database.
Advantages of back-end validation
- Back-end validation confirms no corrupt data/invalid data is present in the database by eliminating the data errors.
- The submitted data is cleaner and more sensible.
Disadvantages of back-end validation
- Implementing the back-end validation code increases the response time resulting in poor user experience.
Summary
Because of both validations, we can have a good performant application with fewer errors. The validation also reduces the complaints and rejections against the requirements of the product.
To improve the quality of a website or application we need to validate both front-end and back-end methods of validation. Both validations are critical in terms of security.
I hope this has been helpful!! Happy learning!

Drupal Front-End Grooming for Beginners
Front-end development takes care of the user interface on the website. It will manage the style, look and feel of the website and everything you see on a webpage, like forms, buttons, links, and more. It is the front-end developer's job to take the design concept from the design file and implement it.
A themer, also known as a front-end developer, sits between the designer and the developer on a project. They are responsible for the architecture and implementation of the client-facing parts of the website. It includes working with HTML, CSS, JavaScript, and related technologies.
List of prerequisite tech stack for front-end developers
HTML5
CSS3
JavaScript - ES5, ES6, jQuery, Typescript, and JS Frameworks (REACT & Angular)
Templating - Twig
Package managers - NPM and Yarn
CSS Preprocessors - SASS and LESS
CSS Frameworks - BootStrap
Build Tools - Task Runners (Gulp & Grunts), Module Bundlers (Webpack), and Linters & Formatters (ES Lint & JS Lint)
Performance - Chrome Devtools
CMS - Drupal
API Server - Nodejs and Drupal
A front-end developer crafts HTML, CSS, and JS that typically runs on the web platforms (web browsers) delivered from one of the following operating systems.
- Android
- Chromium
- iOS
- OS X (macOS)
- Ubuntu (or some flavor of Linux)
- Windows
These operating systems run on one or more of the following devices:
- Desktop Computer
- Laptop
- Mobile phone
- Tablet
Setting up development requirements
VS Code intro & setup
Visual Studio Code, the most popular source code editor, is lightweight but powerful. It is optimized for building & debugging modern web applications. VS Code helps you be instantly productive with syntax highlighting, bracket-matching, auto-indentation, box selection, snippets, and more.
Watch this video on how to set up visual studio code for web developers.
Link:
Learn to use Version Control System
Git is a free & open-source distributed version control system for tracking changes in computer files and coordinating work on those files among the development team. When working on big projects, it is not possible to copy and create multiple versions of the hundreds of files present. The version control system helps to streamline this process.
Watch some videos of Git to understand how it works.
Link:
Learning front-end development from scratch
Create structure with HTML
HTML is a hypertext markup language for creating web pages. We create the structure of the web pages using HTML. Every front-end developer should practically know how to build a web page structure with HTML and all about HTML5 Tags, Semantic Tags, Formatting Tags, HTML Block & Inline Elements, HTML Form Attributes, and HTML Media Tags.
Links:
Style with CSS
CSS stands for cascading style sheets. Learn CSS to set the layout (UI) of the web page with beautiful colors, fonts, styles, and more. Front-end developers should have a strong understanding of setting the web page layout (UI) with attractive styling. Developers should have hands-on practice with all CSS Selectors, like Combinators, Pseudo classes, Pseudo elements, and Attribute Selectors. Learn about Specificity in CSS, Box Model, CSS box-sizing Property, and Units.
Links:
SCSS (CSS preprocessor)
SCSS is a syntactically awesome stylesheet. It is a preprocessor scripting language, interpreted or compiled into cascading style sheets. SCSS lets you use variables, mathematical operations, mixins, loops, functions, imports, and other functionalities that make CSS more powerful.
Links:
JavaScript
JavaScript adds interactivity to web pages. Basic JavaScript is required to make static web pages dynamic and interactive. Learn the scope and difference of Var, Let & Const keywords, Operators, Loops & Arrays, Functions with Arrow & Map function, etc.
Links:
JavaScript Algorithms and Data Structures
jQuery basics for beginners
jQuery is a small & lightweight JavaScript library. It is designed to simplify HTML DOM tree traversal and manipulation, event handling, animation, and Ajax.
Links:
Responsive design concepts
A front-end developer should know how to make a website responsive on all devices. Developers should know how to write the CSS media query and define different style rules for different media queries.
Learn responsive web design & media query
- CSS media query in the stylesheet
- Understand the right approach for media Query
- Understand Width & Device width
Link:
Gulp
Gulp is a tool often used to do front-end tasks like spinning up a web server, reloading the browser automatically whenever a file is saved, using preprocessors like Sass or LESS, and optimizing assets like CSS, JavaScript, and images. Tools like Gulp are often referred to as “build tools” as they are used to build a website.
Link:
Grooming in Drupal front-end development
Drupal themers use PHP in template files, and Twig in Drupal 8. Advanced front-end developers will often create “glue code” modules, or functions in PHP that expose configuration options to site builders.
Links:
Essential skills to learn
Drupal installation
- Install Drupal on your computer: composer update "Drupal/core-*" --with-all-dependencies
- Setup the local development environment: ddev or lando
Theming
- Download, install, and uninstall the contrib theme.
- Define a new theme with .info file.
- Create a custom theme, and add & print some regions in your theme.
- Check the core themes.
- Make a new sub-theme from the base theme, create some CSS and JS files, attach it, and override any template file.
Asset libraries
Links:
Hooks for Drupal theming
Preprocess functions allow Drupal themes to manipulate the variables used in Twig template files by using PHP Functions to preprocess data before it is exposed to each template. Developers should know how to find the list of valid theme hook suggestions for any template file and enable the Twig debugging mode to discover available theme hook suggestions.
- Add a new variable to a template file through the preprocess function & print it in the template file.
- Add the new theme suggestion & use that to override any template file.
- Add a preprocess function in your sub-theme
- Inspect variables available in template: kint(), dump()
- Change variables with preprocess functions
- Add a new variable to a template file
- Discover existing theme hook suggestions
- Add a new theme hook suggestion
Twig in Drupal
Twig is the default engine for Drupal. If you want to make changes to the output markup in Drupal, you need to know Twig. It is a template engine for PHP, that allows an app or system like Drupal to separate the concerns of functional “business” logic and the presentation or markup of the resulting data.
Links:
Print Values from a Field with a for Loop
HTML Classes & Attributes in Twig Templates
JavaScript in Drupal
Developers writing JavaScript in Drupal should use Drupal.behaviors API when writing their custom JavaScript functionality. Doing so ensures that your JavaScript is executed at the appropriate times during the lifecycle of a page, such as when the page loads, or after new DOM elements have been added via an AJAX request.
Links:
Load JavaScript in Drupal with Drupal.behaviors
Wrap your Custom JavaScript in a Closure
Use Drupal.theme for HTML markup in JavaScript
String Manipulation in JavaScript
Use Drupal.t() for Translatable Strings in JavaScript
Pass Data from PHP to JavaScript in Drupal
Improving front-end performance
Web performance is all about making websites fast. Web performance refers to how quickly site content loads and renders in a web browser and how well it responds to user interaction.
- Aggregate JavaScript and CSS.
- Minify JavaScript, CSS, and HTML.
- Leverage browser caching and enable gzip compression.
- Specify image dimensions.
- Optimize images & leverage breakpoints to download appropriate image sizes.
- Use lazy loading for site assets.
- Keep inline background images under ~4KB in size.
- Remove unused CSS & use efficient CSS selectors.
Link:
Conclusion
Drupal Front-End Development (Theming) primarily focuses on User Experience (UX). Developers can use fewer coding and design techniques to make complex websites and attractive User Interfaces (UI) easily.
If you want to attempt the Acquia Drupal Front-End Specialist Certification, explore Preparing For Drupal FE Specialization Certificate.

Top Tips for Drupal FE Specialization Certificate
The Drupal Front-End Specialization Certificate is part of Acquia's Drupal Certification Programs, and the name of the exam is Acquia Certified Drupal 9 Front-End Specialist. The fee for the exam is $300. This exam contains 60 scenario-based questions. You get 90 minutes to complete and require a minimum 68% score to pass the exam.
Why is Acquia Drupal 9 Front-End Specialist Certification necessary?
The certification will assess your knowledge of Drupal front-end development skills. It will validate the skills & knowledge of Drupal developers in fundamental web development, theming, template & preprocess functions, and site-building. Drupal front-end developers will get opportunities to accumulate knowledge and practical skills to improve their work efficiency. The exam tells you where you stand in the front-end area.
Essential exam-related topics
Acquia's Drupal Certification program
TOTAL = 60 Questions
- Fundamental Web Development Concepts (12-15 Questions)
- Theming Concepts (14-16 Questions)
- Templates Preprocess Functions (14-16 Questions)
- Layout Configuration (8-10 Questions)
- Performance (2-4 Questions)
- Security (2-4 Questions)
Find below some essential links and related topics to prepare for the certification exam.
Fundamental web development concepts
HTML
We create the structure of the web pages using HTML. Every front-end developer must have practical practice in creating a structure of the webpage with HTML.
Required knowledge: HTML5 Tags, Semantic Tags, Formatting Tags, HTML Block & Inline Elements, HTML Form Attributes, and HTML Media Tags.
Links:
HTML Block and Inline Elements
CSS
You need to have a strong understanding of setting the layout (UI) of a webpage with beautiful colors, fonts, styles, and more.
Required knowledge: Specificity in CSS, Box Model, CSS box-sizing Property, and Units.
Required hands-on practice: CSS Selectors, like Combinators, Pseudo classes, Pseudo elements, and Attribute Selectors.
Links:
JavaScript
We use JavaScript to add interactivity to the web pages. It helps you to make static web pages dynamic and interactive.
Required knowledge: Scope and difference of Var, Let & Const keywords, Operators, Loops & Arrays, Functions with Arrow & Map function.
Links:
PHP Programming concepts
It is essential to have a good basic knowledge of programming languages.
Required knowledge: How to clear the function calls, print array values, merge two or multiple arrays, and how the operator works.
Required hands-on practice: Data types, Operators, Loops & Arrays, and Functions & Strings.
To do: Create a function, use if conditions & operators in the function, and call another function in the function. Create arrays & check how we print all the values of the array & specific values of the array.
Links:
Responsive design concepts
A front-end developer should have good knowledge of how to make a website responsive so that it looks good on all devices, and which is the right approach for media queries.
Required hands-on practice: Writing CSS media queries and defining different style rules for different media queries.
To learn: Responsive web design & media query, CSS media query in the stylesheet, understanding the right approach for media query, and understanding width & device width.
Link:
Theming Concepts
It is necessary to practice & complete the Drupal Theming from Drupalize.me and Drupal.org
Links:
Building a sub-theme from a base theme
It is vital to know all about core themes and sub-themes as it is necessary to take care of all the required files & basic keys in the custom folder structure.
Required knowledge: Understand the folder structure, core themes, required files & keys in the subtheme.
To do: Create a subtheme with the set base theme as false, subtheme inheritance, and default fallback theme.
Links:
Define and use custom regions in a theme
Drupal FE developers should analyze all the pages of a website and decide the regions for the site. It is important to know about defining & printing the regions, which all Drupal default regions will be available, and from which file it will come.
Required knowledge: Definition of regions, printing the regions, and Drupal default regions.
To do: Practice defining no regions in the sub-theme, with only one region in the subtheme, and check which regions will be available.
Link:
Knowledge of working with stylesheets
It is necessary to understand the process of creating CSS or JS files, defining & attaching libraries, and how to override and extend the asset libraries of the Drupal core.
Required knowledge: Role of asset libraries, adding assets (CSS, JS) to a Drupal theme, ways to attach libraries to the specific and all pages, defining a library, overriding and extending libraries, and adding properties to include CSS/js.
To do: Practice with stylesheets to know how CSS & JS loads for modules and themes as an asset library in Drupal.
Link:
Adding Assets (CSS, JS) to a Drupal Theme
Working with theme configurations
It is important to know about the theme configuration of Drupal & how themes can modify the entire theme settings form by adding a PHP function, and how we can get the settings in the theme files.
Required knowledge: Understand the creation of theme settings in sub-themes, the use of theme-settings.php, learn the add, and get the setting values.
Link:
Creating Advanced Theme Settings
Working with breakpoints in a theme
Drupal front-end developers should use Drupal breakpoints with responsive image modules, know how to define the breakpoints in Drupal, which keys are required to define the breakpoints, and the working of breakpoint groups in Drupal.
Required knowledge: Understand the creation of breakpoints & breakpoint groups.
To do: Practice with breakpoints, use a breakpoint with a responsive image module, and read the advance use part.
Link:
Working with Breakpoints in Drupal
Working with JavaScript in a theme
Required knowledge: Drupal behavior, the use of Drupal behavior, why we use it, and the code syntax to write Drupal behavior functions.
To learn: Understand the use of these two arguments of the function (context & settings).
Understanding JavaScript behavior in Drupal
Required knowledge: How to run JavaScript in Drupal, why we need Drupal behavior, use context, settings & once(), and how to pass variables from PHP to JavaScript in Drupal.
Links:
Understanding JavaScript behaviors in Drupal
Templates Preprocess functions
Using Twig syntax
Twig is a default template engine for Drupal. If we want to output markup in a module or theme in Drupal, we need the Twig templating language & templates.
Understanding Twig in Drupal
Twig all tags - block, extend, auto escape, embed, include, use, merge, set, import.
Twig all filters - spaceless, strip tags, lower, upper, raw, capitalize, trans.
Classes and attributes in Twig templates - Add classes in attribute, add new attributes & attribute objects in Twig, and use without a filter in attributes.
Arrays & functions - Create a new array, add values in an existing array, and t function.
Links:
Filters - Modifying Variables In Twig Templates
Build and customize core templates for managing markup
Template files in Drupal are responsible for the HTML structure of all the Drupal pages.
Required knowledge: Steps of overriding the Twig template file & which order, Drupal template naming conventions, conventions page lists used for the base HTML structure, order of the templates, overriding the template file, & Twig template naming conventions.
Link:
Twig Template Naming Conventions
Work with template suggestions
Developers should know how to find the list of valid theme hook suggestions for any template file. We need to enable the Twig debugging mode to discover available theme hook suggestions.
To learn: Theme template suggestions alter, discover existing suggestions with debug mode, and add new theme hook suggestions.
Link:
Discover Existing Theme Hook Suggestions
Pre-process functions for overriding custom output
Required knowledge: In which file do we write the preprocess function, and when does the code of the preprocess function run.
To do: Add the same preprocess function in the theme & module. Check which one will run first. Which one overrides the existing one? Write the preprocess code for only specific node types.
Link:
Twig Best Practices - Preprocess Functions and Templates
Form alter and template suggestions alter
Developers should know the hooks for form-specific alteration in Drupal.
To do: Provide a form-specific alteration for shared ('base') forms, perform alterations before a form is rendered, and provide a form-specific alteration instead of the global one. Run the hook to alter the node_form for all nodes.
Link:
Layout configuration
You have to have good site-building experience in blocks, views, content, and entity reference fields.
Blocks
Developers should know when and how to create and configure blocks for building layouts.
Required knowledge: Strong understanding of blocks in Drupal, how to create a block, how to place it in one region and multiple regions, how to configure the block to display it in only specific types of content pages, and how to check other configurations of blocks.
Link:
Views
Developers should know how to create and configure views for building content list pages, blocks, and feeds.
Required knowledge: A good understanding of views with all configurations, how & when to create a view block & view page.
Required hands-on practice: The why & how to use relationships in views.
To do: Check all the settings of views (formats, fields, filter criteria, pager, and block), Expose, Grouping, Relationship, and Contextual Filters.
Links:
Layout Builder
We can create a different layout structure based on content type & as per page of the same content type. Use the Layout Builder module to build different layouts
Required knowledge: How to create a page layout using the layout builder.
Required hands-on practice: Working with the layout builder module.
To do: Change the layout on a content type basis, and change the layout on a per-page basis of the same content type.
Link:
Introduction to Layout Builder
Performance
Every front-end developer should know how to resolve the site performance issues arising from site configuration, what to do if a website is loading slowly, and how to take care of site performance.
Effective ways to improve the page performance
A few ways to improve front-end performance are to minify HTML, CSS, and JavaScript, aggregate CSS, and JavaScript, optimize images, leverage browser caching, and more.
Link:
Security
Resolve security issues arising from custom theme
Developers should write secure code for Drupal and use safe translation filters with placeholders while writing the code in a Twig file.
Writing secure code in a Twig file, & Safe Translation Filters with the placeholder
Link:
Filters - Modifying Variables In Twig Templates
New techniques implemented in Drupal 9 for security
Link:
Writing Secure Code for Drupal
Naming conventions & location of files
Link:
Extra introductions to read
Drupalize - Acquia Certified Drupal Front End Specialist Exam
Tip
Read the questions carefully. Be calm and relaxed during the examination.
Conclusion
The Drupal Front-End Specialist Certification helps to showcase your skills & knowledge in the area of Drupal Theming. It allows you to prove your experience and increase your value as a Drupal Front-End Specialist Developer.
All the best for your Drupal Front-End Specialization Certificate!

Making Moves: What to Do With your Drupal 7 Site?
Drupal 10’s tentative release date has been set to 14th December 2022. Now, several improvements come with that, including enhanced editing features in the CKEditor 5, improved page customization for enabling an exceptional UX, and even a modular architecture.
Needless to say, there has never been a better time to think about migrating from your existing Drupal 7 framework.
Still, considering that the End-of-Life (EOL) support for Drupal 7 has been extended till November ’23, you have some time to make that shift. However, there's no denying that a decision has to be made soon enough.
There is a simple solution to this issue. Yes, it lies in upgrading to Drupal 9 while preparing for the possibility of transitioning to Drupal 10. But before getting into that, let's discuss why that's necessary. Besides the obvious reasons, of course.
Why upgrade from your Drupal 7 framework at all?
Drupal 8 already reached its EOL on 2nd November 2021. And considering the looming end of Drupal 7, there’s no other choice than to migrate to Drupal 9. In short, if your site still functions on the legacy versions, you open your pages up to vulnerabilities, bugs, and redundancies that the community will not help solve.
Yet, putting in the effort now will result in several benefits for you. Take the integration of contributed modules into the core, for example. In Drupal 7, you must rely on separate panels to customize your page layout.
However, Drupal 9 developers can use the Layout Builder to perform that function much better. In short, they now have a single dedicated tool that enables them to modify one specific page, set custom preferences for various content types, and build visually appealing landing pages.
There's even dedicated media handling, meaning you don't have to install additional frameworks and then configure them individually. Merely enable the Media Library Modules, and most of the work is already done.
The best part? The mentioned features are part of Drupal 9’s core modules, alongside content and site moderation, API configuration, theme customization and many others. As a result, Drupal will focus heavily on enhancing these with every major update.
Simply put, your developers can access consistently patched and upgraded tools alongside a few experimental modules.
Understandably, these benefits may mean little when you've been accustomed to the same framework for years. However, you must also recognize that sticking to legacy Drupal frameworks will directly translate to a host of issues, including the lack of community-backed bug fixes, additional customization updates, and security patches.
Besides, why stick to a soon-to-be relic when QED42 can help you take the next step in Drupal migration?
What can an upgrade offer you?
Besides enhanced security, site functionality, and integrated contributed modules, an upgrade to Drupal 9 can offer several advantages.
Here are four of the most prominent ones:
Improved PHP support
While most Drupal 7 websites may have moved on to PHP 7, there’s a high chance that a site is still running on older variants, some even as ancient as 5.3. With the continuous improvements being made to the script, this can directly translate to security liabilities for your pages.
Meanwhile, Drupal 9's minimum requirement is PHP 7.4, thus providing better compatibility and access to more secure script versions.
All of this is made even more attractive through the provision of the Twig theme engine. Even better, Drupal 9 has made systemic enhancements to Twig, resulting in the birth of the 2.0 model.
As such, the engine breaks templates down to optimized PHP code, thus reducing the overhead time significantly compared to the regular script variant. In addition, Twig has built-in shortcuts for the most commonly used code patterns alongside comprehensive support for template development, such as automatic output-escaping, dedicated blocks, and multiple inheritances.
The outcome? Improved site performance, a better development ecosystem, and, most importantly, reduced site vulnerability.
Better developer accessibility
With all the talk around Drupal 9’s accessibility and scalability, it becomes essential to examine where exactly it differs from the previous frameworks.
First, there's the inclusion of new field types, such as dates, emails, phone numbers, links and references. Essentially, programmers don't have to describe each field individually and can directly add a new one to the current database. There are also additional avenues to add modified fields to contact forms, comment sections, and blocks.
Second, the integration of the CKEditor into Drupal 9’s core functionality gives developers direct access to a dedicated editing console. Using it, they can organize data while deploying conventional word processing functions.
As an added benefit, being a WYSIWYG tool, the CKEditor allows users to rearrange any content as they prefer in the final page layout.
The whole ‘Composer’ package
A prominent issue with Drupal 7 was the over-reliance on Drupal-specific code. That concern is entirely done away with in Drupal 9.
As such, all third-party libraries are handled by a single tool, appropriately dubbed the 'Composer'. Using it, developers can declare the required code libraries for any project, following which Composer will manage it independently.
It also provides pre-made packages that can be incorporated into the development lifecycle to solve the most common programming challenges. There’re even provisions for convenient autoloading of classes and files alongside better visibility into existing dependencies to keep them secure and functional.
Finally, Composer automatically applies patches while documenting the patch history and current version. As a result, you have a powerful new tool that eliminates several redundancies in this area.
Of course, considering it's a new tool, your team may take some time to get the hang of things. But once they become accustomed to it, they'll realize that dependency management is much easier than they thought it to be.
Simplified configuration management & multilingual modules
Drupal 7 frameworks rely on the Features module to assist with configuration tasks, requiring developers to take site-building elements from different modules. Following that, they would have to bundle all of it together to build another module which would then be used for the task at hand.
For instance, to build a blog, you'd have to go through 5 or 6 modules, take specific elements that you want in your page, and then integrate them. Only then would you be able to design what you set out to do.
Drupal 9 significantly streamlines this process by allowing database configuration to be directly exported through YAML strings.
To put it briefly, any interrelated content can be put into a format parallel to the original entity value array. In addition, the material (template, content block, etc.) can be defined further through programmable and pre-defined structures, thereby eliminating the need to sift through separate modules.
Now, this includes conventional content creation alongside menu links, media files, blocks, and many others. The result? Simplified configuration management.
This addition is incredibly beneficial when constructing multilingual pages or modifying images based on device specifications. In fact, developers have all the options they could ever want regarding image styles with Drupal 9.
What should you consider while upgrading your Drupal site?
Drupal has an entire section on what you need to watch for when upgrading your current site. Note that there are specific differences when migrating from older frameworks, such as Drupal 7, or later versions, like Drupal 8.
To summarize the requirements in broad strokes, they are as follows:
- Your site must have the most recent minor version or the one previously released (for example, 8.8 or 8.9 if you are running on Drupal 8)
- All created modules must be updated to be compatible with the framework you are upgrading to
- The hosting environment needs to meet the minimum system requirements (PHP 7.4 or later)
- Any depreciated code must either be removed or fixed (the Upgrade Status can highlight the necessary ones in this regard)
Regardless, the migration process will vary widely depending on whether you used Composer or tar.gz files to build your site. In addition, there are also specific guidelines to navigate based on which minor version your site is currently running on.
All of this can get a little too taxing on your team. In that case, you can outsource your Drupal migration, thereby eliminating any challenges on your end.
Should you hold out for Drupal 10’s December release?
Understandably, upgrading to Drupal 9 comes with the question of 'why not just wait for Drupal 10 to release?'. Well, the simple answer is you can do that.
Yet, you also have to ask yourself: Why delay the upgrade when Drupal 10 will probably be backward-compatible, just like Drupal 9 was? Essentially, any module, configuration, or data you create on Drupal 9 can be seamlessly edited, customized, and managed on Drupal 10.
Granted, transitioning to Drupal 9 from Drupal 7 involves a lot of preliminary and exhausting busy work. However, if you commit to the migration now, you will set yourself up for a hassle-free migration to Drupal 10 later.
You only need to use the Upgrade Status on your current Drupal site to get an overview of the amount of work required. Then, the provided plan will highlight the exact points where you need to update any custom code or contributed projects.
Consolidating everything, transitioning to Drupal 9 now, and subsequently shifting to Drupal 10 is the best way to go about this. After all, why wait when an upgrade sits right before you?
Adapting to a better way with QED42
Changes are always a little jarring in the beginning. Still, once they have been implemented, the benefits far outweigh the effort needed to make them. That's precisely the outlook you need to take on upgrading your Drupal 7 site.
Besides, upgrading your Drupal site can give you several advantages. Exceptional page customization, streamlined developer access through Composer, enhanced and secure PHP support, simplified site building through YAML strings—the list can go on.
If you still need convincing, here's a simple truth: Drupal 7 and Drupal 8 are done. The latter has already reached its EOL, while the former is fast approaching the same. Holding out for a year won't change that.
Granted, taking the first step in this area can seem daunting. If that's the case for you, you could opt for QED42’s migration services.
With over a decade of experience in Drupal development and framework upgrades, QED42 specializes in managing large volumes of content, complex website transitions, and risk mitigation during the site transition process. In addition, we have a vast wealth of experience when it comes to migrating from Sitecore, Adobe CQ, WordPress, SharePoint, AEM, and other proprietary systems to Drupal. Chat with our Drupal Migration experts for more information.

Improve your Editorial Experience with CKEditor 5
With businesses focusing on delivering personalized digital experiences, content becomes a key factor. Content marketing is a crucial aspect to establish a brand presence. Businesses can engage meaningfully with their audience with compelling, unique, and visually attractive content.
Businesses require the capability to publish powerful content faster, on a large scale, and at reduced costs. One way of making this possible is by enhancing their editorial experience. How can you enhance your editorial experience?
Drupal, one of the most popular open-source CMSs in the market, continues to evolve to deliver the best editorial experiences for its customers. Starting from building Drupal pages on nodes to modules, page layouts, paragraphs, and Layout Builder, Drupal has come a long way in empowering content editors.
Drupal 10 is all set to release in December 2022, and with it comes a modern, and versatile WYSIWYG editor, the CKEditor 5. What are the exciting features of CKEditor 5? How does it enhance the editorial experience?
CKEditor 5 – Collaborative editing features
CKEditor 5 will be the default editor in Drupal 10. The new version was completely rewritten from scratch and took almost two years to complete. CKEditor 5 eliminates all the older code issues that were present in CKEditor 4. CKEditor 5 seamlessly integrates with Drupal 10 and guarantees the best editorial experience for developers and users.
The CKEditor 5 architecture is designed to encourage collaboration and empower multiple authors to work asynchronously on the same rich-text document. Drupal 10 users can take advantage of the core editor features and the new premium features (which need to be purchased additionally) to boost their content editing experiences.

Consider the premium features available in CKEditor.
Track Changes
Edit content in suggestion mode. Users can accept, edit, or reject the suggestions.

Comments
Add, delete, or edit comments. Users can start discussions with comment threads.

Revision History
Create and view document versions in a preview mode. Users can compare, rename, and restore document versions.

Real-time Collaboration
Combine comments and track changes features to enable real-time collaboration. Users can enable an all-around co-authoring experience.
Import from Word
Import unlimited Word documents. Users can utilize features, such as track changes, comments, and suggestions on imported Word docs.

Export to PDF and Word
Export your content into portable Word and PDF formats with a single click. Users can export content in the same design as the original content.
Spell and Grammar Check
Correct grammatical and spelling mistakes. Users can use this feature while creating content or in a separate dialog to polish the writing.

Pagination
View how your document is laid out for printing. Users can organize lengthy documents by viewing the number of pages.
CKEditor 5 – Modern writing and editing
Rich text editor
CKEditor 5 comes with an ultra-modern JavaScript rich text editor. With features, such as drag-and-drop, autoformatting, tables, lists, autocomplete, and block quotes, writing and editing content becomes an effortless task.
Customized implementation
It is easy to create a customized rich text editor with CKEditor 5 using the online builder. Currently, CKEditor 5 is the only collaborative rich text editor that provides a ready-to-use solution, with a backend on both on-premises and cloud. The modular architecture of CKEditor 5 makes it easy to make any further customizations as per business requirements.
Collaborative editing
The CKEditor 5 architecture is designed for collaborative editing from the ground up. The import from Word feature means editors do not need to switch between apps to paste content. Integration to an email marketing CRM means marketers can easily report the content and get feedback without using any third-party application. Authors and editors can simultaneously work on the same document, saving time and boosting efficiency.
Scale and growth
CKEditor 5 promises better experiences, happy users, and bigger growth. The CKEditor 5 takes content editing to the next level with rich core features and premium collaborative features. Being the default editor, CKEditor 5 will grow and scale with Drupal 10 to deliver a full-fledged editorial experience to content teams.
CKEditor 5 - Enhanced experiences
Enhanced UI & UX
CKEditor 5 comes with a well-designed UI and perfect UX for users to manage content creation and editing seamlessly. Enhanced UI and UX include intuitive image insert with automated uploading, simple linking without complex dialogs, autoformatting, a new visible toolbar while page scrolling, and easy styling with the content placed inline in the page.
Customizable & extensible
The CKEditor 5 core is open for reuse and extensions enabling developers to create customized editors with rich features. The CKEditor 5 is implemented as multiple npm packages with a separate repository for each package. It makes it easy for others to contribute and focus on each feature separately.
New data model
The CKEditor 5 comes with a much more efficient data model that is part of the MVC architecture. Defined and controlled by JavaScript, the data model provides more control over the data output and data format.
Modern
The CKEditor 5 is totally rewritten in JavaScript ES6. It provides all the necessary integration tools to connect with modern apps, such as React, Angular, Node.js, npm, etc. CKEditor 5 is a modern rich-text editor with 100% code coverage providing the best quality assurance.
CKEditor 5 – Next level of content editing
Drupal is always in search of the best editorial experience and keeps evolving to use the latest technologies to achieve that purpose. Drupal 10 with rich features, such as the CKEditor 5, empowers organizations to deliver personalized content.
Businesses all around the world using Drupal testify to the enhanced editing experiences they enjoy. The CKEditor 5 takes content editing to the next level to deliver exceptional digital experiences.
Enjoy the full benefits of CKEditor 5 by upgrading your website to Drupal 10!
How to Prepare and Upgrade to Drupal 10
The latest major version of Drupal, Drupal 10 is set to release on 14 December 2022. Drupal 10 is built on Drupal 9 as a part of the methodical approach adopted from the release of Drupal 8. Instead of a complete codebase overhaul, new functionalities are added to the later Drupal 9 versions, like the Drupal 9.4. This approach enables Drupal to deliver new value without disruption and gives developers sufficient time to update future API changes.
Getting ready for Drupal 10
Drupal users should keep an eye on current updates. The move from Drupal 9 to Drupal 10 is estimated to be easier than upgrading to Drupal 9 from other old versions. The steps to switch to Drupal 10 would be similar to the steps required to upgrade to Drupal 9.
You need to keep your website ready for the switch now to make the move easier when Drupal 10 is available. Keep the Drupal core updated and note the modules that are compatible or no longer compatible with Drupal 10.
Use the available tools to estimate how much work is required to switch to Drupal 10.
- The Drupal Upgrade Status module helps to find the deprecations to fix. You can estimate the effort you need for the switch.
- The Drupal Rector app helps to automate the process of removing deprecations.
- The Drupal PHPStan module, a static code analysis tool, helps to analyze the code for deprecations.
- The Drupal Check module helps to check static code for deprecation.
The switch from Drupal 9 to Drupal 10 will be more automated with a lesser turnaround time. It will be effortless due to faster iterations and fewer minor versions in Drupal 9.
Preparing for Drupal 10
- Upgrade to Drupal 9, if not done already
- Install Drupal Upgrade Status
- Check whether contributed modules need an update using Administer > Reports > Upgrade Status
- Find out the deprecated APIs to fix in the custom code
- Ensure all deprecated APIs are detectable using the latest Drupal 9 release
- Use Drupal Rector to fix various issues in your custom code automatically
Upgrading to Drupal 10 from other versions
.avif)
Drupal 9
Drupal 9's end of life is in November 2023. You will no longer receive bug updates or community-supported security updates for Drupal 9 beyond November 2023. The EOL of Drupal 9 also means the EOL of Symfony 4 and CKEditor 4.
You will have 11 months from the release of Drupal 10 to migrate. With Drupal major versions getting easier with each release, upgrading to Drupal 10 from Drupal 9 will be an effortless upgrade.
Start updating contrib projects and custom code now.
Drupal 8
Drupal 8's end of life was in November 2021. If you are still using Drupal 8, you are no longer receiving community support for bug updates or security updates.
Migrate to Drupal 10 upon release or migrate to Drupal 9 and then upgrade to Drupal 10.
Drupal 7
Drupal 7's end of life is in November 2023. While Drupal 7 is still supported by the community, the support for contrib projects has decreased. If you are still using Drupal 7, you are missing out on more than a decade worth of technical innovations and current technologies as Drupal 7 was released in 2011.
Migrate to Drupal 9 now as it is a complex migration involving rewrites of custom code and replacing many contrib projects.
Drupal 6
Drupal 6 end of life was in February 2016. If you are using Drupal 6, you are no longer receiving community support. Migrating from Drupal 6 to Drupal 9 is the same as Drupal 7 to Drupal 9 migration. It involves a complicated process, and it is better to start your migration process now.
Migrate to Drupal 9 and then upgrade to Drupal 10.
Drupal 10 Readiness initiative
The Drupal 10 Readiness initiative oversees the release of Drupal 10. Its main priorities are to
- Support contributed module maintainers while modules are updated
- Track the tasks required to release
- Update dependencies and remove deprecated APIs
- Ensure Drupal 10 is released in December 2022
Keep an eye on the Drupal 10 Readiness initiative to keep yourself updated with the Drupal world.
We’re here to help!
You can start preparing your website now to migrate to Drupal 10. Check out how the exciting new features of Drupal 10 with the enhanced existing features pave the path to creating exceptional digital experiences for your customers across all touch points.

Drupal 10: Why You Should Upgrade
Drupal 10 is all set to release on 14 December 2022. Since Drupal 8, the Drupal community has taken a methodical approach to release new versions of Drupal. This approach allows for releasing new features within a major release and provides a clear path to update to the new major versions more seamlessly.

Drupal 10 was supposed to release in August 2022 but was pushed to December. There are 2 significant reasons for it.
Drupal 10: Why releasing in December
Drupal 10 will be using CKEditor 5 and integration to CKEditor 5 is the most crucial aspect. CKEditor 4 will be deprecated by the end of 2023.
Core developers with CKEditor teams have collaborated and invested numerous hours in integrating CKEditor 5 into Drupal. There were additional critical issues discovered with the work done and those issues need to be resolved to make CKEditor 5 stable. The issues could not be resolved by the 13 May beta deadline, and is the first reason why Drupal 10 was not released in August 2022.
The second reason is that a December release means more time for the Drupal community to stabilize CKEditor 5. Site owners can move content from CKEditor 4 to the new version in Drupal 9 securely. Drupal 10 requires PHP 8.1, and hosting providers have time to support PHP 8.1 for sites to update. PHP 8.1 will be the minimum requirement for Drupal 10 until November 2024. PHP 8.2 version will release in November 2022 and will be compatible with Drupal 10.
The whole Drupal community has worked hard to complete the Drupal 10 release date and goals. They have been working to eliminate deprecated code, update JavaScript, and prepare modules for contribution.
Drupal 10: Deprecated code removed
All core code and libraries in Drupal 9 that are identified as deprecated will be removed. Deprecated code refers to the code that is no longer used as it has been improved and enhanced. Removing the code immediately affects the functionality of a site’s custom code, hence, the code is marked ‘deprecated’ to inform that it will be removed in the next Drupal major version. The community will get sufficient time to update their code to be compatible with Drupal 10.
Some external code and libraries have end-of-life. Symfony 4, used in Drupal 9, reaches its end of life in November 2023. Drupal 10 will use Symfony 6.2, which is the latest version with bug issues resolved and improvements from Symfony 6. The Symfony framework provides major functional capabilities to websites, namely routing and handling incoming requests, and managing cookies. The entire list of deprecated code and libraries are listed on the Drupal website.
Drupal 10: Core modules removed
A few redundant core modules will be removed from Drupal and moved to the ‘Contributed Module’ for continuity. Removing modules that are not used makes Drupal core leaner and easy to maintain.
The following modules are likely to be removed.
- Activity Tracker
- Aggregator
- CKEditor
- Color
- Forum
- HAL
- QuickEdit
- RDF
According to user surveys and statistics, some of these modules were enabled by default but hardly used. In addition, some JavaScript dependencies will also be removed. Some uses of jQuery will be cleared which will reduce the past risks of jQuery and jQuery UI’s security processes.
Drupal 10: Upgrades
Upgrades enhance site performance and user experiences for all users. A few major third-party components are scheduled to update from Drupal 9 to Drupal 10.
- CKEditor: Version 4 to 5
- Composer: Version 1 to 2
- PHP: Version 7 to 8
- Symfony: Version 4 to 5/6
With Drupal 9 released in 2020, and Drupal 10 announced in 2021, site developers have a year to prepare their Drupal sites for migration. The third-party upgrades help improve the overall Drupal experience for all.
Drupal 10: What’s new
Drupal 10, a polished version, comes with some exciting new features.

Claro
The ‘Seven’ theme designed for Drupal 7 in 2009 was giving out an outdated system impression. The new ‘Claro’ theme replaced Seven and has been designed as per the latest standards.
Olivero
‘Olivero’ is the front-end theme designed to work with user-popular features, such as the Layout Builder. The Olivero theme will be compliant with WCAG AA.
Auto-Updates
The ‘Auto-Update’ feature will be available on composer-based sites and will enable the Drupal website to update automatically and securely.
Decoupled Menus
The ‘Decoupled Menus’ feature helps to build small web components that address a common use case. The feature will help to create a large repository of web components rapidly.
Project Browser
“Project Browser’ will help site builders to find and install modules from the admin dashboard. It will be available as a contributed module only at present.
Starter-Kit
The new ‘Starter-Kit’ theme will replace the ‘Classy’ theme. The new theme will not affect the production themes initially and will be easier to maintain.
Drupal 10: Built on Drupal 9
Drupal 10 is built on Drupal 9 instead of a complete codebase overhaul. New functionalities are added to the later Drupal 9 versions. Each minor release until Drupal 9.4.0 will be backward compatible and gives the community ample time to stay updated with future API changes.
This methodical approach allows Drupal to deliver new value every six months without disruption. Once Drupal 10 is released in December 2022, all deprecated code will be removed, and dependencies will be updated. The strategy is the same as the successful Drupal 8 to Drupal 9 migration strategy that helped contributed modules and extensions to become compatible with the new version much sooner.
Drupal 10: For the future
Drupal is much bigger than a CMS and has made the web much better. Each new version aims to enhance development more. Agile infrastructure is essential to deliver exceptional digital experiences and Drupal 10 promises to deliver the same.
Major brands and organizations use Drupal to boost their audience outreach capabilities. Drupal 10 with feature-rich modules will empower organizations to create unique customer experiences across all touch points. The themes and content editing experience will evolve with Drupal 10 making content creation, management, and delivery seamless and meaningful.

All about Building an Open DXP with Headless Drupal
Scalability is the key when determining which digital properties work best for your business. It helps you keep pace with the rapidly changing landscape of digital experiences. In today's digital landscape, it is essential to deliver the right experience via the right touchpoints at the right time. Here’s where DXPs play an essential role.
A Digital Experience Platform (DXP) is the platform that powers the unique capabilities of a digital experience. The platform enables businesses to build, deploy, run, and scale digital products. DXPs have become the core of most modern organizations because it centrally manages all aspects of delivering digital experiences via multiple touchpoints. A DXP can be used to build portals, websites, intranets, integration platforms, and more.
DXPs come in various types:
- Monolithic DXPs
- Composable DXPs
- Hybrid DXPs
All versions aim to empower businesses to deliver exceptional Customer Experience (CX) across all digital touchpoints.
What is a Closed DXP & Open DXP?
A closed DXP is a full-stack platform consisting of all key components and is maintained by a single provider. It facilitates the supply of one vendor’s product and services. Adobe Experience Cloud is an example of a closed DXP.
An Open DXP is a composable platform that combines several components from different sources to make them function as one. The open architecture is API-first making it easy to integrate with existing and third-party systems, unlike a traditional closed DXP.
Open DXPs are backed by open-source CMS like Drupal where organizations have complete control over the direction of their digital transformation. Businesses can also upgrade tools and features wherever and whenever necessary without waiting for one provider to update the platform. Open DXPs enable low-code solutions, enterprise functionalities, and easy-to-use reusable components that empower businesses to create digital experiences as required.
The main components of a DXP

DXPs pack a lot of components and functionalities in one system for omnichannel content delivery and management. Check out some common components that make up a typical DXP. The application and inclusion of these components may differ based on the product, use case, and industry.
- Content management system (CMS)
- Customer Relationship Management (CRM)
- Customer Data Platform (CDP)
- Customer Experience Management (CEM)
- Business Intelligence (BI) Tools
- eCommerce
- Conversion Rate Optimization (CRO)
- Digital Asset Management (DAM)
- Artificial Intelligence (AI)
- Search Engines
Monolithic DXP vs. Composable DXP vs. Hybrid DXP

Monolithic DXP
A monolithic DXP is an all-in-one platform with a legacy CMS as the core to deliver and manage content. Such DXPs contain more features that a business might need. The tools that integrate with the CMS are not usually best-in-class, making monolithic DXPs cumbersome to developers and organizations.
Composable DXP
A composable DXP contains several microservices or components for integration via advanced technologies. The CMS is headless and leverages best-in-class APIs to integrate with other microservices. Businesses and developers can use a composable DXP to custom create a modular tech stack suiting their business needs.
Hybrid DXP
A hybrid DXP is one step above a composable DXP with pre-built integration services. A headless CMS is the core of a hybrid DXP which provides a user-friendly interface of a traditional CMS and the architectural flexibility of a headless CMS. Businesses can choose the technologies they want to integrate with and also get to choose from a catalog of pre-built integrations that suits their needs.
CMS - The core of DXPs
The CMS is the core of a DXP since it provides the required content for other microservices within a DXP to work together. A CMS like Drupal empowers businesses to communicate effectively with their customers by providing the right context and content. Even when a DXP offers advanced services such as omnichannel initiatives and automation, it relies on Drupal for the content.
The digital era, especially the post-pandemic market, has highlighted the increasing demand for personalized content on all digital touchpoints in a customer’s journey. This shift in digital experience has resulted in the creation of headless Drupal to keep up with customer expectations.
What is a Headless CMS?
In Drupal, the head is the presentation layer (front-end website templates, views, & pages), and the body is the back-end content repository. The traditional Drupal or Coupled Drupal enabled non-technical users to create and edit the content on the back-end and displayed that content on a pre-built front-end presentation layer.

Headless Drupal decouples or separates the back-end and front-end content management. The back-end serves as the center responsible for content creation and storage, while the front-end is responsible for content delivery via an interface.
Decoupled Drupal offers the flexibility to developers to choose the desired front-end technologies for each project and design experiences for multiple new devices and channels. Developers are not limited by the front-end possibilities offered by Drupal as decoupled Drupal empowers them to select the right tools they require. Businesses are empowered to deliver content on websites, mobile apps, IoT devices, chat portals, wearables, and CRM systems.
Is the future of content management headless?
Headless CMS (Drupal) works best for content creation and management that can be delivered to any given channel via APIs. It also allows customizing content integration with better security and improved performance. As customers continue to demand personalized content, headless Drupal enables organizations to customize content creation, management, and delivery to enhance CX.
Businesses focusing on omnichannel marketing, seamless integration, hyper-personalization, and high security would find an Open DXP with headless Drupal as the ideal solution. As DXPs evolve with advancing technologies, organizations can also future-proof their sites and create interactive experiences with new-age technologies. The future of content management would be DXPs with headless CMS as they allow companies to create solutions and experiences on multiple channels effectively.
Benefits of headless Drupal
Omnichannel content
Editors get more control over content management for consistent and seamless delivery, and content is reusable over multiple interfaces.
Enhanced front-end experience
Developers and marketers can create amazing interactions and experiences for mobiles with PWA and front-end app development.
Out-of-the-box performance
Businesses can scale front-end and back-end independently with isolated templating and development for complete control without limitations.
API-first approach
Developers can use APIs for data consumption and transfer content across multiple channels, devices, interfaces, and platforms.
Cost-effective marketing
With faster updates, rollouts, and easy-to-access and reuse marketing content, businesses can enjoy increased productivity with reduced costs.
Content future-proofing
Businesses can get the maximum value of the created content without having to recreate or revise content pieces every time technology or innovation is updated.
Headless Drupal & Open DXPs: The way forward for digital experiences!
A modern Open DXP enhances the way businesses deliver digital experiences. It empowers companies to utilize customer data, buying patterns, and evolving technologies to craft personalized experiences for each customer. DXPs enable better collaboration between internal teams, like marketing, IT, sales, operation, and management.

A headless approach is a perfect solution to deliver excellent content and digital experiences across multiple touchpoints. Headless Drupal helps businesses manage an omnichannel digital ecosystem efficiently and adapt seamlessly to changing technologies and customer demands. An Open DXP with a headless Drupal would be the ideal marketing strategy for companies to future-proof themselves.

CRUD Operations in Decoupled Drupal: A 101 Guide
CRUD in computer programming refers to the functions required to perform different operations on specific data within a database. CRUD stands for Create, Read, Update, and Delete. CRUD operations are widely used in applications supported by relational databases.
In this blog, we will look at how to perform CRUD operations utilizing a simple JavaScript front-end system and the Drupal core’s JSON API module.
What is Decoupled Drupal?
Decoupled Drupal refers to a Drupal architecture where Drupal’s back-end exposes content to other front-end systems, essentially serving as a central repository of content that can be served to a wide variety of devices.
What are the advantages of Decoupled Drupal?
A decoupled Drupal architecture enables the development team to take advantage of Drupal’s highly regarded back-end functionality, using Drupal as a repository for content that can be made available to other front-end systems.
Drupal’s JSON API
Drupal Core provides a module named JSON API which provides us with a REST API. This provided API is centered on Drupal’s entity types and bundles. It simply means that the JSON API module converts all the entity types, bundles, etc into a REST API representation. For example, articles, pages, and users are given the types: node--article, node--pages, and user--user, respectively.
To learn more about the JSON API module, click here.
Objective
To understand how CRUD operations are done using the JSON API module used in a Decoupled Drupal Application.
Pre-requisites
Make sure you have a freshly installed Drupal site up and running. That's it!
Authentication using JSON API
- CRUD operations can only be performed by the authenticated user.
- To authenticate a user using JSON API, we need to make a POST request to the Drupal Back-end.
- The body parameter of the POST request must contain the username and password in a JSON format.
- Create a JSON body for the request, this JSON body will contain the username and password of the user.
- Making the final request.
- This HTTP request will provide us with two tokens.
- CSRF token.
- Logout token
- The CSRF token can prevent CSRF attacks by making it impossible for an attacker to construct a fully valid HTTP request suitable for feeding to a victim user.
- The Logout token can be used as a parameter when logging out of the website.
- It is recommended to store these tokens in some sort of memory, for example, browser cookies, so that they can be accessed whenever required.
- For example, to make CRUD operations, the CSRF token is required whereas while logging out, the Logout token is required.
Enabling the JSON API module
- The JSON API module is a core module available to us OOTB (Out-of-the-box) when we install Drupal.
- To enable the JSON API module in Drupal CMS, follow the below-mentioned steps :
- Log in as administrator.
- Go to the extend tab, present in the admin toolbar (admin/modules)
- Make sure you are on the List tab of the extend page.
- In the search bar, search for the JSON API module.
- Select the JSON API module by clicking the checkbox.
- Click on Install.
- The installation process requires the Serialization module to be installed.
- It will enable the JSON API module.
- After installing the JSON API module, let's see how to use it.
Using the JSON API module
- A JSON: API URL looks like this:
- Every resource type must be uniquely addressable in the API.
- The Drupal implementation follows the pattern:
- The URL is always prefixed by /jsonapi.
- A simple jsonapi request can be made like
- Enter the following URL in the URL tab :
- Example :
- Make sure the URL ends with the term jsonapi.
- This URL will generate the following kind of output :
- As you can see, the JSON API module converts all the Drupal data into JSON representation.
- This makes the JSON API module one of the most useful core modules in Drupal.
- Now you can fetch the required data, add new data or alter the existing data by making a HTTP request.
- Example:
- We want a list of all articles in JSON, do the following :
- In URL tab enter :
- It will give a list of all the nodes of the article content type or bundle in the Drupal site.
- The output will look something like this :
- In a similar way, you can access any entity bundle like a basic page (jsonapi/node/page).
- To access taxonomy terms, the following HTTP request can be made.
- and you will get the entire list of the taxonomies present in tags vocabulary.
- If you want to target a specific article, we need to append the UUID of the particular article to the HTTP request.
- Example:
- To learn more about the JSON API module, click here
Creating a Client Secret
Before we move forward, we need a client_id and client_secret, as these terms will be necessary to generate an authorized access token. There is a contributed module in Drupal for generating a client_id and client_secret, the simple OAuth module.
Using the Simple OAuth module :
- Using this module, we will generate a client_id and a client_secret.
Download the module
- Using composer:
- In terminal : composer require drupal/simple_oauth
Enable the module
- Using drush: drush en simple_oauth
- Using admin UI :
- Login as administrator.
- Go to the extend tab, present in the admin toolbar admin/modules
- Make sure you are on the List tab of the extend page.
- In the search bar, search for the Simple OAuth module.
- Select the Simple OAuth module by clicking the checkbox.
- Click on Install.
- The module will be enabled.
Create the client secret
To create a client secret, follow the below-mentioned steps :
- Go to the configuration page - admin/config
- Under people, select Simple Oauth - admin/config/people/simple_oauth
- Select Add client action link
- Fill in the details
- Note down the New secret field’s data as we will need it in the further process. This data is basically your client-secret data
- Click save.
- The client secret has been created
- Note the UUID of the client, which is known as ‘client_id’, and the scope of the client for the scope header of the HTTP request
- So now we have the client_id and client_secret and the client-scope
CRUD operations in Decoupled Drupal
- There are 4 main operations that most of the users do on a regular basis.
- Create, Read, Update and Delete.
Create Operation
- To create some content in a Decoupled Drupal site, we have to make a POST request to the Drupal Back-end.
- To make a Post request, you need an authorized JSON Web Token (JWT) and a CSRF token.
- JSON Web Token (JWT) is a compact URL-safe means of representing claims to be transferred between two parties.
- A CSRF token is a secure random token (e.g., synchronizer token or challenge token) that is used to prevent CSRF attacks.
- The token needs to be unique per user session and should be of large random value to make it difficult to guess.
- The CSRF token is provided when the user is authenticated.
- A CSRF secure application assigns a unique CSRF token for every user session.
- That means every time the user logs in a new token is generated which prevents the attack on the site.
- Steps to make a POST request using JSON API in Drupal.
First, generate the access token (JWT) for a user.
- URL
- Request Body/Params -
- grant_type : password
- client_id : <client-id>
- client_secret : <client-secret>
- username : Admin (Drupal User)
- password : 123 (Drupal password)
- scope : <client-scope>
Making the request to Drupal.
- URL
Headers -
- Authorization: Bearer <access-token-goes-here>
- Headers:
- Content-Type : application/vnd.api+json
- Accept : application/vnd.api+json
- “X-CSRF-Token”: <csrf-token-goes-here>
- Body: select ‘raw’
- The article data should be represented in JSON format.
- It will generate either a bad request or the article will be created and we will receive this newly created article in JSON response.
- If a bad request is generated, it means something is wrong with our custom request.
Read Operation
- To read or search any content, we can make a GET request.
- Here, the filtering feature of the JSON API is very useful.
- For example: We want to search for an article using the title, so our HTTP request will be something like this :
- Here using filters, we can fetch the entire requested article in a single request, which enhances the time complexity of the request-response cycle.
Update Operation
- To update any content, we can fire a POST request which contains the updated content and a CSRF token.
- The request will look something like this
- Here UUID is the unique id of the particular content we want to update.
Delete Operation
- To delete a particular content, we can make a DELETE request to the Drupal BE.
- We need the UUID of the article we want to delete
- This delete request must contain a few important headers :
- ‘Content-Type’
- ‘X-CSRF-Token’
- The final DELETE request will look something like this :
- The requested article will be deleted.
CRUD operations are crucial and frequently used in database and database design cases. The above example explains how we can perform CRUD operations on a Drupal Back-end using the JSON API. While there are many other examples to achieve the same, the premise and ideology remain constant.

Everything You Need to Know About the Drupal 9 Layout Builder
Layout builder is a tool for creating the layouts of an entity. Before, we had to code for creating simple layouts or structures to place our content. With this module, not only developers but also content authors can create layouts. This blog will help you to learn more about the Layout Builder module in Drupal 9 and how to use it.
About the layout builder module
- Layout is the arrangement of different materials like text, images, etc on a page.
- Layout Builder Module allows us to define the layout of landing pages.
- We can create the layout of all the entity types, Node, Comment, Taxonomy, and Menus.
- At a high level, it allows content authors to create a layout for their content. They don’t need to know the code for creating the layouts, they can simply install the module and create sections and add blocks.
- It also gives a DRAG-DROP interface to easily arrange the blocks.
Layout builder consists of two modules:
- Layout Discovery - Provides a way for modules or themes to register layouts.
- Layout Builder - Allows users to add and arrange blocks and content fields directly on the content.
Layout Builder has two main concepts while creating a layout:
- Sections - are columns or containers to place blocks. E.g., it can be a 2-column layout or a 3-column, etc.
- Blocks - is an element of content that we can place in sections.
What purpose does it solve?
As a developer, we know how to code or develop particular features or add content, Right? But a content creator or writer doesn’t know that. They only know “how to add content” and “what to add”. Their main goal is to create, add, arrange, and design content. That's it! Through the Layout Builder Module, the content creators can achieve all their goals. They simply need to enable the module and add sections and content. And if they want to change the layout, they can arrange those sections by drag and drop.
What do content editors think about this module?
Content creators liked the experience of the layout builder, but they found that a lot of options are hidden while adding content.
How to use the layout builder module
- Enable the module - Navigate to Extend and install both the module Layout Builder and Layout Discovery.

- After installing the modules, navigate to Structure -> Content Types -> Article -> Manage Display, scroll down to Layout Options and check the option ‘Use Layout Builder.’ Note: You can enable the module of any entity type - Nodes, Comments, Taxonomy, etc.

- If you want to enable the layout for a different view mode like RSS or Full content, then you can select the options from custom display settings.
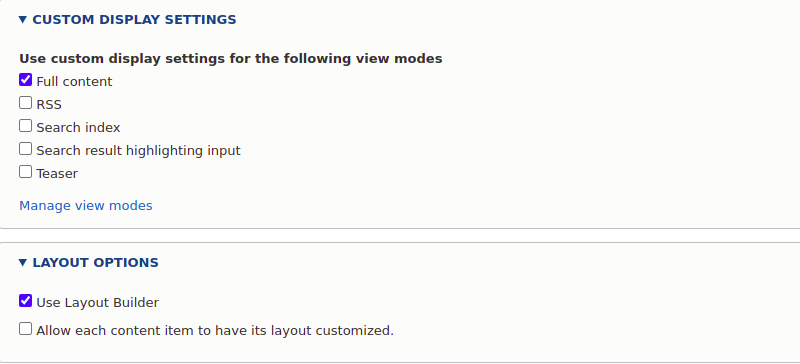
- After clicking the save button, the field table will be removed, and the Manage layout button will be displayed.
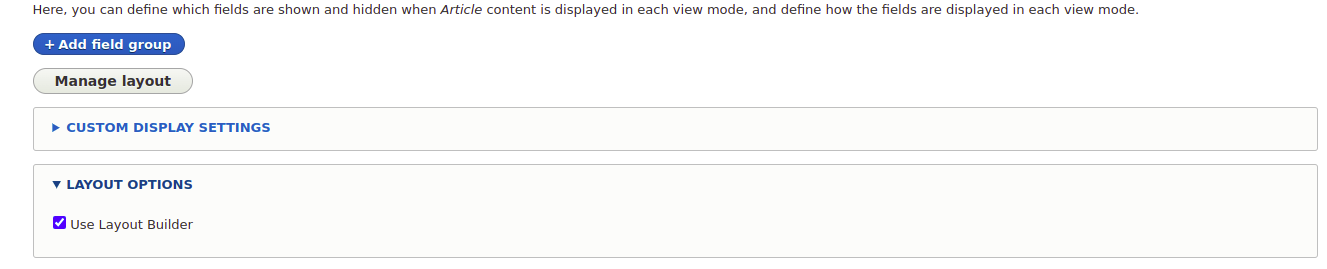
- Click on the manage layout button, and you will be redirected to the manage/article/display/default/layout page.
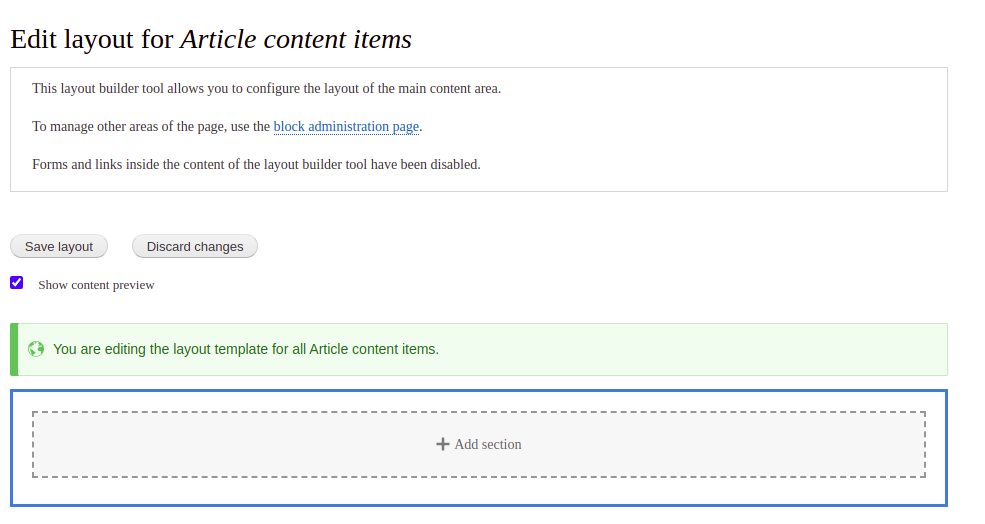
- Click on Add Section and choose a layout.
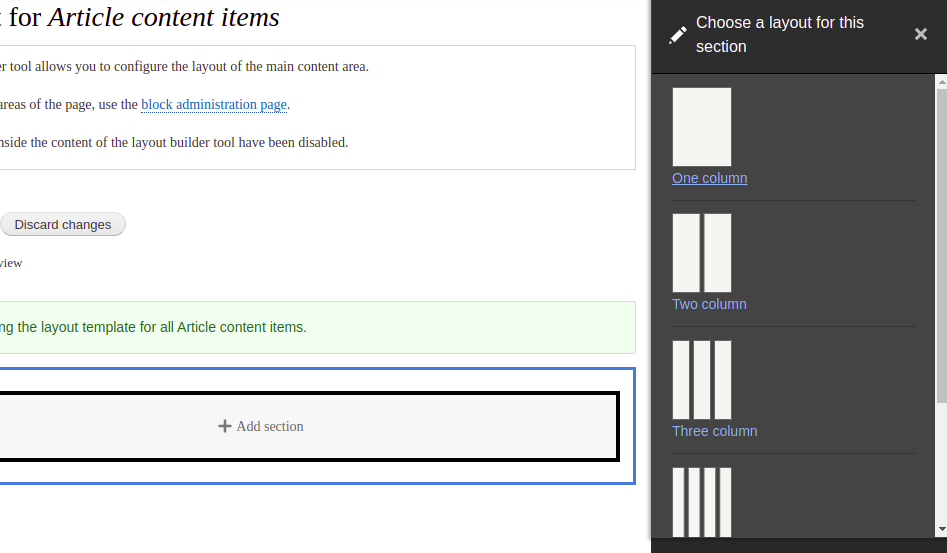
- Select the width of the columns
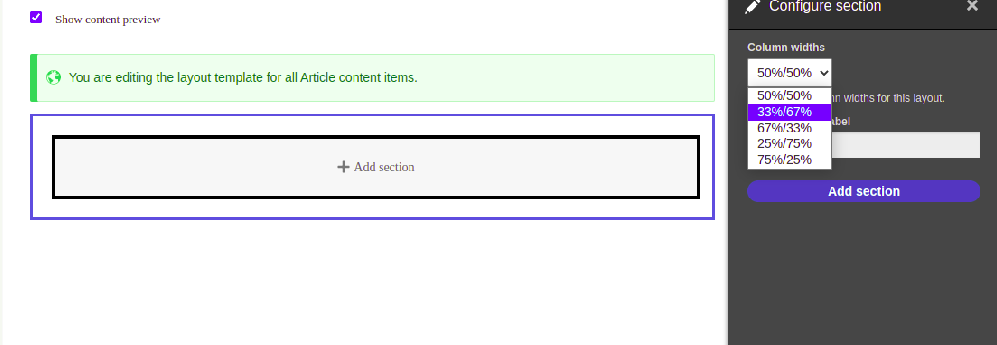
- Here I have added 2 column sections of 50%-50%. Now you can add blocks in sections.
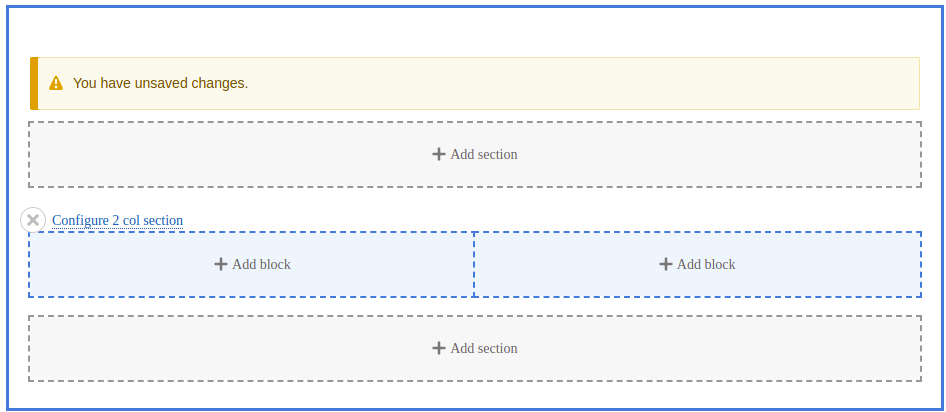
- Configure the block like add title, label, classes, etc.
- You can add multiple blocks in single sections.
- Once your layout is completed, all sections have been added. Save your layout by clicking on the Save layout button.
- After saving the layout, visit any article landing page the content of your layout will look like this:
How to override a default layout
The default layout will be created for all the article landing pages. But there can be a requirement where every different article page should have a different layout. In that case, we need to override the default layout.
Go to the Manage display of article content type. And enable the second checkbox, which is “Allow each content item to have its layout customized.”
It will allow you to have different layouts for each article landing page.
After saving this, navigate to any article landing page to find a layout tab, click on that tab, and it will allow you to create the layouts.
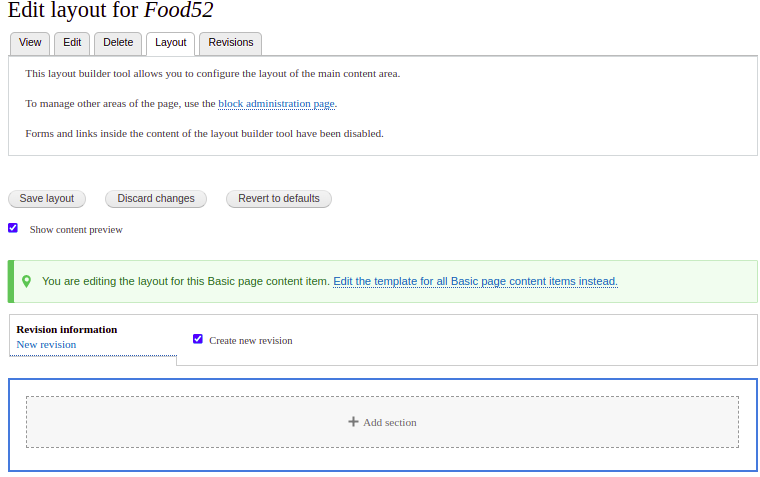
- I have also created a custom layout module where I have created my own layout, which is Grid Layout.
- By enabling that layout, it will allow you to add that grid layout. Also, it has multiple features like removing extra fields when the layout is enabled, and after the layout is disabled, the extra fields are added again in the Manage display table.
- Also, after enabling the module, it sets the ThirdPartySettings to enable and disable the module and add the fields.
Here is the link - https://github.com/Libbna/Libbna-Custom-Layout-Module
.avif "Multisite Platforms – Why, When, and Where?")
Multisite Platforms – Why, When, and Where?
A large organization, Fannie Mae, also known as FNMA (Federal National Mortgage Association), manages multiple sites to meet its business goals. How? The answer is 'multisite.'
This reputed public traded company and government-sponsored enterprise has consolidated all its non-integrated sites and content into one unified platform for efficient management. The multisite platform enables Fannie Mae to communicate better with lenders and borrowers and meet all demands for its services.
That’s the power of multisite. It’s a systemic feature available in most content management systems (CMS), allowing organizations to operate multiple websites on the same codebase. Enterprises may need to maintain a host of different websites for products, extranet, community platforms, forums, blogs, and more. Attempts at managing countless websites simultaneously can often have inefficient and redundant outcomes. Multisite mitigates such inadequacies by fostering editorial efficiency, flexibility, ease of use, and security of content management across numerous sites by bringing all sites under a single platform.
Given its tremendous importance let’s delve into these multisite platforms- learning their application and how large organizations are successfully reaping their benefits today.
Understanding Multisite Platforms – A Fundamental Overview
Let’s understand how multisite platforms work with the help of an example. Centara Hotels & Resorts, a leading hotel operator in Thailand, provides Thai-based hospitality services across 81 deluxe properties in Thailand and 34 hotels and resorts across various locations in Asia. Consistent services and content management were essential to maintain brand reputation across all branches.
However, Centara was using a custom CMS created in 2005. Though the platform was updated over the years, content management was difficult making decentralization impossible and was the biggest roadblock to the corporate. The loyalty program journey and booking engine were not easy and user-friendly.
With a multisite platform, Centara was able to manage content efficiently. The group now easily manages multiple customized sites with decentralized content management. As a result, Centara has seen a 100% increase in conversion rates and overall bookings in a year.
Types of Multisite Platforms
Constructing a multisite platform is easy given that the organization is aware of the required content framework and model.
1. Same Codebase with a Shared Database
This is the simplest approach, where platforms include a central system hosting multiple websites with the same functionality and visual elements. Here, a single authoritative structure is responsible for the content.
2. Same Codebase with Multiple Databases
This approach is similar to the first, such that it involves one codebase with multiple websites sharing similar functionalities. However, its configuration and content exist in varying databases, allowing the authoritative body to change the functionality and looks of one website without disturbing the other.
3. Same Codebase with Clusters of Instances and Different Databases
This technique goes a notch higher in terms of flexibility and scalability. With this, the system can use the most efficient database according to the requirements.
4. Installation Profile for Distribution
Along with the features of the option mentioned above, this approach allows websites to install individual instances without coordination with the central authority. It lets organizations set up multiple installations for distributions.
Industries That Use Multisite Platforms
Let’s look at how multisite platforms allow organizations from different industries to create a multitude of sites under a single CMS, enabling agility and flexibility of editing, content migration, collaboration among teams, and above all, aids brand consistency across multiple sites.
Corporate Sites
Most giant corporations have multiple facets. It may comprise a parent company managing different sub-brands or just a single company with more than one website for blogs, products, and community updates. Since visitors prefer a tailor-made solution, multiple websites make more sense.
Multisite platforms enable corporate sites to deliver a seamless user experience to all stakeholders. They also ensure that each of these websites aligns with the core brand guidelines and design standardization.
One unique example is the Roman Catholic Archdiocese of Boston (RCAB). Identified as a church more than a corporate, the RCAB oversees 288 parishes and 116 schools with independent websites. With a multisite platform, RCAB has migrated 288 parish sites into 157 parish-collaborative sites, with a single template also adopted for the Catholic Schools Office website, www.csoboston.org, and the Central Ministries website, www.bostoncatholic.org. Currently, the RCAB runs 22 live parish-collaborative sites and 14 more to go live with the end goal of running all 157 sites seamlessly within 2-4 years.
Educational Institutes
Educational institutes have a large community of educators, students, and contributors, and it only escalates with the standard of the universities. These establishments use multisite platforms to create custom websites so that the staff, administrators, and other members can effortlessly share information.
Multisite platforms prove ideal for educational institutes, and The George Washington University is an excellent example. The university can curate personalized experiences for students, staff, alumni, applicants, and visitors through a multisite platform. Relying on one fully-managed cloud, the university can unify platform updates, security, and compliance across its entire site network. GW can seamlessly provision hundreds of sites supporting the university's various colleges and departments.
Media and Entertainment Industry
Mediacorp, the largest content creator and national media network in Singapore is an ideal example of how the media industry thrives on multisite platforms. Running 11 radio stations, six TV channels, multiple websites, and a digital news site on a multisite platform, the network offers engaging content to 98% of Singaporeans in four languages every week and reaches 81+ million households in 29 territories across Asia, Australia, and the Middle East.
Besides, the cut-throat competition in the entertainment industry compels companies to ensure attention-grabbing, enticing content on time for the viewers. The Emmys, one of the four major entertainment awards in the US, uses a multisite platform to provide up-to-date content to hundreds of thousands of visitors on its website during the awards season.
Government and NGOs
Modern governments require multisite platforms to handle dedicated websites for different wings and subject matters without hassles. Besides, the central governments of each country need to manage a separate website for each state/district. Here’s an example of Bhutan, the South-Asian state with 20 districts and 4 municipal corporations that is interesting. Using different servers for each website was costly, time-consuming, and vulnerable to malware attacks, but by adopting a multisite platform the IT team was able to manage the intricate functionalities and updates with ease while also getting the freedom to maintain distinct colors, layouts, and structures.
Large-scale NGOs like Doctors Without Borders operating at a high-level need to maintain multiple websites dedicated to different states and countries. Each of these sites usually has a massive traffic load, requiring separate servers for each site.
Benefits of Multisite Platforms
Organizations need reliable platforms to ensure the security of sensitive data and manage multiple websites with minimal errors. Leveraging the incredible benefits of multisite platforms allows enterprises to invest more time in crucial decision-making.
- Single CMS Installation: One installation for multiple websites means ease of deployment. The bug fixes and features installed at the platform level can be used by all the sites, facilitating high hosting efficiency. Developers can create a single-parent theme and develop unique child themes for each website. Additionally, maintaining a single platform ensures greater security.
- Cost-effective solution: Keeping the multisite network up-to-date is highly cost-efficient as the concerned personnel need to update the themes only once. Regardless of the active number of sites, the settings will automatically be implemented to all of them without any errors.
- Flexibility: With the different types of multisite platforms available, enterprises can opt for flexible options allowing them to configure varying settings for individual websites present on the same server.
- Scalability: With multisite platforms in place, companies looking forward to expanding need not invest in a new server if they want to introduce an additional wing or a department. Thus, multisite platforms enable enterprises to scale efficiently with minimum setup work required.
- Ease in integration with other systems: Enterprises can easily integrate different systems like CRM, cloud, and more with a single or multiple websites within a few clicks. It facilitates easy migration of content, web applications, and other crucial information within the network.
- Single dashboard: A single dashboard expedites the administration of multiple websites. Organizations can manage controls, create clone sites for various regions, and generate templates for ease of use.
- Faster time-to-market: With multisite hosting, business establishments can introduce new websites to the public quickly. That is because the newer sites will share the same codebase, design language, and components, ensuring a lower time-to-market.
In a nutshell, multisite platforms foster growth and management of company websites with efficiency, simplicity, and speed.
The Why, When, and Where?
With the need to host multiple websites to sky-rocket businesses, leveraging platforming can prove to be downright beneficial. Therefore, we must highlight the why, when, and where of adopting a multisite system for small, medium, and large organizations.
- Why: To manage and expand websites, operating smoothly from a single source.
- When: Organizations need to provide a host of services for a broad range of audiences with varying tastes and preferences.
- Where: Any industry – private or governmental, and all types of web elements including forums, eCommerce sites, blogs, educational sites, portfolios, non-profit, multi-service businesses, and more.
Drupal - The All-Inclusive Multisite Platform
Drupal is a comprehensive multisite platform, helping businesses create multiple websites with a single codebase. It allows organizations with a large number of different websites to host all of them on the same platform in a hassle-free manner.
For example, universities have a multitude of departments and councils but operate as a single unit. While every department may have a separate website, it has the same branding, theme, and content model, i.e., the same core, making a multisite platform like Drupal a perfect hosting and management solution.
Drupal is loved by organizations from almost every industry including agriculture, eCommerce, healthcare, blogging, entertainment, and even retail. Besides, government and non-profit organizations also use this exceptional multisite platform to manage their websites. Some of the most prominent clients of this industry giant include Tesla, UNICEF Innovation Fund, The City of London, City of Boston, Syfy.com, Warner Records, and Visit the USA.
Final Words
When an enterprise understands how to utilize a multisite, it becomes a potent tool. Many global companies leverage multisite platforms to manage massive amounts of data and configurations.
LUSH, a British cosmetics company uses Drupal to run its multisite e-commerce platform that supports 17 different countries and local sub-sites for 100 different markets. The establishment optimizes its processes for a seamless operation.
Once organizations have a tech partner with the complete know-how of utilizing a multisite architecture, implementation is painless. Businesses can enjoy all-inclusive control over content distribution, ensure brand consistency, and knock off the additional costs.

Attaching custom libraries to a component/template in Acquia Site Studio
Acquia Site Studio is a low-code, Drupal add-on available for Acquia subscribers which allows users to create sites using drag and drop Layout Canvas, empowering non-developers in marketing or other departments, designers with little coding knowledge to create unique layouts with fully customizable CSS.
While Site Studio allows users to add custom CSS to each component/element there is currently no way to add JS directly to a component or element or template. This means that if a component needs custom JS, the user will have to write it in the theme’s global JS file which will be included on every page of the site.
This can create problems if two or more components have conflicting JS, and it can also lead to performance and security issues since even though a component appears on just a few pages, the JS code related to it is included on every page. In this article, we will explore how to create a custom element that can add a custom library to any component/template.
Let’s get into it!
1. Setting up files
1.1 Creating/Editing custom module
Let's start by finding a home for our custom element's files, for this, you can either use your existing custom module or create a new one.
1.2 Adding dependency
For creating a custom element, our module should have cohesion in the list of dependencies.
Let's go ahead and make changes to the info.yml file of our module.
1.3 Creating required files
Our custom element file should be placed in the src/Plugin/CustomElement directory, so the directory structure looks like this:
2. Creating a custom Site Studio element
2.1 Setting up the class
We can create a custom Site Studio element by extending the CustomElementPluginBase class.
2.2 Adding methods
There are two methods we need to override to create our element:
- getFields()
- render()
As the name suggests, the getFields() method returns fields that are needed to build this element, and the render() method returns a render array of the element.
Here we have added a text field to accept the name of the library to be attached.
The values that we accepted in fields created by getFields() method can be retrieved from the $element_settings array, here we are just retrieving the value of the library field and adding it in the $build render array, and finally returning the $build render array.
You can refer to the full documentation for creating a custom element here.
So our complete code looks like this:
3. Adding our custom element to a component
Now it’s time to see our custom element in action!
Make sure you have enabled our module, then create a new component or edit an existing one and you should be able to see our custom element in the Custom elements category at the end.
Let's go ahead and add this to our element.
Go ahead and edit the element, and you will see the field created earlier.
Add the name of your library and save it.
Here we are assuming that awesomeness is a custom theme and its libraries.yml file looks something like this:
You can use the library present in any module or theme.
Et voila! We are done, you should be able to see your JS file in the page source wherever this component is present.
Note: Even though we are primarily focusing on attaching a custom JS library, the same element can also be used to attach custom CSS since Drupal follows the same workflow to attach CSS and JS libraries.

Masonry layout with Acquia Site Studio
Masonry is a grid layout based on columns with auto-placement, but without sticking to a strict grid for the rows. Unlike other grid layouts, it doesn’t have a fixed height of rows. Basically, Masonry layouts optimize the use of space inside the web page by reducing any unnecessary gaps.
The most well-known example of the Masonry layout is Pinterest, and you will sometimes hear people refer to the layout as a “Pinterest layout”.

Practical uses of Masonry Layout
- Image galleries
- Blog posts
- Portfolios
- A listing page where the card component is being with an image, title, description, and link
Masonry Layout with Site Studio
Creating the Masonry layout in Site Studio with multiple options for the content editor or site manager offers an innovative way to display content. We have created a Masonry layout in Site Studio using plain CSS without JS or any JS library so that it will not impact the website’s performance.
The Masonry component in Site Studio will be available for the content editor/site manager with the following settings/configurations:
- They can drop a ready Card or Image component inside it.
- They can add the main heading and a short description to the Masonry layout if needed. With that, they can also set their alignment to left or center align.
- They can set the number of columns to be displayed in a row with options for desktop, iPad, and mobile.
- They can set the gap between the columns (horizontal) with the option for desktop, iPad, and mobile.
- They can set the column gap between rows (vertical), like the bottom margin with the option for desktop, iPad, and mobile.
- In addition to this, they also can set the background color of this whole section as per their preference.
Approach
To achieve this we need two components:
- Masonry container
- Masonry item

By navigating Site Studio > Components > Components > + Add components (admin/cohesion/components/components) you can create/add new components.
Masonry container
- This will act as a container or wrapper or as a parent container
- The component will have a Dropzone area where the content editor can drop the Masonry item
- With that,
- In the Content tab of this component, the content editor can add a heading and a short description
- In the Layout and Style tab of this component, the content editor can select the alignment, set the number of columns they want, the gap in between, margin below, and background color if needed.
This is how it will look:
Content tab
Layout and style tab
Masonry item
- This will act as an item of a Masonry container since this will get dropped inside it.
- Multiple Masonry items can be dropped inside a Masonry container.
- Masonry items will also have a dropzone area so that the content editor can drop ready Card or Image components etc. in it.
Note: Always better to keep one card component or one image component in one Masonry item so that it will work as expected.
Here’s is how it will look:


Result
With the above combination both Masonry layouts will look like this:

Conclusion
Thank you for reading and we hope this blog was helpful. Here's a ready Masonry layout that you can download and import the package to your Site Studio instance - https://github.com/qed42/masonry-layout.

Why and how should you switch to Drupal 10?
Drupal has been around for 20 years, serving as one of the best open-source digital experience platforms (DXP). It boasts top-of-the-line content management tools and sophisticated functions to elevate your digital presence.
Well, its newest version, Drupal 10, is set to release soon! It may come as a surprise since Drupal 9 has only been around for a while, but it's undoubtedly a pleasant one.
While Drupal 9 was released five years after Drupal 8, the creators have sped up their processes this time around.
They are all set for a revamped Drupal version to go live in June 2022. There are already many tools and processes in place to ensure a smooth upgrade.
Let us look at everything you need to know before Drupal 10 goes live.
Drupal 10 is releasing soon—Want to know the reason why?
You might wonder why Drupal 10 is releasing much sooner compared to previous versions.
While there was a waiting time of almost four to five years between Drupal 7 and 8, version 9 and 10 kicked it pretty soon.
The primary purpose of bringing in new versions sooner is to ensure the security of the CMS system.
Drupal depends on multiple third-party elements that come with their own end-of-life dates.
When their release cycle ends, and they are no longer supported, their security cannot be fixed. As a result, nobody can guarantee that the website will remain secure.
The most prominent third-party elements in question are PHP 7, Symfony 4, and CKEditor, among others.
Since Symfony 4 will reach its end-of-life by November 2023, Drupal will have to adopt Symfony 5, or possibly an even higher version of Symfony by then.
Here are when some other third-party components will reach their end-of-life:
- jQuery UI: 2017
- PHP 7: 2022
- CKEditor: 2023
What upgrades will Drupal 10 bring?
There are plenty of crucial features that newer versions will replace with Drupal 10. Moreover, we will also see some new features. To know more about what’s included in Drupal 10 visit.
The following third-party components will be updated to newer versions:
- Symfony 4 to Symfony 5 or 6
- PHP 7 to PHP 8
- CKEditor 4 to CKEditor 5
- Composer 1 to Composer 2
Here are some of the other things that will change with Drupal 10:
- The Claro administration theme will replace Seve.
- The Layout Builder and Media will see improvements.
- Modern JavaScript components will replace jQuery UI, as well as some functions of jQuery.
- The default Olivero theme will replace Bartik.
- Site builder experience will be improved, especially for URL handling and menu.
- Theme starter kit tools will be added for bespoke theme creation.
Drupal 10 will be built-in Drupal 9
Instead of building Drupal 10 as its own branch with a complete code overhaul, Drupal is building it within Drupal 9 with new functionalities.
Every minor release up to Drupal 9.4.0. will be backward compatible. As a result, developers will have sufficient time to keep up with any API changes as they come.
This approach will enable Drupal to deliver fresh value every few months without disrupting your current site.
As soon as Drupal 10 is ready for release, Drupal will remove all the redundant code and automatically update their dependencies. Drupal used the same strategy for switching from Drupal 8 to Drupal 9.
The method proved highly successful, and as a consequence, modules and extensions were able to become compatible with Drupal 9 much quicker.
Why should you use Drupal 10?
Drupal has proven itself as one of the best open DXPs out there. Time and again, they have catered to the users' interests to ensure a seamless experience.
Their main goal is to make Drupal a lot more user-friendly content management system. They aim to ease the processes and maintenance for developers while allowing them to be flexible. The Drupal 10 Readiness Initiative places the focus on platform stability and components.
With Drupal 10, developers can use their creativity and innovation to create unforgettable digital experiences. This version will improve all the features of Drupal 9 and even include initiatives contributed by the global community.
If that doesn't convince you to move to Drupal 10, maybe the following points will:
- Enhanced user experience
- Implementation of automated updates
- Introduction of JavaScript components
- Addition of the new Olivero front-end theme
How can you switch to Drupal 10?
It's time to prepare! It would be best to switch to Drupal 10 as soon as its release because the older versions might be nearing their end of life.
So, how should users of different Drupal versions go about the upgrade? Let's find out.
Drupal 9 Users
Drupal 9 users can automate the process for upgrading to Drupal 10. You could check out the drupal-rector for help. There are several APIs that could be of use to you.
Check out the Upgrade Status on your Drupal 9 site to determine the amount of work that will be required.
Drupal 8 users
Drupal 8 has reached its end of life. Only users that have upgraded to Drupal 9 can switch to Drupal 10.
If you had upgraded to Drupal 9, you could use Upgrade Status in this case, too, to analyze your website. As it turns out, there are about 6000 contributed projects that are ready for Drupal 9.
Drupal 7 users
Drupal 7 will be around only till November 2022. Although it will end after the planned release of Drupal 10, it would be best if you upgraded earlier.
While Drupal 10 will feature migration tools from Drupal 7, a better idea would be to move to Drupal 9 first and then upgrade to Drupal 10.
Wrapping up
Open source DXPs are vital since they provide businesses with the tools required to satisfy their audience. Buyers today expect more customized experiences throughout sales channels. DXPs, such as Drupal, can help your business shine in this regard.
The release of Drupal 10 has created quite a buzz in the developer community. If you are still on one of the older versions, upgrade to Drupal 9 as soon as you can for a smooth shift to Drupal 10.
It will be interesting to see how Drupal improves its own stellar track record with its newest release!